Будь вы кинорежиссером, создателем контента или маркетологом, стремящимся расширить свою аудиторию за языковые границы, это руководство проведет вас через каждый этап процесса дубляжа. От выбора идеального AI-голоса до настройки аудиовыхода, Speechify Studio предлагает простое и эффективное решение для воплощения ваших проектов на нескольких языках. Готовы погрузиться? Давайте исследуем, как Speechify Studio может улучшить ваш контент и завоевать мировую аудиторию.
Как начать новый проект дубляжа в Speechify Studio
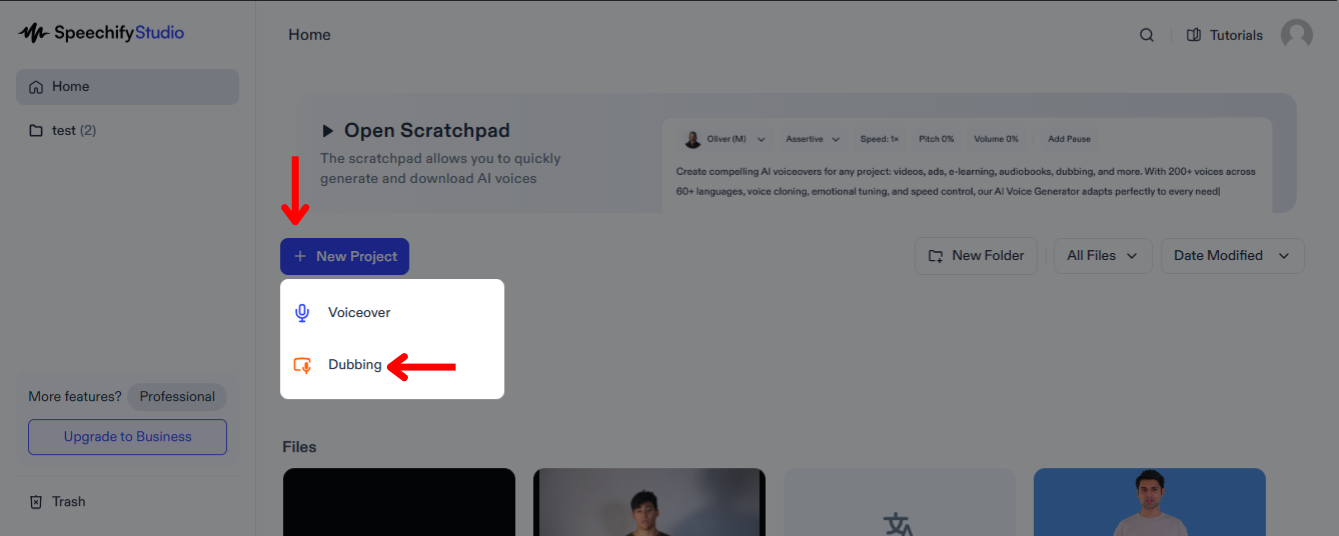
Дубляж ваших видео может значительно расширить вашу аудиторию, позволяя зрителям из разных языковых сред взаимодействовать с вашим контентом на родном языке. Чтобы начать:
- Нажмите «Новый проект» на главном экране.
- Выберите «Дубляж».
Как загрузить файлы в Speechify Studio для дубляжа

Первый шаг в дубляже — это загрузка файла, который вы хотите перевести и озвучить. Для этого:
- Нажмите «Импорт».
- Загрузите файлы или вставьте ссылку на YouTube.
- Выберите количество говорящих в вашем видео.
- Выберите язык вашего видео.
- Отметьте «Удалить слова-паразиты», чтобы убрать лишние слова, такие как «э-э» или «типа».
- Нажмите «Извлечь паузы из оригинального аудио», чтобы ваш дубляж звучал естественно.
- Нажмите «Отправить», и Speechify Dubbing автоматически транскрибирует ваше видео на текущем языке.
Как редактировать автотранскрипцию в Speechify Studio для дубляжа

Если вы хотите внести изменения в транскрипцию оригинального аудио, просто:
- Нажмите на текстовый блок, который хотите изменить.
- Отредактируйте сценарий так же, как вы редактируете текст.
Как перевести и озвучить видео в Speechify Studio
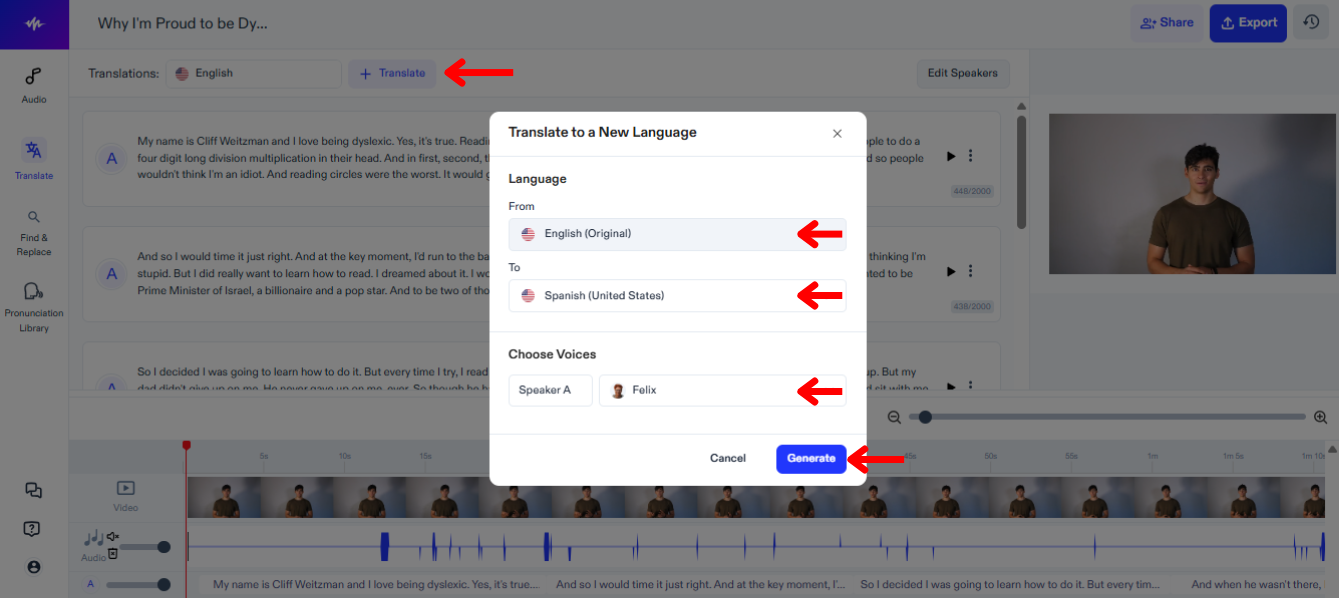
Следующий шаг — это перевод и озвучка вашего видео на другой язык. Следуйте этому руководству:
- Нажмите «Перевести».
- Выберите язык, на котором ваше видео в данный момент, в разделе «С».
- Выберите язык, на который вы хотите перевести и озвучить видео, из более чем 60 языков в разделе «На».
- Выберите голос для каждого говорящего.
- Нажмите «Создать» и дождитесь, пока Speechify Dubbing автоматически озвучит ваше видео.
Как редактировать перевод в Speechify Studio для дубляжа
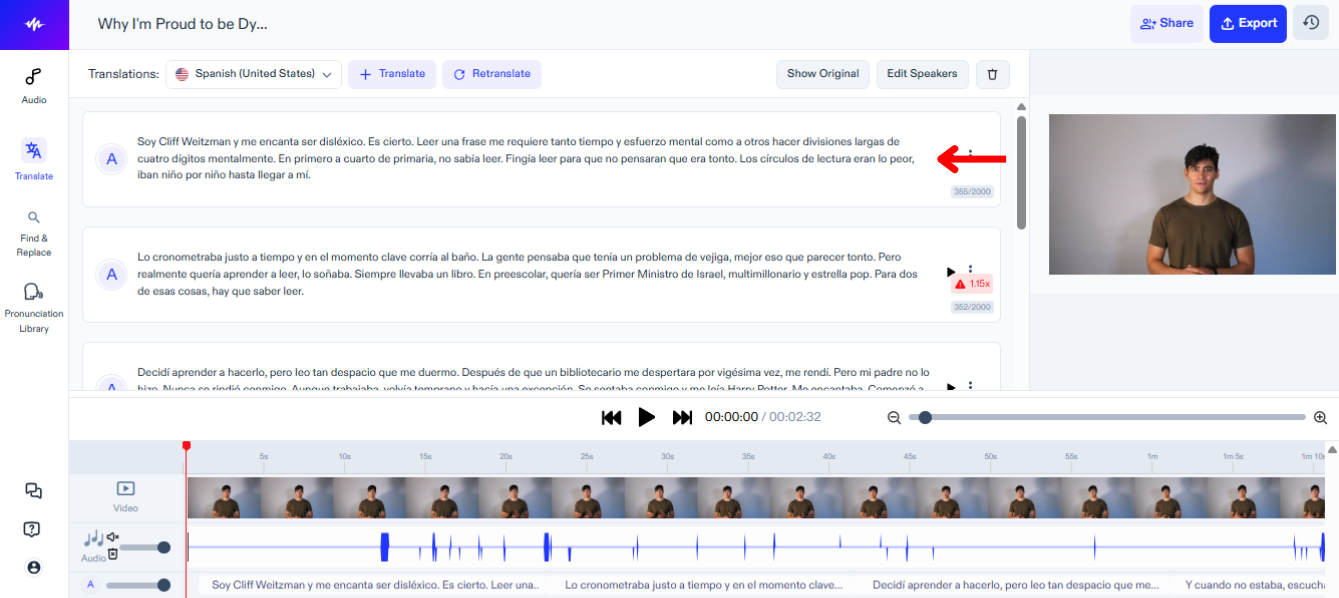
Редактировать перевод вашего видео легко, просто:
- Нажмите на текстовый блок, который хотите изменить.
- Отредактируйте сценарий так же, как вы редактируете текст.
Как изменить голос в Speechify Studio для дубляжа
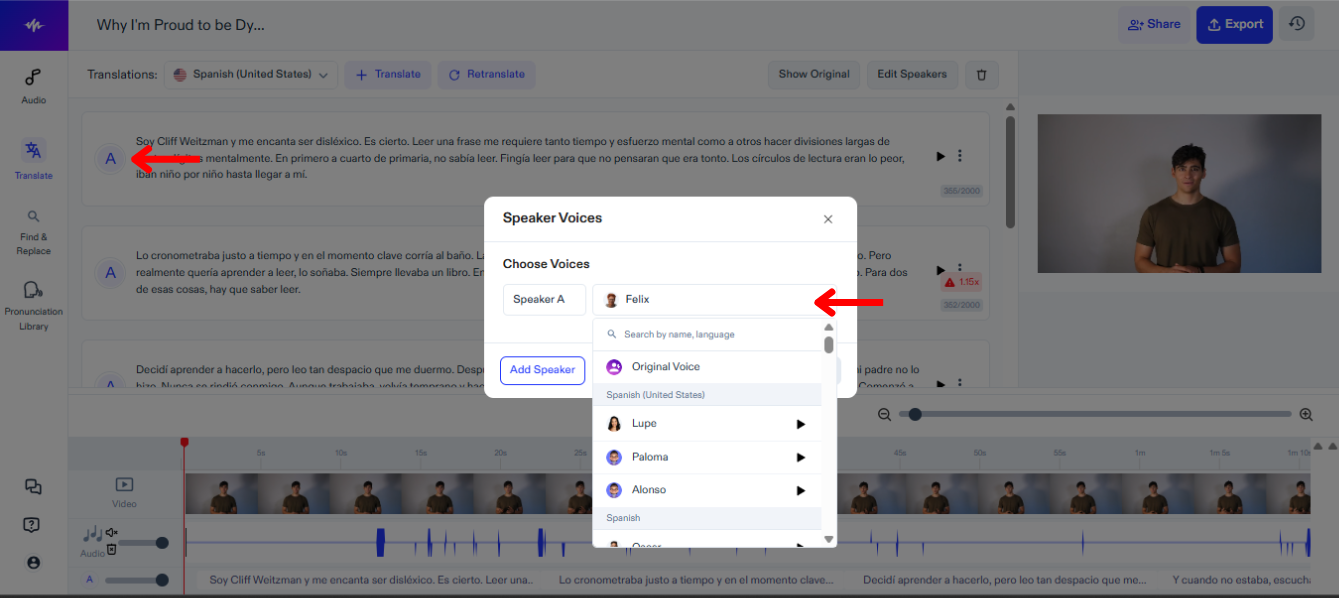
Вы можете назначить разные голоса разным говорящим в вашем видео и менять голоса в любое время, чтобы найти идеальное соответствие. Чтобы изменить голос в Speechify Studio:
- Нажмите на значок динамика.
- Выберите из более 200 реалистичных голосов.
Как добавить фоновую музыку в дубляж на Speechify Studio
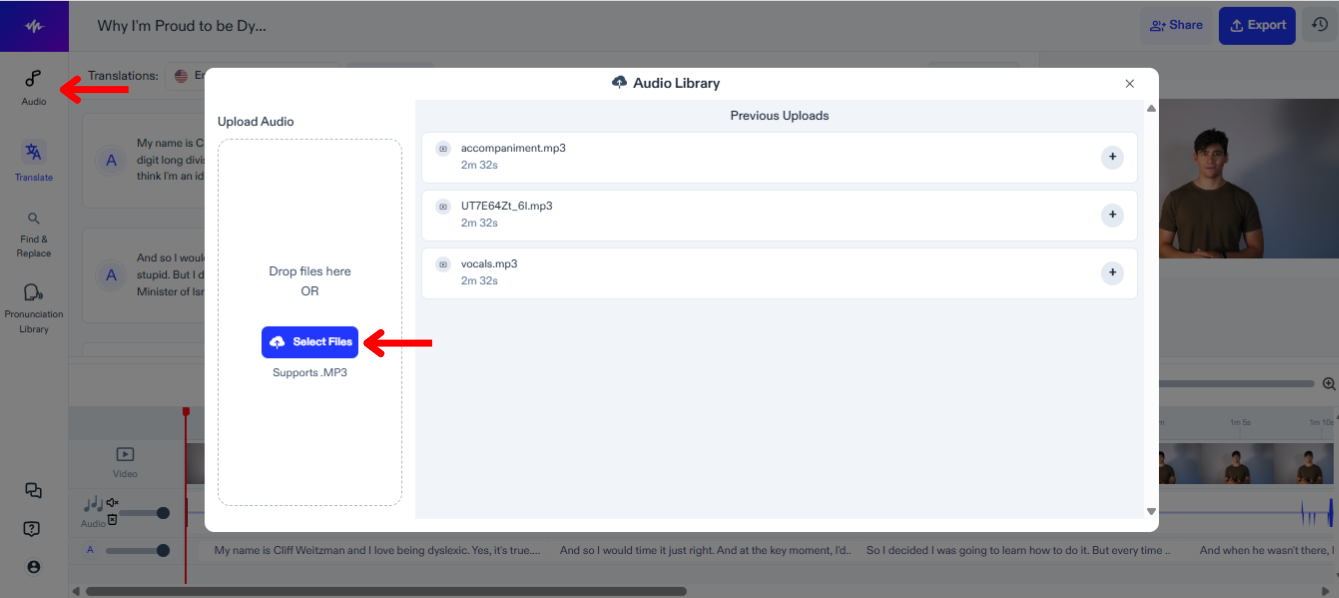
Чтобы добавить музыку или другие аудиофайлы в ваш проект дубляжа, выполните следующие шаги:
- Нажмите «Аудио» на панели инструментов слева.
- Загрузите ваши аудиофайлы.
- Выберите файл для добавления на временную шкалу редактирования.
Как добавить в библиотеку произношений на Speechify Studio
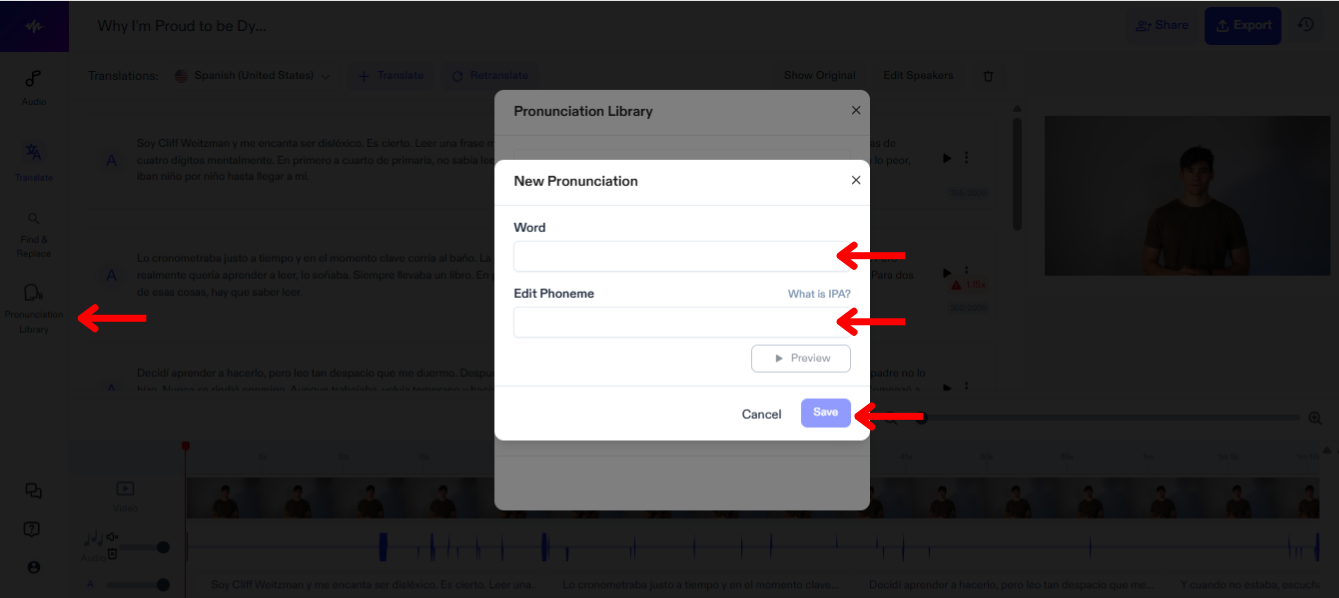
Добавление в библиотеку произношений в Speechify Studio позволяет настроить и обеспечить точное воспроизведение речи, гарантируя, что каждое слово и имя в вашем видео будет произнесено правильно. Следуйте этим шагам, чтобы добавить термин в библиотеку произношений:
- Нажмите «Библиотека произношений».
- Нажмите «Создать новое произношение».
- Введите слово вместе с его фонемой.
- Нажмите «Предпросмотр», чтобы просмотреть новое произношение.
- Выберите «Сохранить», чтобы сохранить новое произношение для будущего использования.
Как экспортировать проект дубляжа на Speechify Studio
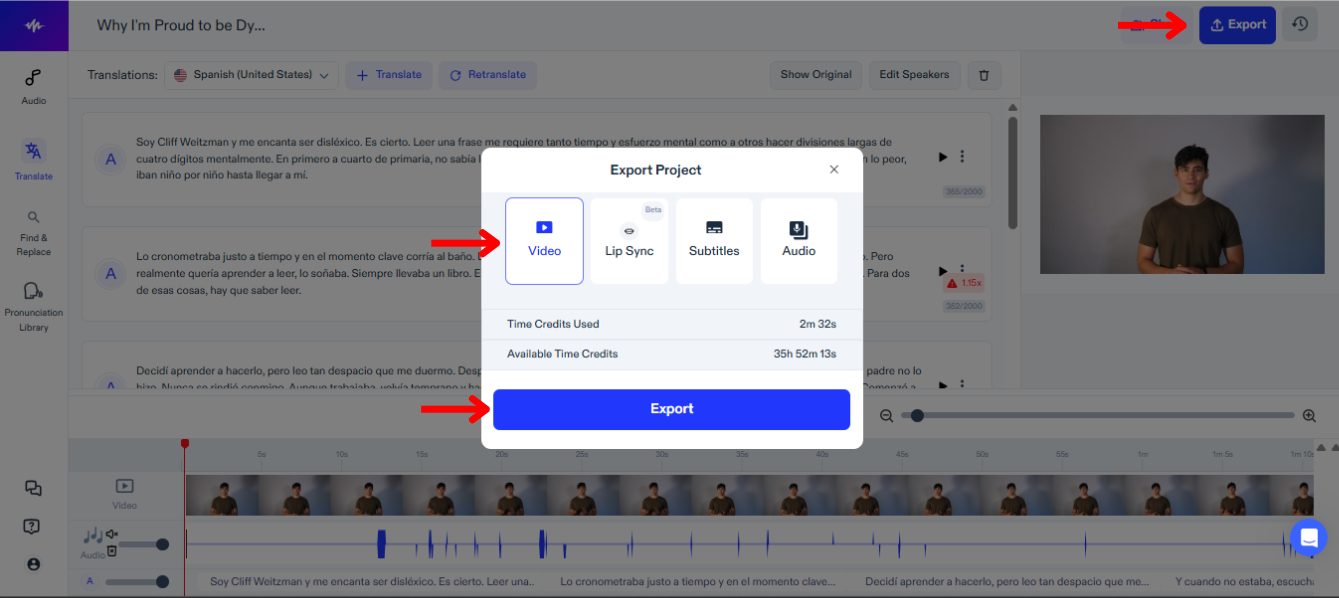
Экспорт вашего дубляжа проекта на Speechify Studio позволяет интегрировать ваш новый озвученный контент в различные платформы и форматы. Чтобы экспортировать:
- Нажмите «Экспорт».
- Выберите, хотите ли вы экспортировать ваш проект в видеоформате, формате субтитров (SRT, VTT или PDF) или аудиоформате (MP3, WAV или OGG).
Как использовать синхронизацию губ с дубляжом на Speechify Studio
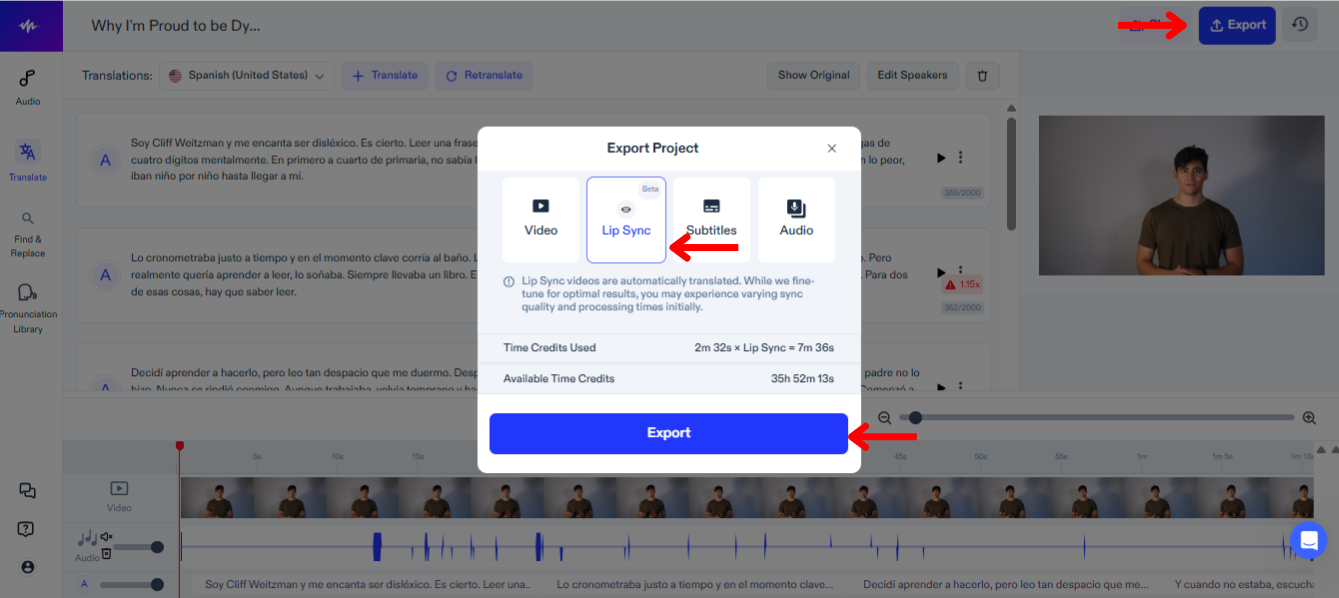
Использование синхронизации губ с дубляжом на Speechify Studio улучшает впечатление от просмотра, точно согласовывая озвучку с движениями губ говорящих. Чтобы попробовать эту новую функцию:
- Выберите «Экспорт».
- Выберите «Синхронизация губ».
- Нажмите «Экспорт», и функция синхронизации губ, которая все еще находится в стадии БЕТА, автоматически озвучит видео, чтобы оно соответствовало новому переводу.
Как получить поддержку на Speechify Studio
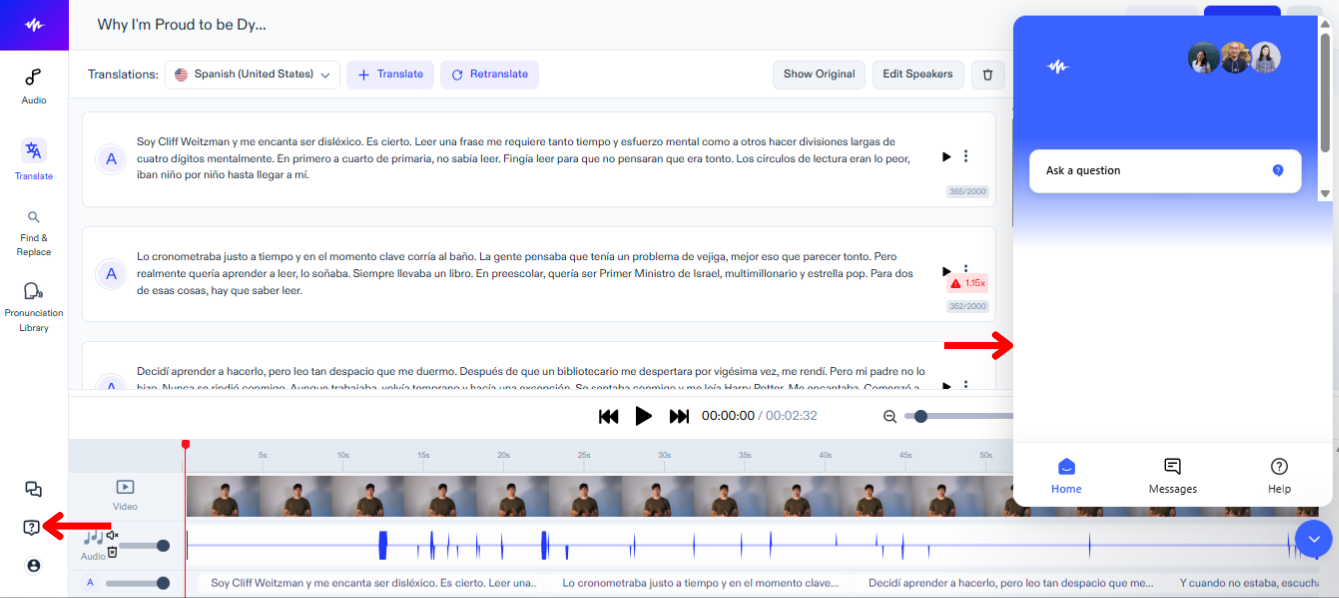
Чтобы быстро решить любые технические проблемы или получить дополнительную помощь, свяжитесь с нашей службой поддержки, следуя этим шагам:
- Нажмите на значок вопросительного знака на панели инструментов слева.
- Отправьте сообщение в службу поддержки.