Of je nu een filmmaker, contentmaker of marketeer bent die zijn publiek over taalgrenzen heen wil uitbreiden, deze gids leidt je door elke stap van het nasynchronisatieproces. Van het kiezen van de perfecte AI-stem tot het verfijnen van je audio-uitvoer, Speechify Studio biedt een naadloze, efficiënte oplossing om je projecten tot leven te brengen in meerdere talen. Klaar om te beginnen? Laten we ontdekken hoe Speechify Studio je content kan verbeteren en een wereldwijd publiek kan boeien.
Hoe een Nieuw Nasynchronisatieproject te Starten op Speechify Studio
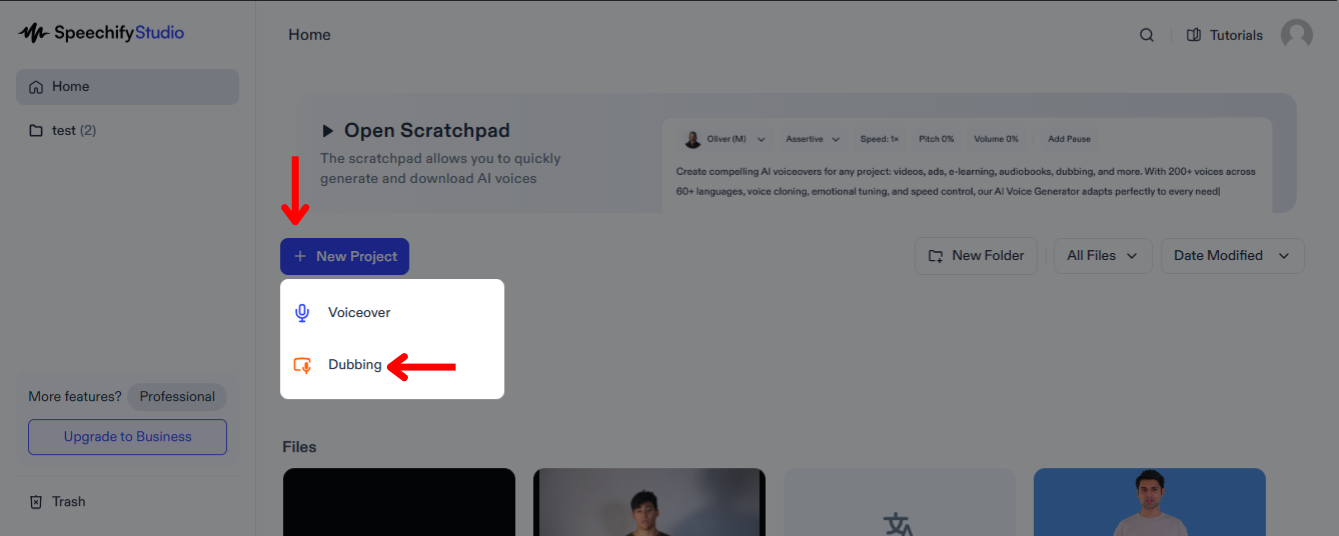
Het nasynchroniseren van je video's kan je bereik aanzienlijk vergroten, waardoor kijkers uit verschillende taalachtergronden je content in hun moedertaal kunnen ervaren. Om te beginnen:
- Klik op “Nieuw Project” vanaf het Startscherm.
- Kies “Nasynchronisatie.”
Hoe Bestanden te Uploaden op Speechify Studio Nasynchronisatie

De eerste stap bij nasynchronisatie is het uploaden van het bestand dat je wilt vertalen en nasynchroniseren. Om dit te doen:
- Tik op "Importeren."
- Upload bestanden of plak een YouTube-link.
- Selecteer het aantal sprekers in je video.
- Kies de taal van je video.
- Vink “Verwijder Vulwoorden” aan om extra woorden, zoals “eh” of “zeg maar,” te verwijderen.
- Klik op “Pauzes uit Originele Audio Extracten” om ervoor te zorgen dat je nasynchronisatie natuurlijk is.
- Tik op “Indienen” en Speechify Nasynchronisatie zal automatisch je video transcriberen in de huidige taal.
Hoe de Autotranscriptie te Bewerken op Speechify Studio Nasynchronisatie

Als je wijzigingen wilt aanbrengen in de transcriptie van de originele audio, doe je eenvoudigweg het volgende:
- Tik op het tekstblok dat je wilt wijzigen.
- Bewerk het script zoals je tekst zou bewerken.
Hoe Video te Vertalen en Nasynchroniseren op Speechify Studio
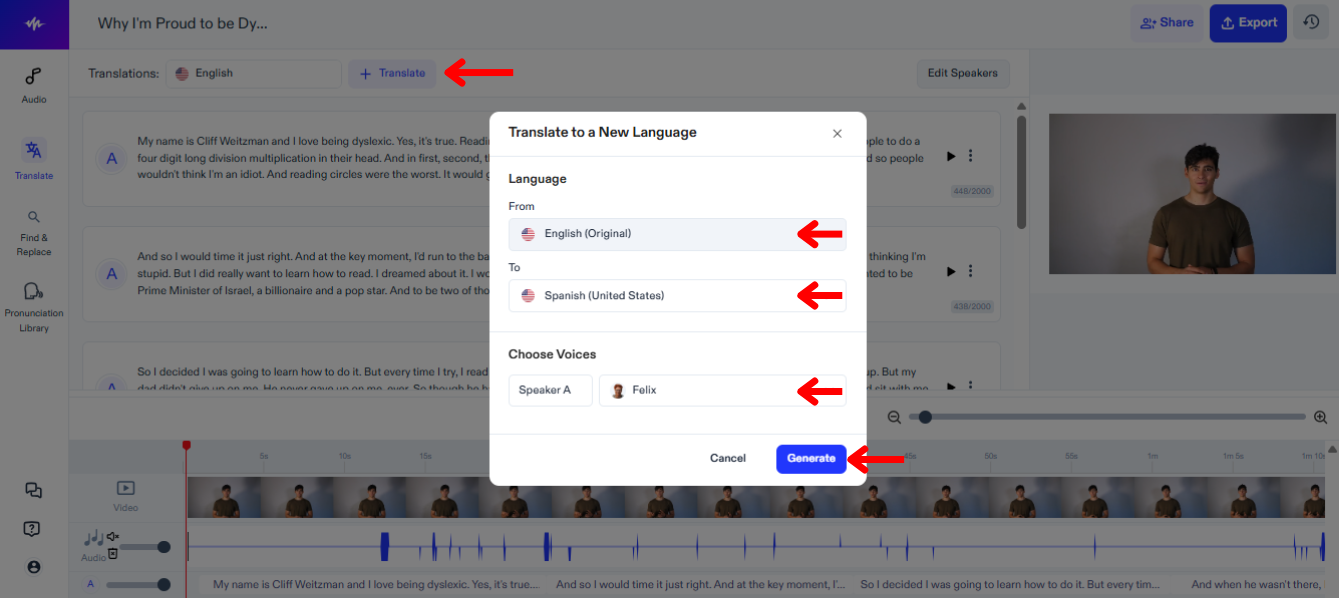
De volgende stap is om je video te vertalen en nasynchroniseren in een andere taal. Volg deze gids:
- Klik op “Vertalen.”
- Kies de taal waarin je video momenteel is onder “Van.”
- Selecteer de taal waarin je je video wilt vertalen en nasynchroniseren uit meer dan 60 talen onder “Naar.”
- Kies een stem voor elke spreker.
- Tik op “Genereren” en wacht tot Speechify Nasynchronisatie automatisch je video nasynchroniseert.
Hoe de Vertaling te Bewerken op Speechify Studio Nasynchronisatie
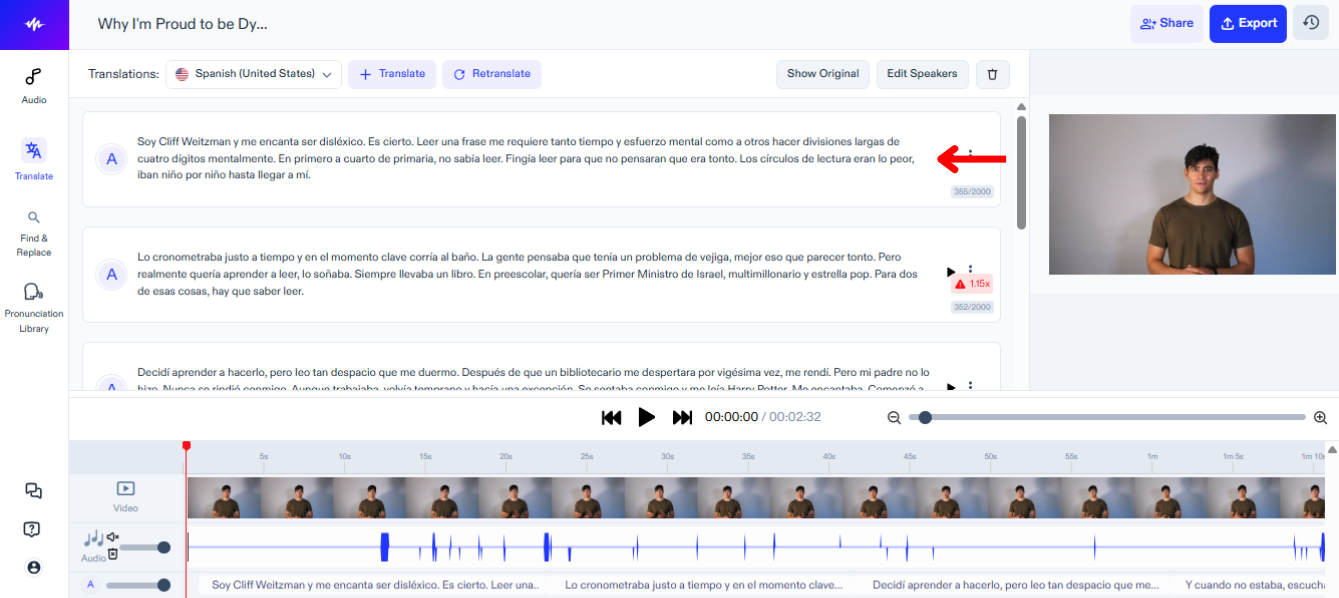
Het bewerken van de vertaling van je video is eenvoudig, doe gewoon het volgende:
- Tik op het tekstblok dat je wilt wijzigen.
- Bewerk het script zoals je tekst zou bewerken.
Hoe de Stem te Wijzigen op Speechify Studio Nasynchronisatie
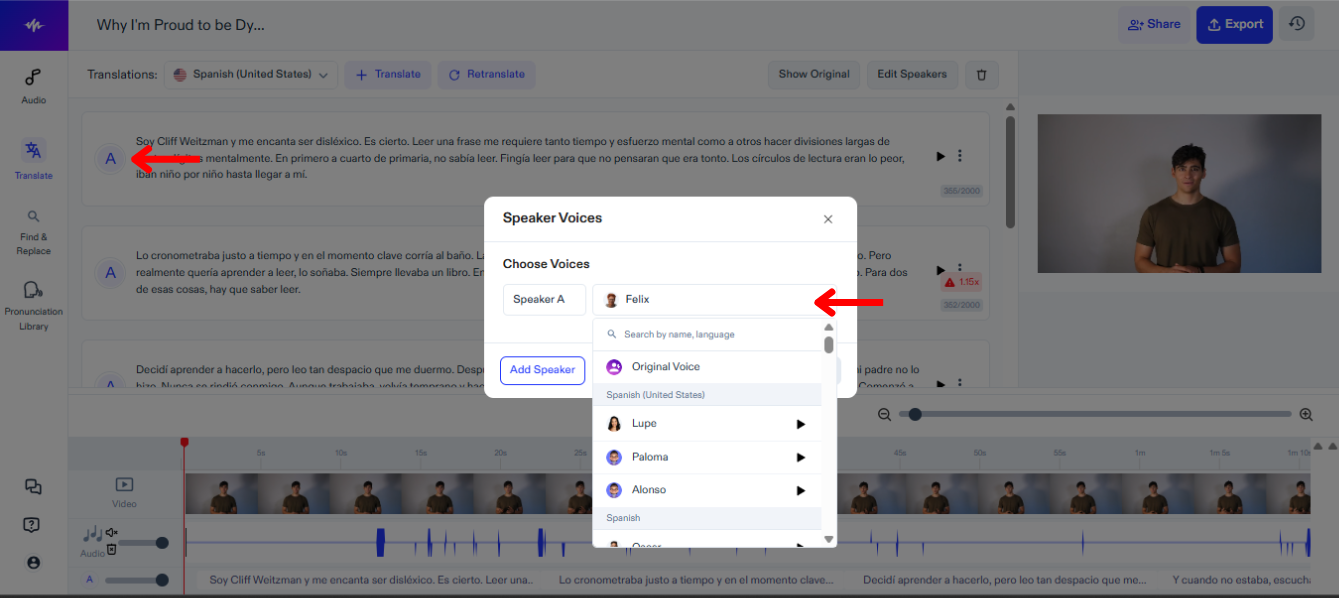
Je kunt verschillende stemmen toewijzen aan verschillende sprekers in je video en op elk moment van stem veranderen om de perfecte match te vinden. Om de stem te wijzigen op Speechify Studio:
- Druk op het Spreker-icoon.
- Kies uit 200+ levensechte stemmen.
Hoe achtergrondmuziek toe te voegen in Speechify Studio Dubbing
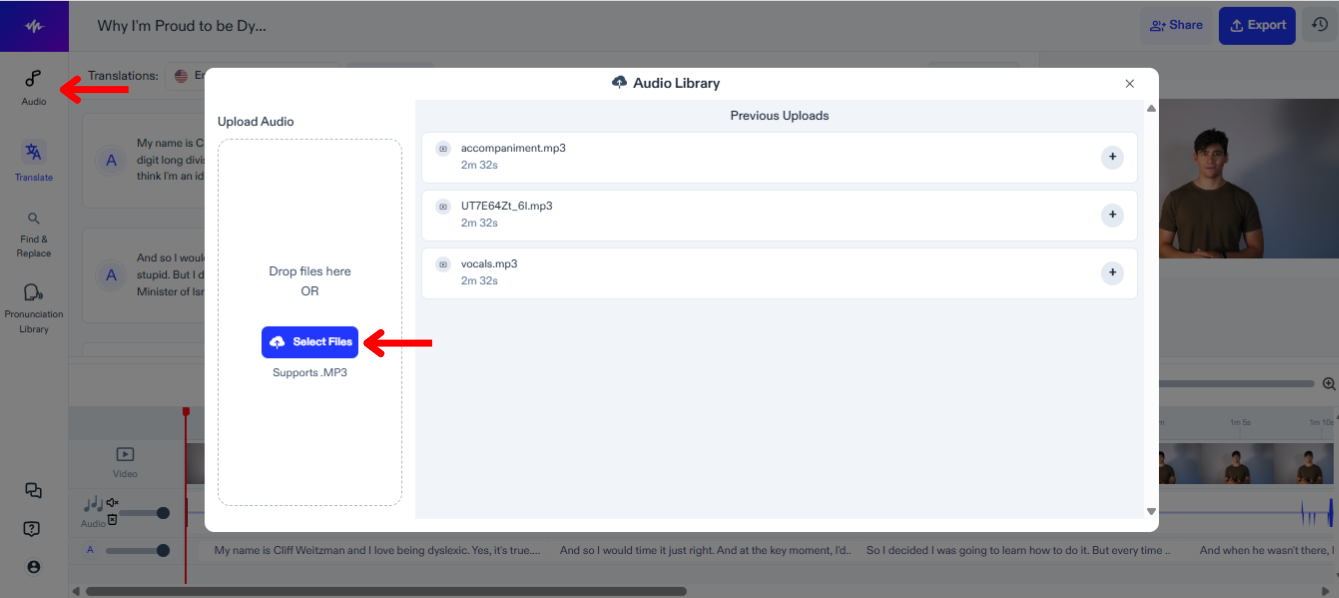
Om muziek of andere audiobestanden aan je dubbingproject toe te voegen, volg je deze stappen:
- Tik op "Audio" in de linkerwerkbalk.
- Upload je audiobestanden.
- Selecteer het bestand om toe te voegen aan je bewerkingstijdlijn.
Hoe toe te voegen aan de uitspraakbibliotheek in Speechify Studio Dubbing
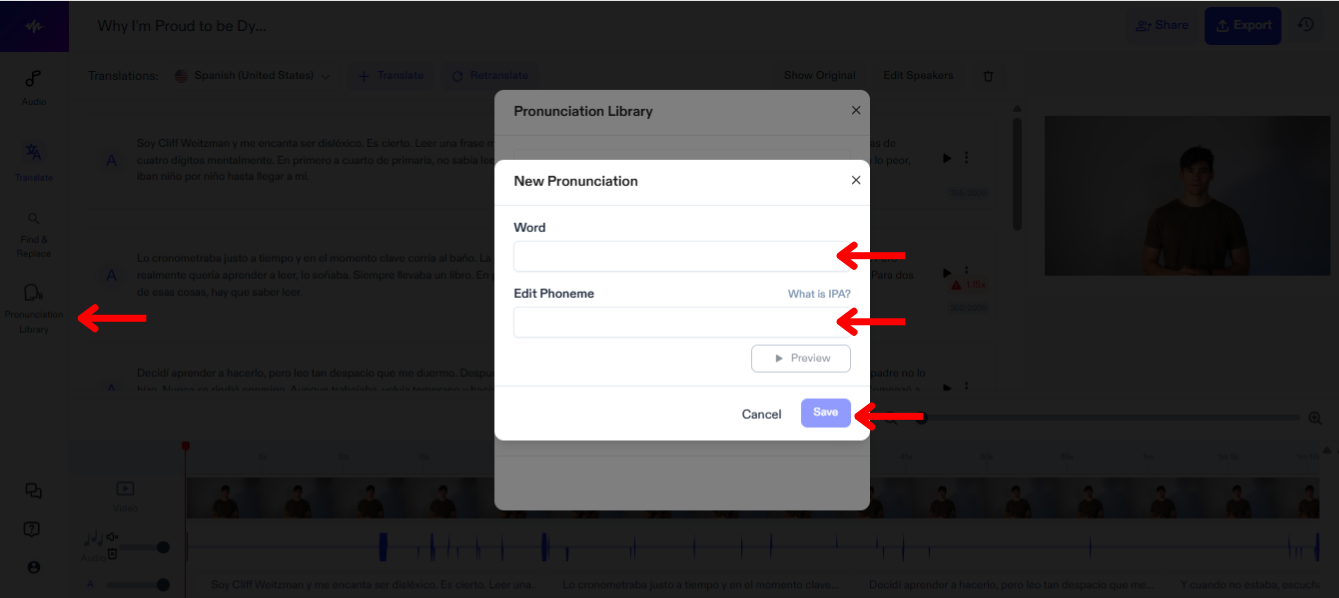
Toevoegen aan de uitspraakbibliotheek in Speechify Studio zorgt voor aangepaste en nauwkeurige spraakuitvoer, zodat elk woord en elke naam in je video correct wordt uitgesproken. Volg deze stappen om een term toe te voegen aan de uitspraakbibliotheek:
- Klik op “Uitspraakbibliotheek.”
- Druk op “Nieuwe Uitspraak Maken.”
- Voer het woord in samen met zijn fonetische weergave.
- Tik op “Voorbeeld” om de nieuwe uitspraak te bekijken.
- Selecteer “Opslaan” om de nieuwe uitspraak voor toekomstig gebruik op te slaan.
Hoe je je Dubbingproject exporteert in Speechify Studio
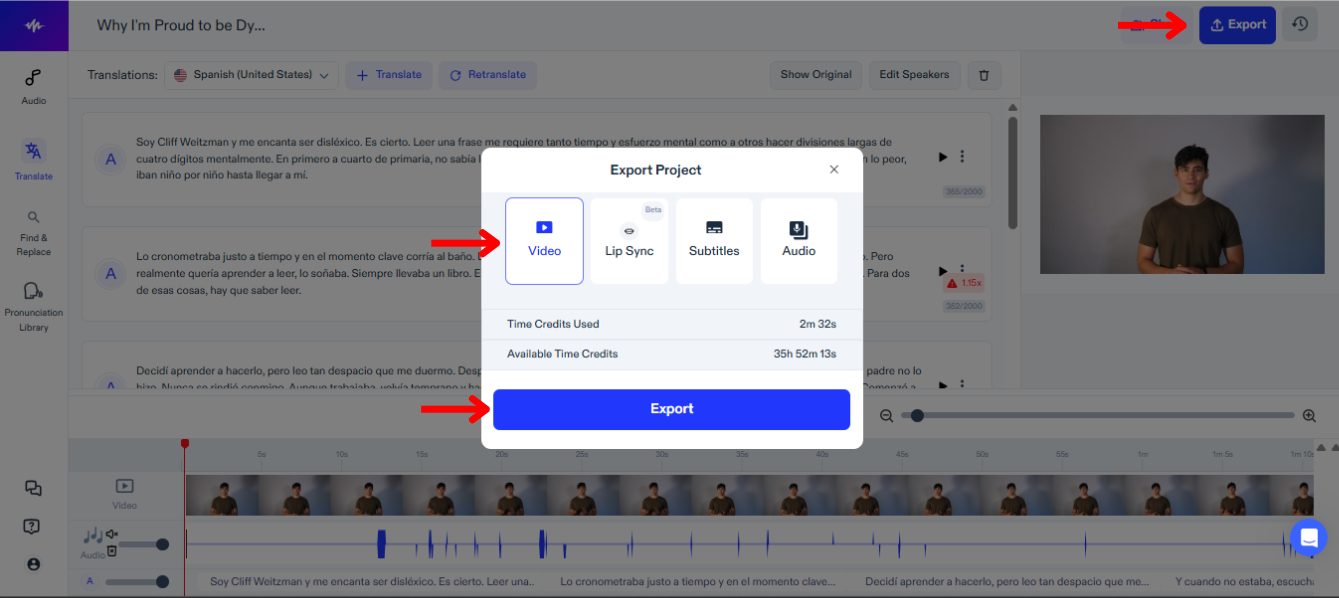
Het exporteren van je dubbing project in Speechify Studio stelt je in staat om je nieuw ingesproken content te integreren in verschillende platforms en formaten. Om te exporteren:
- Klik op “Exporteren.”
- Kies of je je project wilt exporteren in videoformaat, ondertitelformaat (SRT, VTT, of PDF), of audioformaat (MP3, WAV, of OGG).
Hoe je Lip Sync gebruikt met Dubbing in Speechify Studio
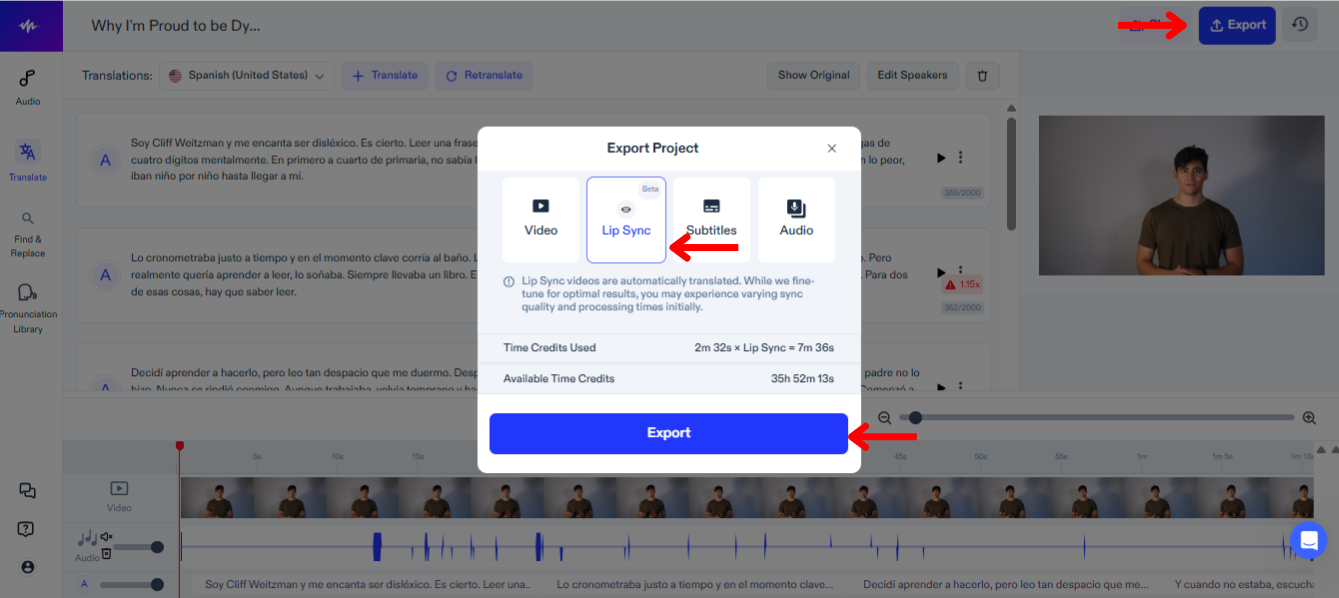
Het gebruik van lip sync met dubbing in Speechify Studio verbetert de kijkervaring door de gesproken audio precies af te stemmen op de lipbewegingen van de sprekers. Om deze nieuwe functie uit te proberen:
- Selecteer “Exporteren.”
- Kies “Lip Sync.”
- Tik op "Exporteren" en de Lip Sync-functie, die nog in BETA is, zal de video automatisch dubben om overeen te komen met de nieuwe vertaling.
Hoe je ondersteuning krijgt in Speechify Studio Dubbing
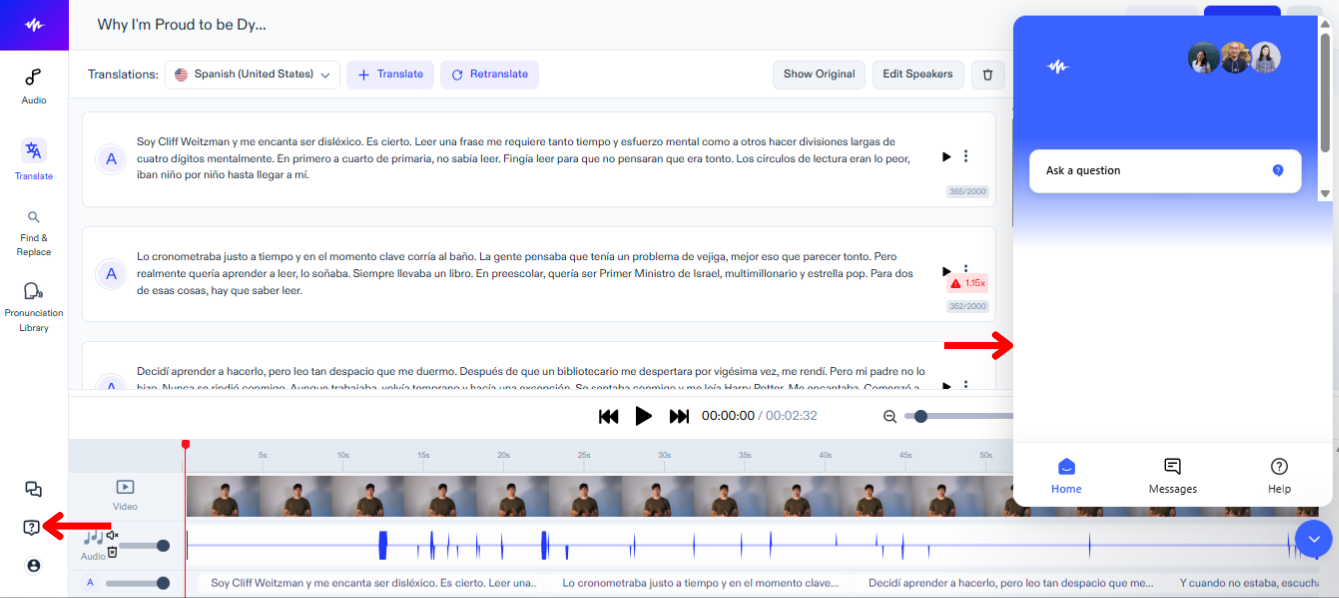
Om snel technische problemen op te lossen of verdere begeleiding te ontvangen, neem contact op met ons ondersteuningsteam via deze stappen:
- Tik op het Vraagtekenpictogram in de linkerwerkbalk.
- Stuur een bericht naar het ondersteuningsteam.