Ya seas un cineasta, creador de contenido o mercadólogo buscando expandir tu audiencia más allá de las fronteras lingüísticas, esta guía te llevará paso a paso por el proceso de doblaje. Desde seleccionar la voz de IA perfecta hasta ajustar tu salida de audio, Speechify Studio ofrece una solución fluida y eficiente para dar vida a tus proyectos en múltiples idiomas. ¿Listo para comenzar? Vamos a explorar cómo Speechify Studio puede mejorar tu contenido y cautivar a una audiencia global.
Cómo Iniciar un Nuevo Proyecto de Doblaje en Speechify Studio
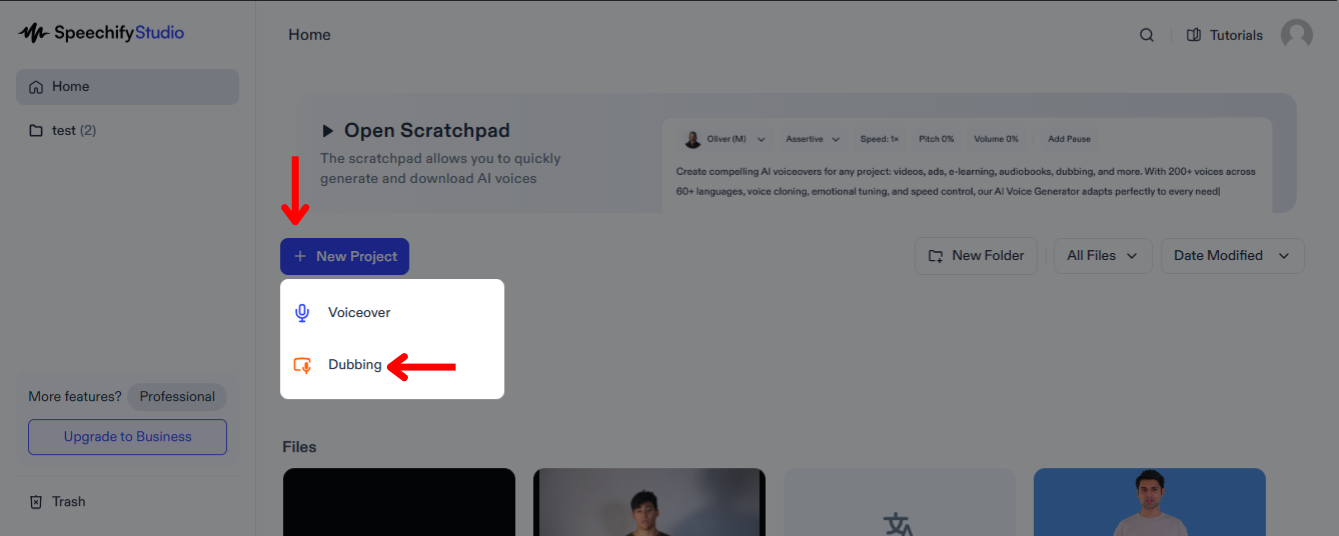
Doblar tus videos puede ampliar significativamente el alcance de tu audiencia, permitiendo que espectadores de diferentes orígenes lingüísticos interactúen con tu contenido en su idioma nativo. Para comenzar:
- Haz clic en “Nuevo Proyecto” desde la pantalla de inicio.
- Elige “Doblaje.”
Cómo Subir Archivos en el Doblaje de Speechify Studio

El primer paso para doblar es subir el archivo que deseas traducir y doblar. Para hacerlo:
- Toca "Importar."
- Sube archivos o pega un enlace de YouTube.
- Selecciona el número de hablantes en tu video.
- Elige el idioma de tu video.
- Marca “Eliminar Palabras de Relleno” para quitar palabras extra, como “eh” o “como.”
- Haz clic en “Extraer Pausas del Audio Original” para asegurar que tu doblaje sea natural.
- Toca “Enviar” y Speechify Dubbing transcribirá automáticamente tu video en su idioma actual.
Cómo Editar la Transcripción Automática en el Doblaje de Speechify Studio

Si deseas hacer ediciones a la transcripción del audio original, simplemente:
- Toca el bloque de texto que deseas cambiar.
- Edita el guion como lo harías con cualquier texto.
Cómo Traducir y Doblar Video en Speechify Studio
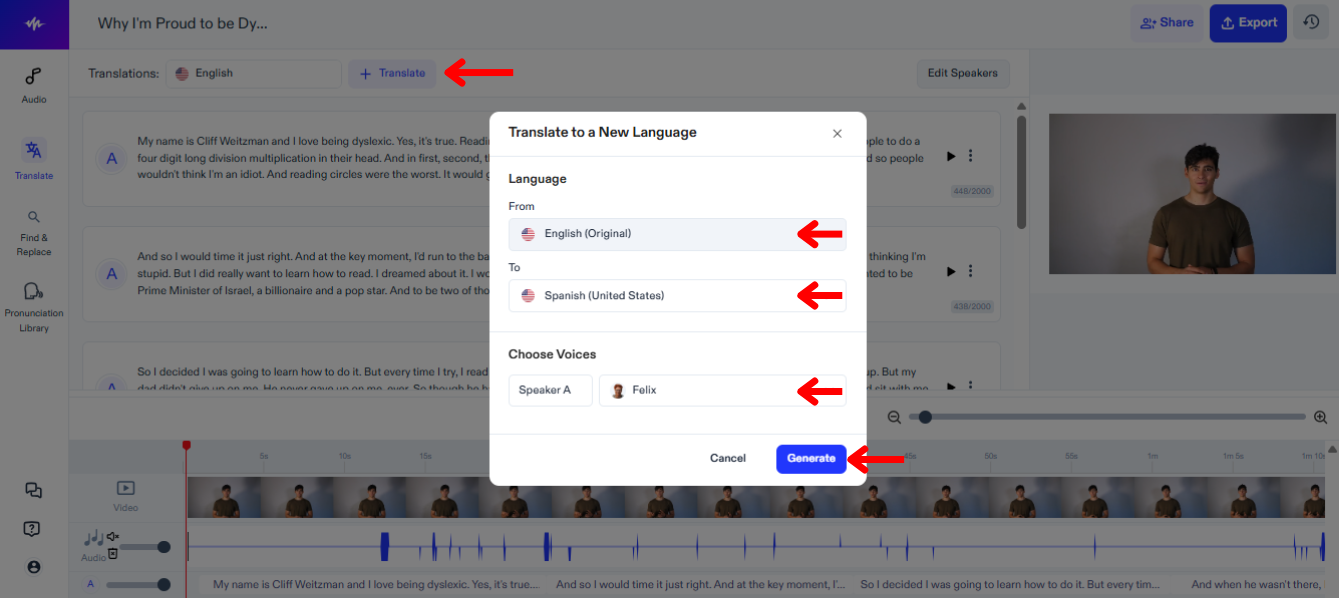
El siguiente paso es traducir y doblar tu video a otro idioma. Sigue esta guía:
- Haz clic en “Traducir.”
- Elige el idioma en el que está actualmente tu video en “De.”
- Selecciona el idioma al que deseas traducir y doblar tu video de entre más de 60 idiomas en “A.”
- Elige una voz para cada hablante.
- Toca “Generar” y espera a que Speechify Dubbing doble automáticamente tu video.
Cómo Editar la Traducción en el Doblaje de Speechify Studio
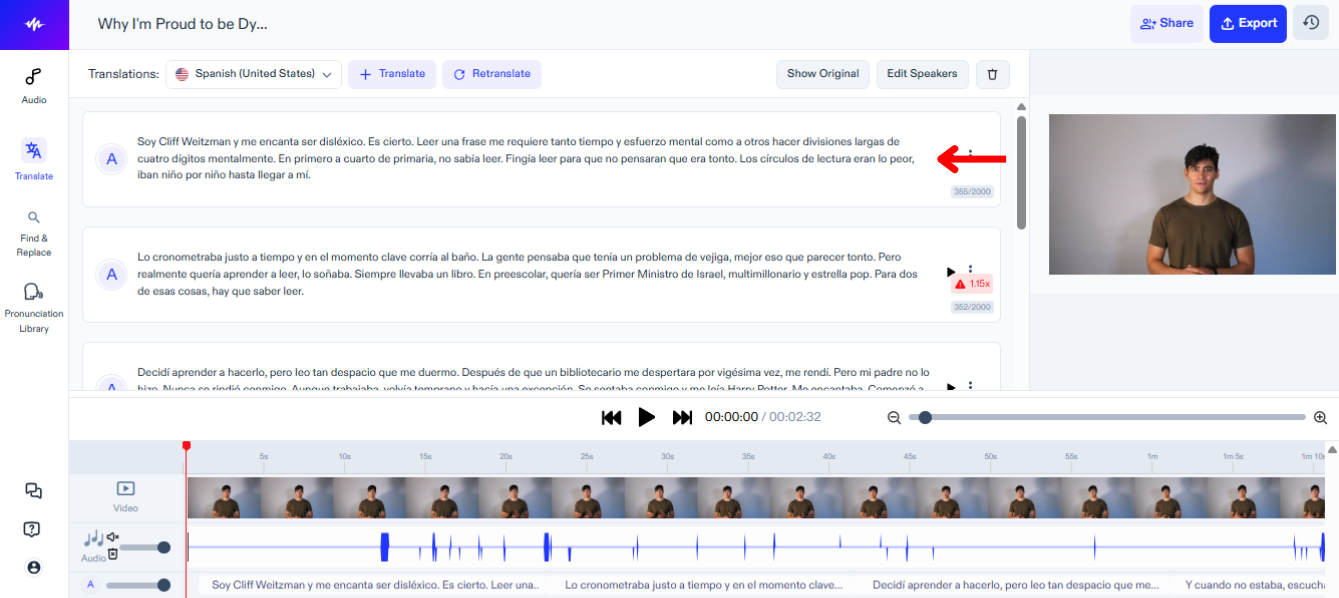
Editar la traducción de tu video es fácil, simplemente:
- Toca el bloque de texto que deseas cambiar.
- Edita el guion como lo harías con cualquier texto.
Cómo Cambiar la Voz en el Doblaje de Speechify Studio
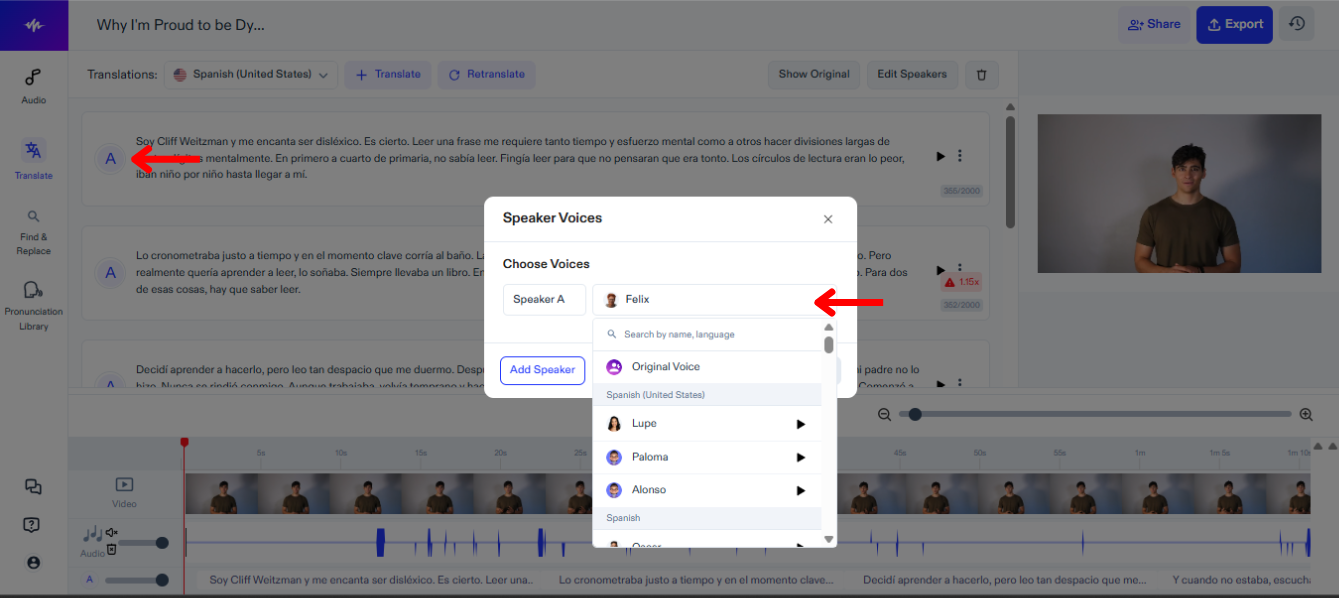
Puedes asignar diferentes voces a distintos hablantes en tu video y cambiar las voces en cualquier momento para encontrar la opción perfecta. Para cambiar la voz en Speechify Studio:
- Presiona el ícono de Altavoz.
- Elige entre más de 200 voces realistas.
Cómo Añadir Música de Fondo en el Doblaje de Speechify Studio
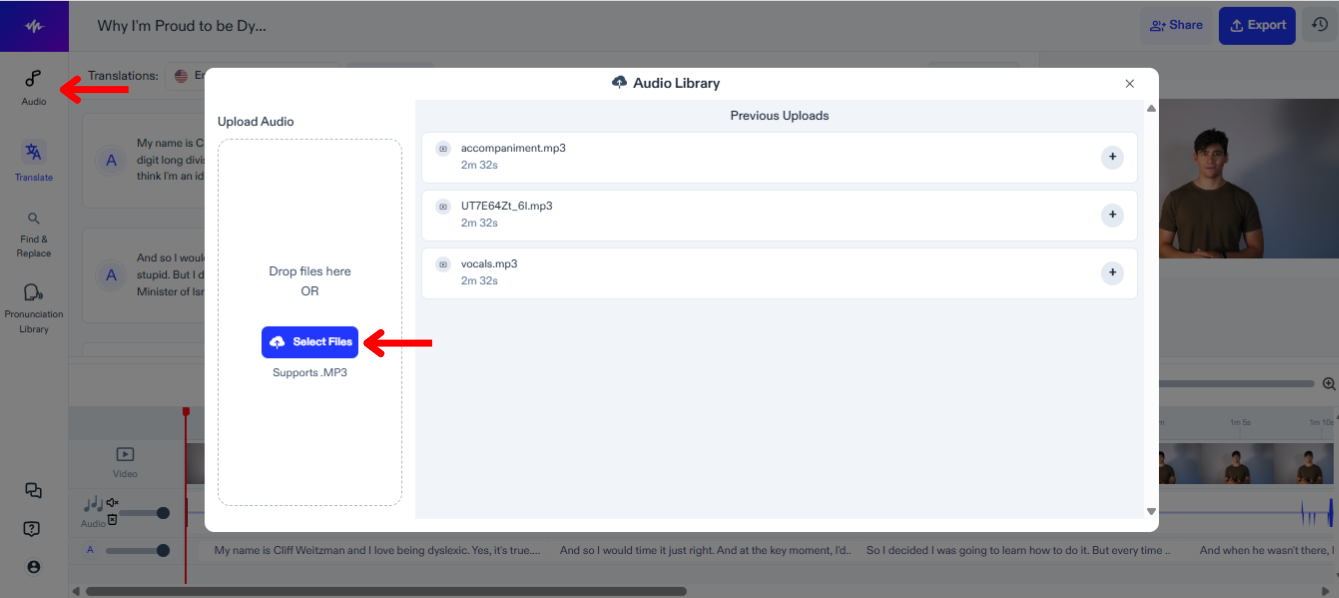
Para añadir música u otros archivos de audio a tu proyecto de doblaje, sigue estos pasos:
- Toca "Audio" en la barra de herramientas a la izquierda.
- Sube tus archivos de audio.
- Selecciona el archivo para añadirlo a tu línea de tiempo de edición.
Cómo Añadir a la Biblioteca de Pronunciación en el Doblaje de Speechify Studio
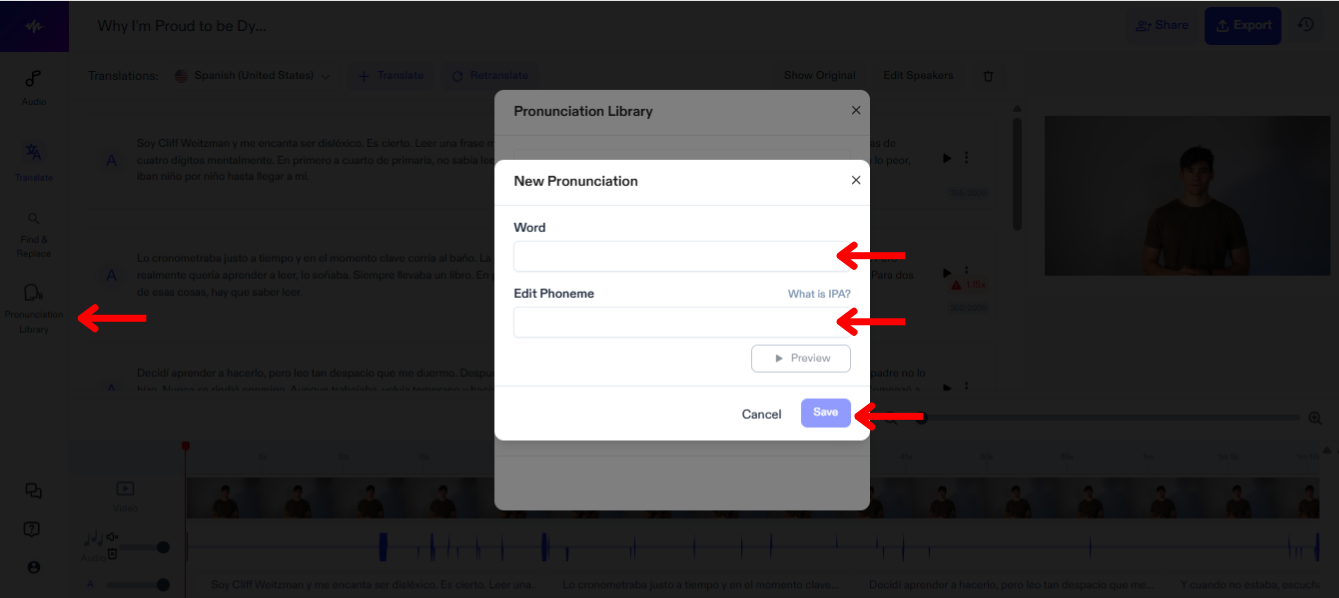
Añadir a la biblioteca de pronunciación en Speechify Studio permite una salida de voz personalizada y precisa, asegurando que cada palabra y nombre en tu video se articule correctamente. Sigue estos pasos para añadir un término a la biblioteca de pronunciación:
- Haz clic en “Biblioteca de Pronunciación.”
- Presiona “Crear Nueva Pronunciación.”
- Inserta la palabra junto con su fonema.
- Toca “Vista Previa” para revisar la nueva pronunciación.
- Selecciona “Guardar” para guardar la nueva pronunciación para uso futuro.
Cómo Exportar tu Proyecto de Doblaje en Speechify Studio
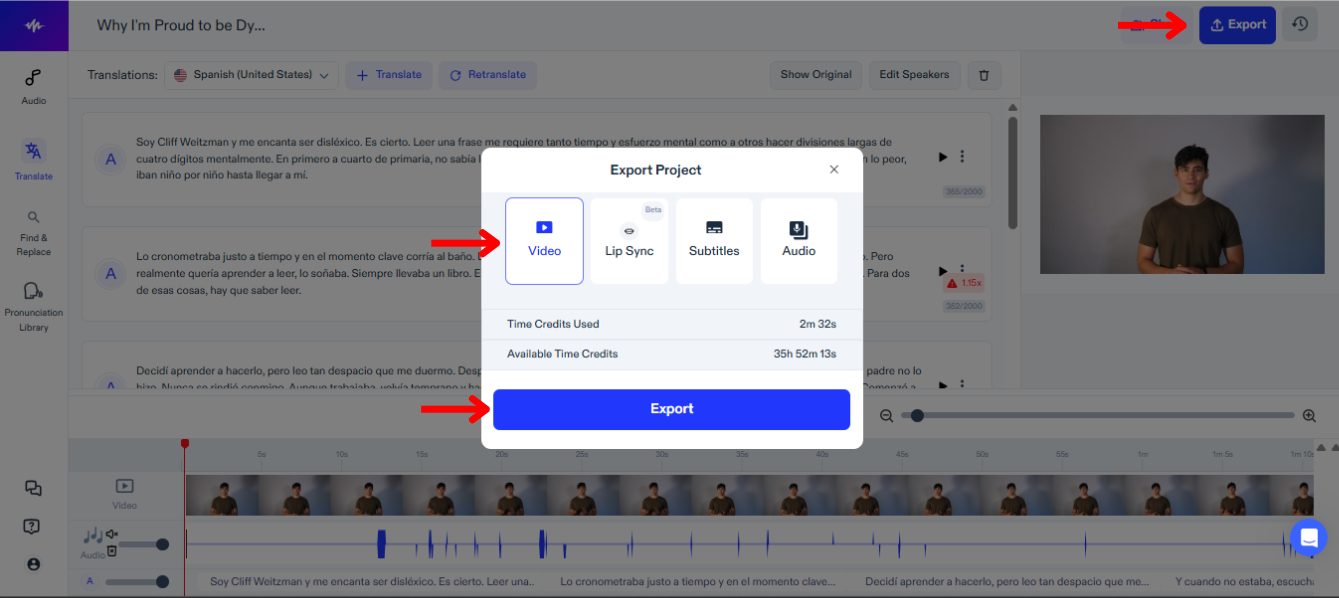
Exportar tu proyecto de doblaje en Speechify Studio te permite integrar tu contenido recién doblado en varias plataformas y formatos. Para exportar:
- Haz clic en “Exportar.”
- Elige si deseas exportar tu proyecto en formato de video, formato de subtítulos (SRT, VTT o PDF), o formato de audio (MP3, WAV o OGG).
Cómo Usar Sincronización Labial con Doblaje en Speechify Studio
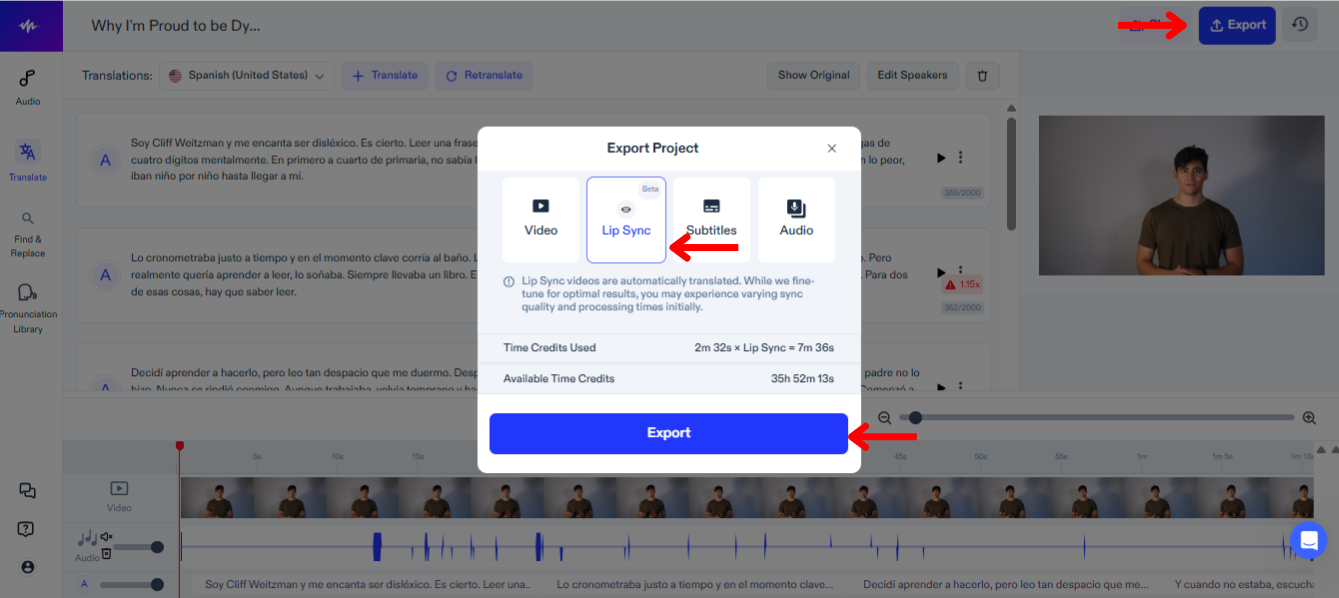
Usar sincronización labial con doblaje en Speechify Studio mejora la experiencia visual al alinear el audio hablado precisamente con los movimientos labiales de los hablantes. Para probar esta nueva función:
- Selecciona “Exportar.”
- Elige “Sincronización Labial.”
- Toca "Exportar" y la función de Sincronización Labial, que aún está en BETA, doblará automáticamente el video para que coincida con la nueva traducción.
Cómo Acceder al Soporte en el Doblaje de Speechify Studio
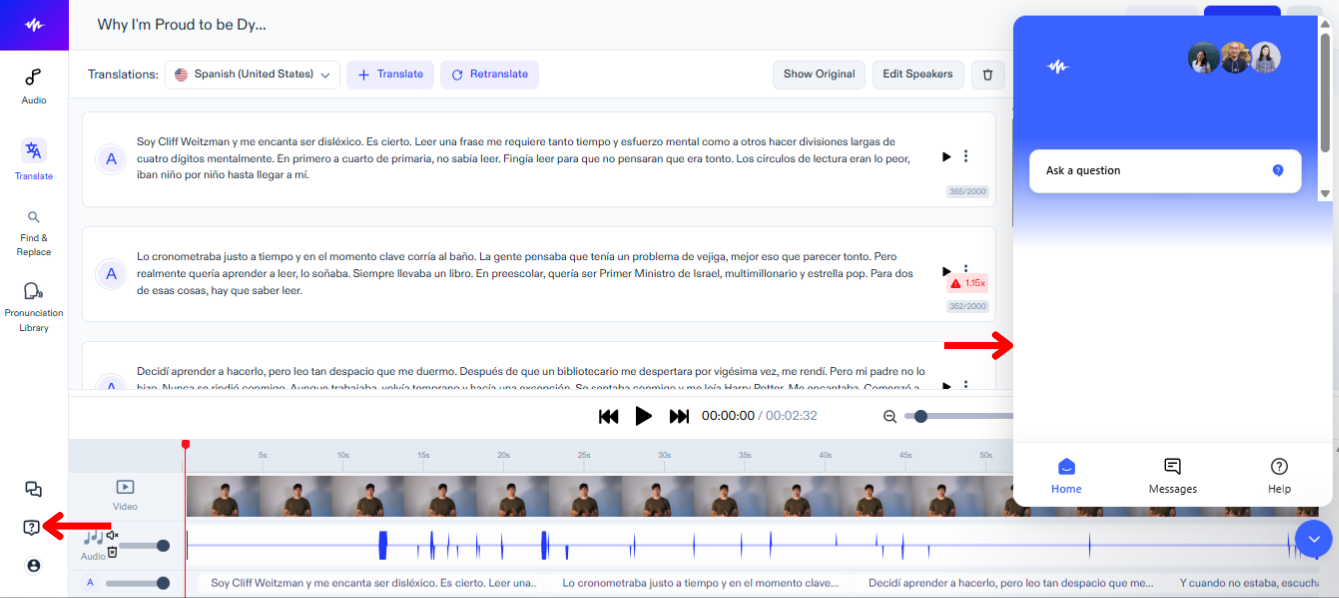
Para resolver rápidamente cualquier problema técnico o recibir más orientación, contacta a nuestro equipo de soporte con estos pasos:
- Toca el ícono de signo de interrogación en la barra de herramientas a la izquierda.
- Envía un mensaje al equipo de soporte.