The Speechify iOS app transforms text into spoken words, enhancing reading accessibility and efficiency. This guide covers everything you need to know, from downloading the app and exploring its key features to delving into advanced settings, enabling you to fully utilize Speechify's text to speech features.
How to Access the Speechify iOS App
To start using the Speechify iOS app, simply install it by following these steps:
- Download the Speechify iOS App from the App Store.
- Sign up for an account.
How to Upload Text into the Speechify iOS App
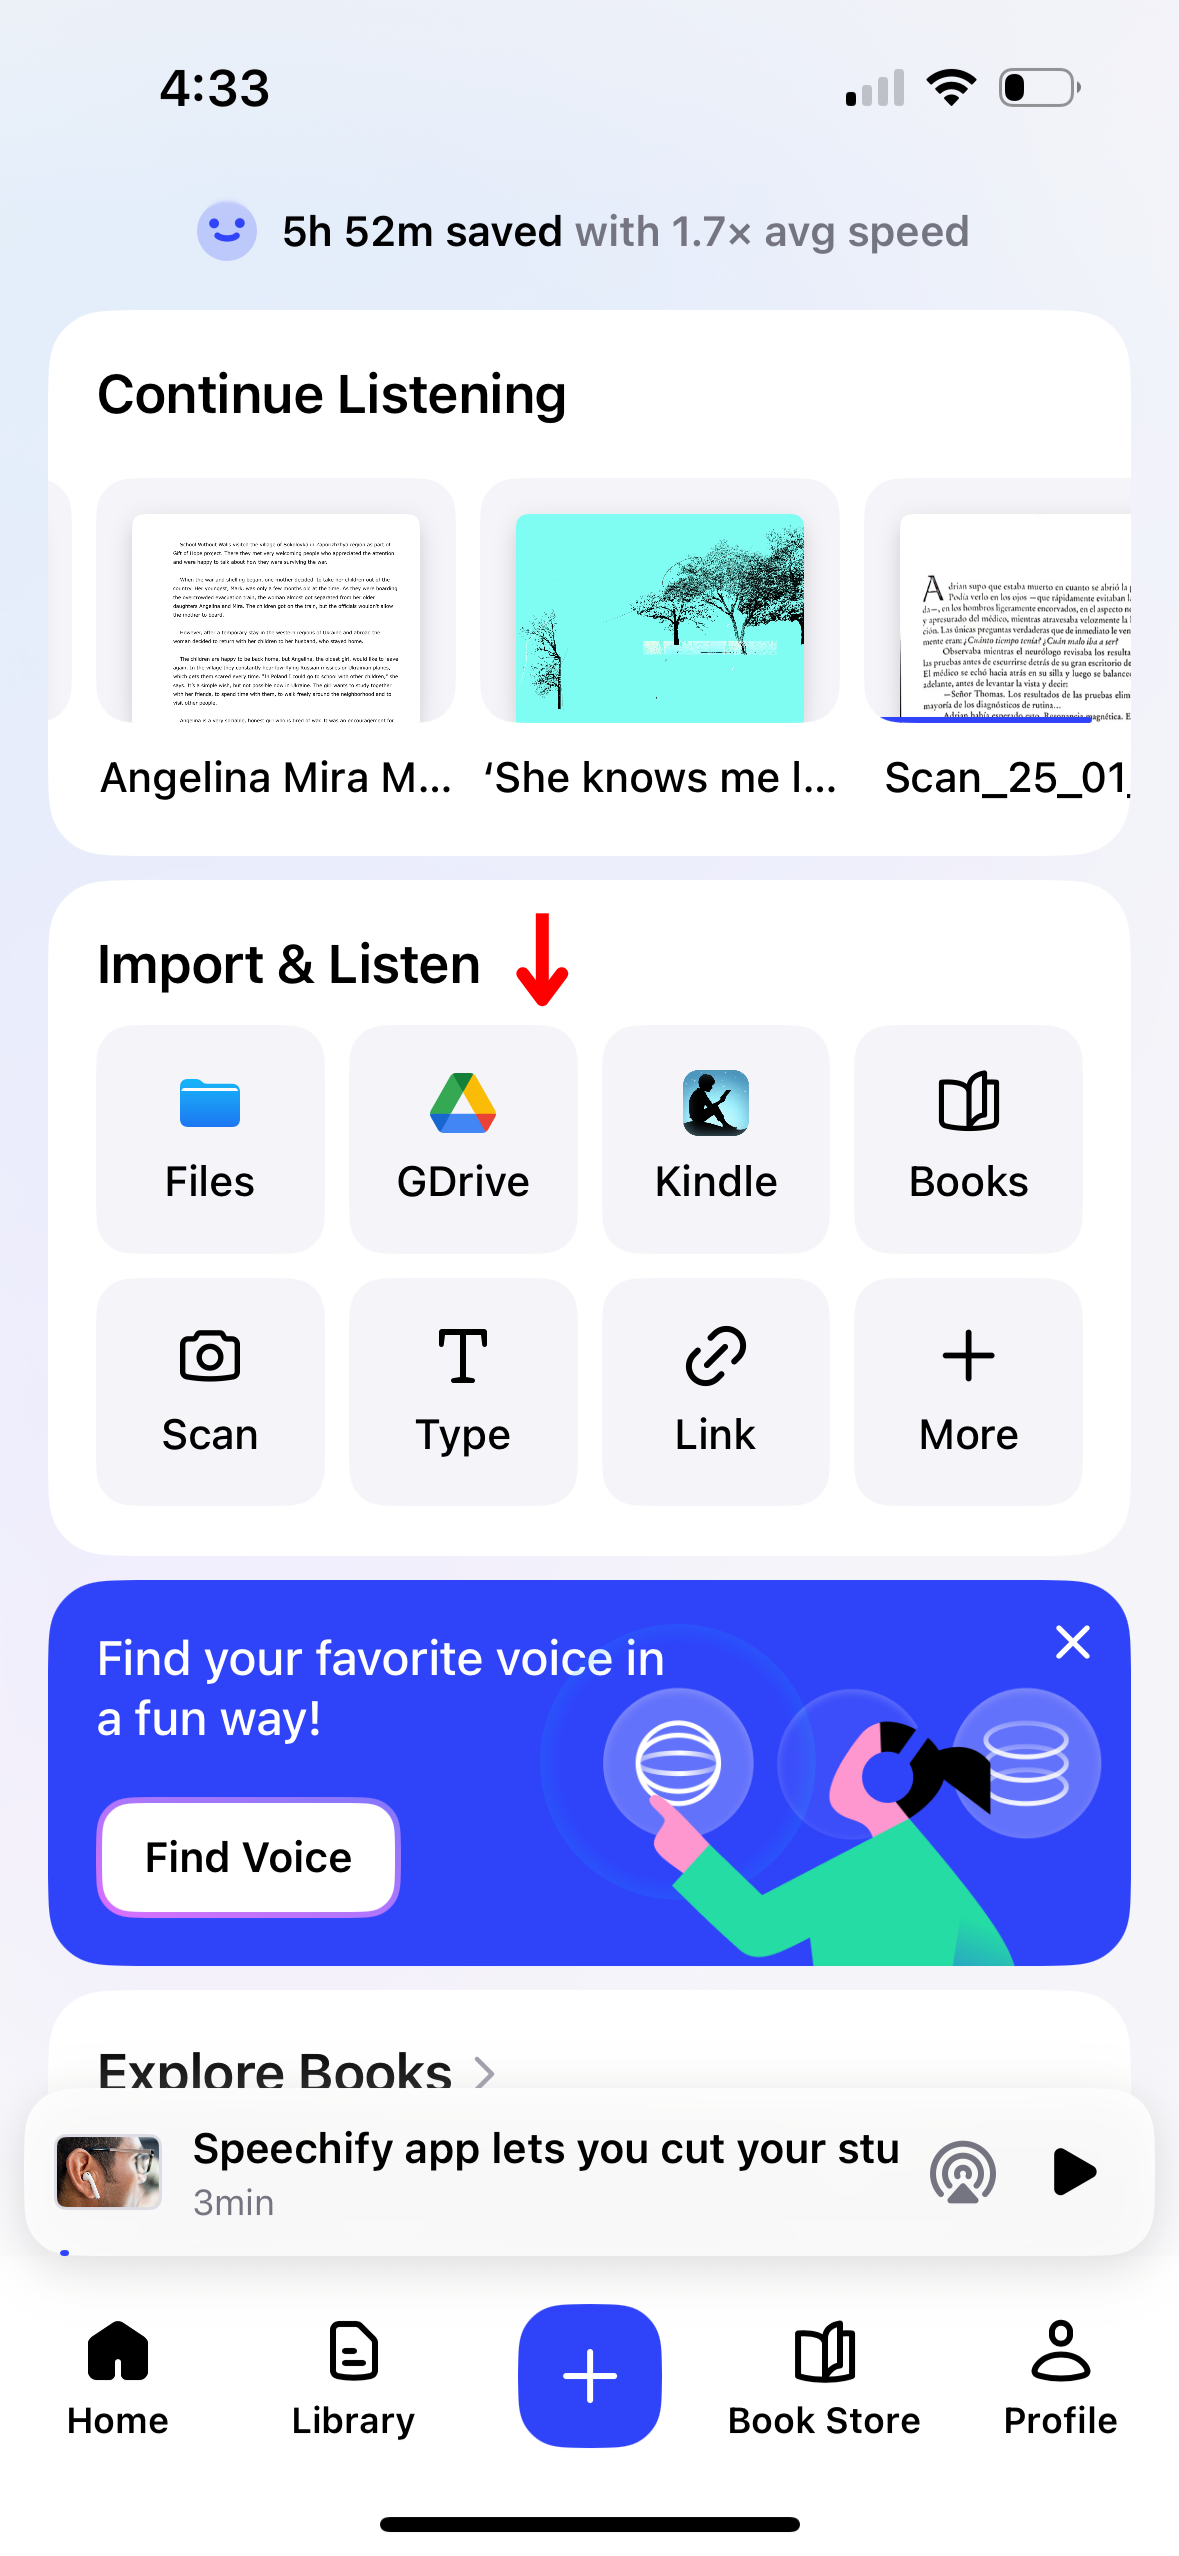
Uploading your material to have it read aloud is easier than ever with the Speechify iOS app. Follow these instructions to get started:
- Open the Speechify iOS app.
- On the Home Screen, upload or import the content you wish to read. You can either:
- Import files from your iPhone.
- Connect Google Drive, Dropbox, OneDrive or Canvas, or to import files.
- Type or paste text. To use this feature, simply tap “Add Text,” add a title, add text, click “Add Text.”
- Paste a web link to automatically import any webpage into Speechify. Choose “Paste a Web Link,” insert the link, and hit “Submit.”
- Scan text by selecting Scan and taking a photo of a book, worksheet, or more.
How to Scan on the Speechify iOS App
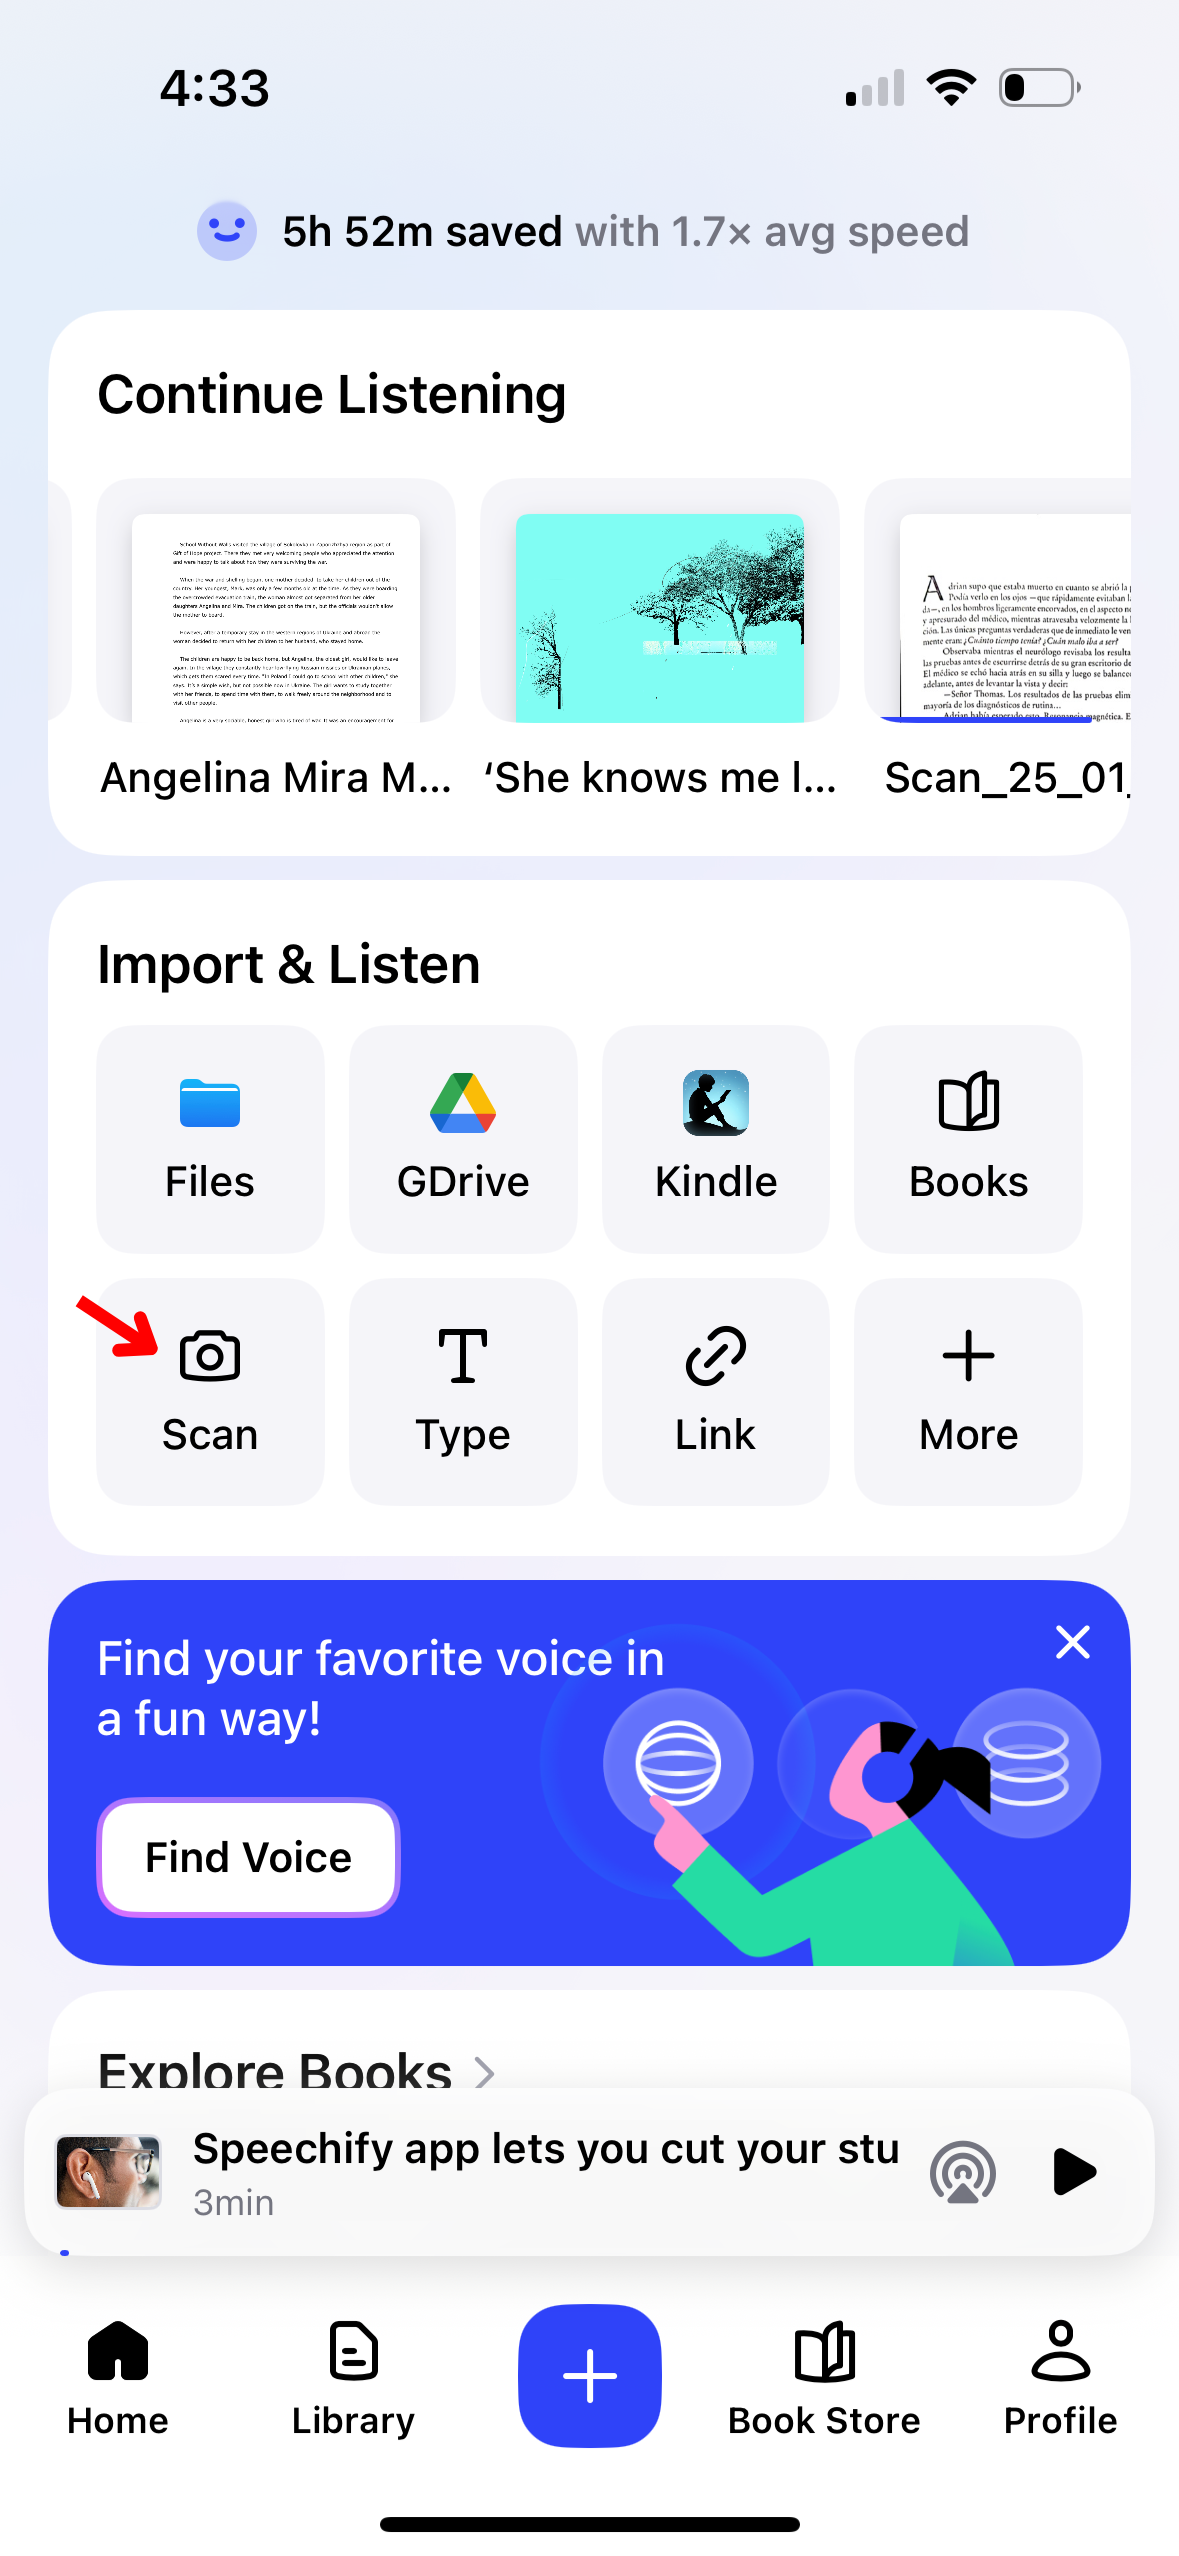
If you’d like to have Speechify read aloud physical text, such as textbooks, worksheets, or handwritten notes, the OCR scanning feature can help. Here’s a quick guide to the scan feature:
- Click the Scan button on the Home screen.
- Take a photo of a book, handwritten notes, or anything you wish to scan.
- You can now have Speechify read the text aloud.
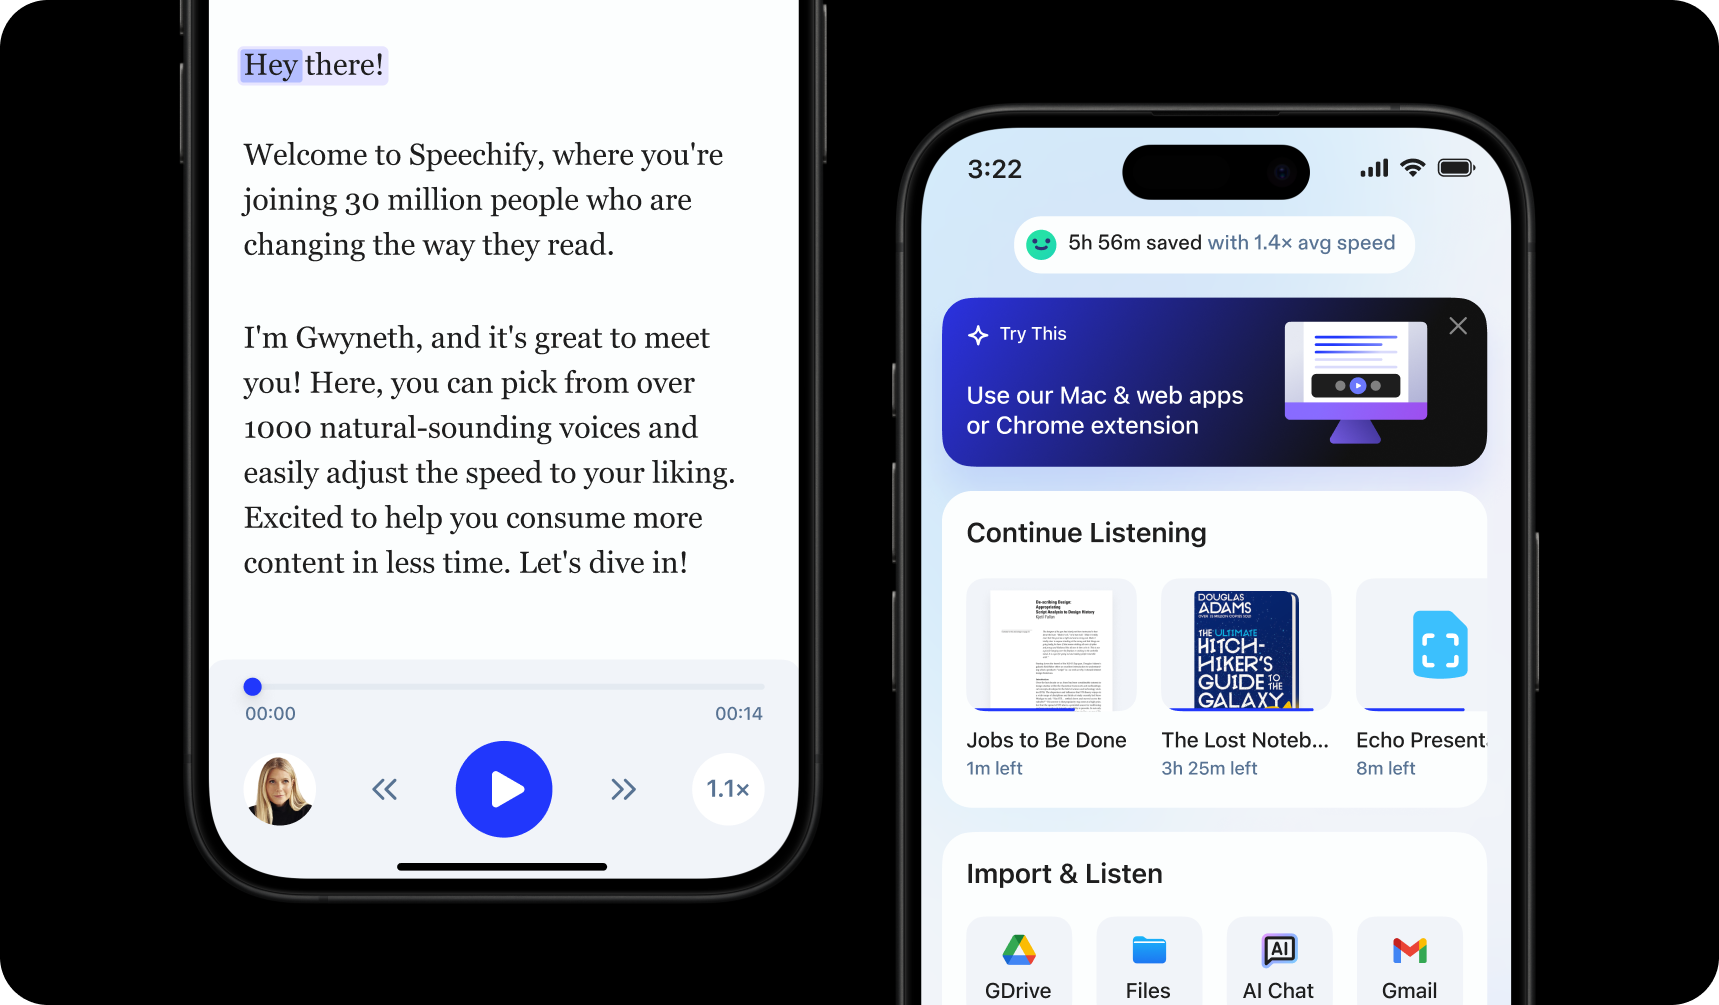
How to Change the Voice on the Speechify iOS App
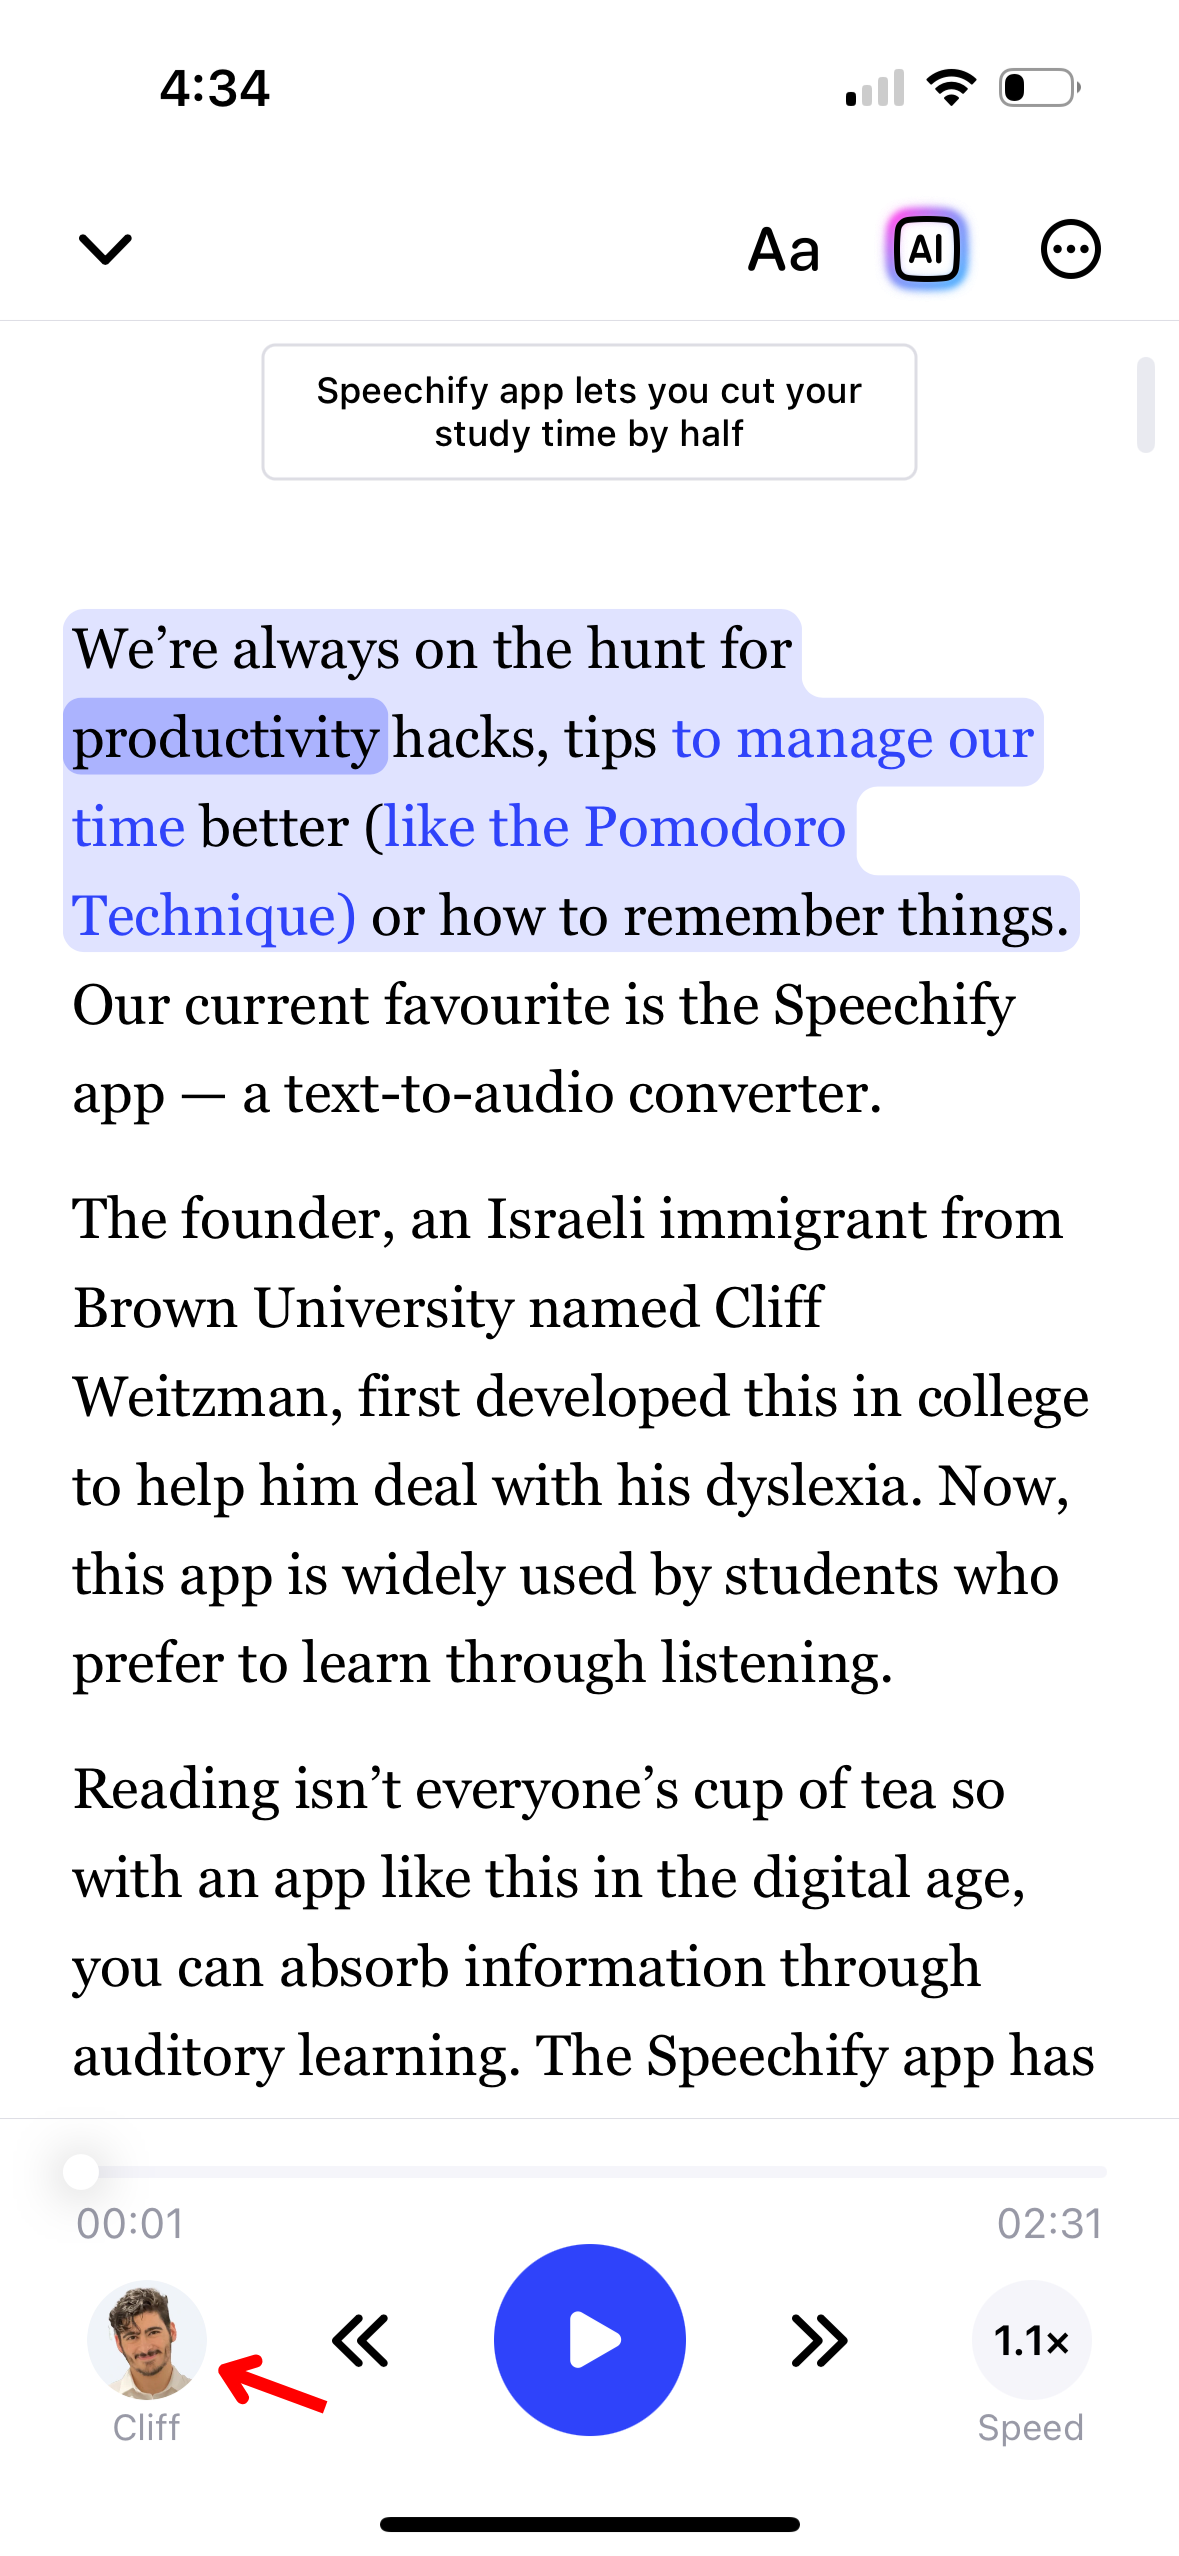
You can personalize your listening experience in Speechify by changing the voice. Here’s how to adjust it:
- Tap the voice icon in the bottom left.
- Select one of 200+ lifelike AI voices, including from celebrity voices like Snoop Dogg and Gwyneth Paltrow.
How to use a Custom Voice on the Speechify iOS App
Make your reading experience in Speechify uniquely personal by using a custom voice. Although you have to create custom voices in the Web App, you can access the custom voices in the Speechify iOS app. Just follow these steps to use custom voices:
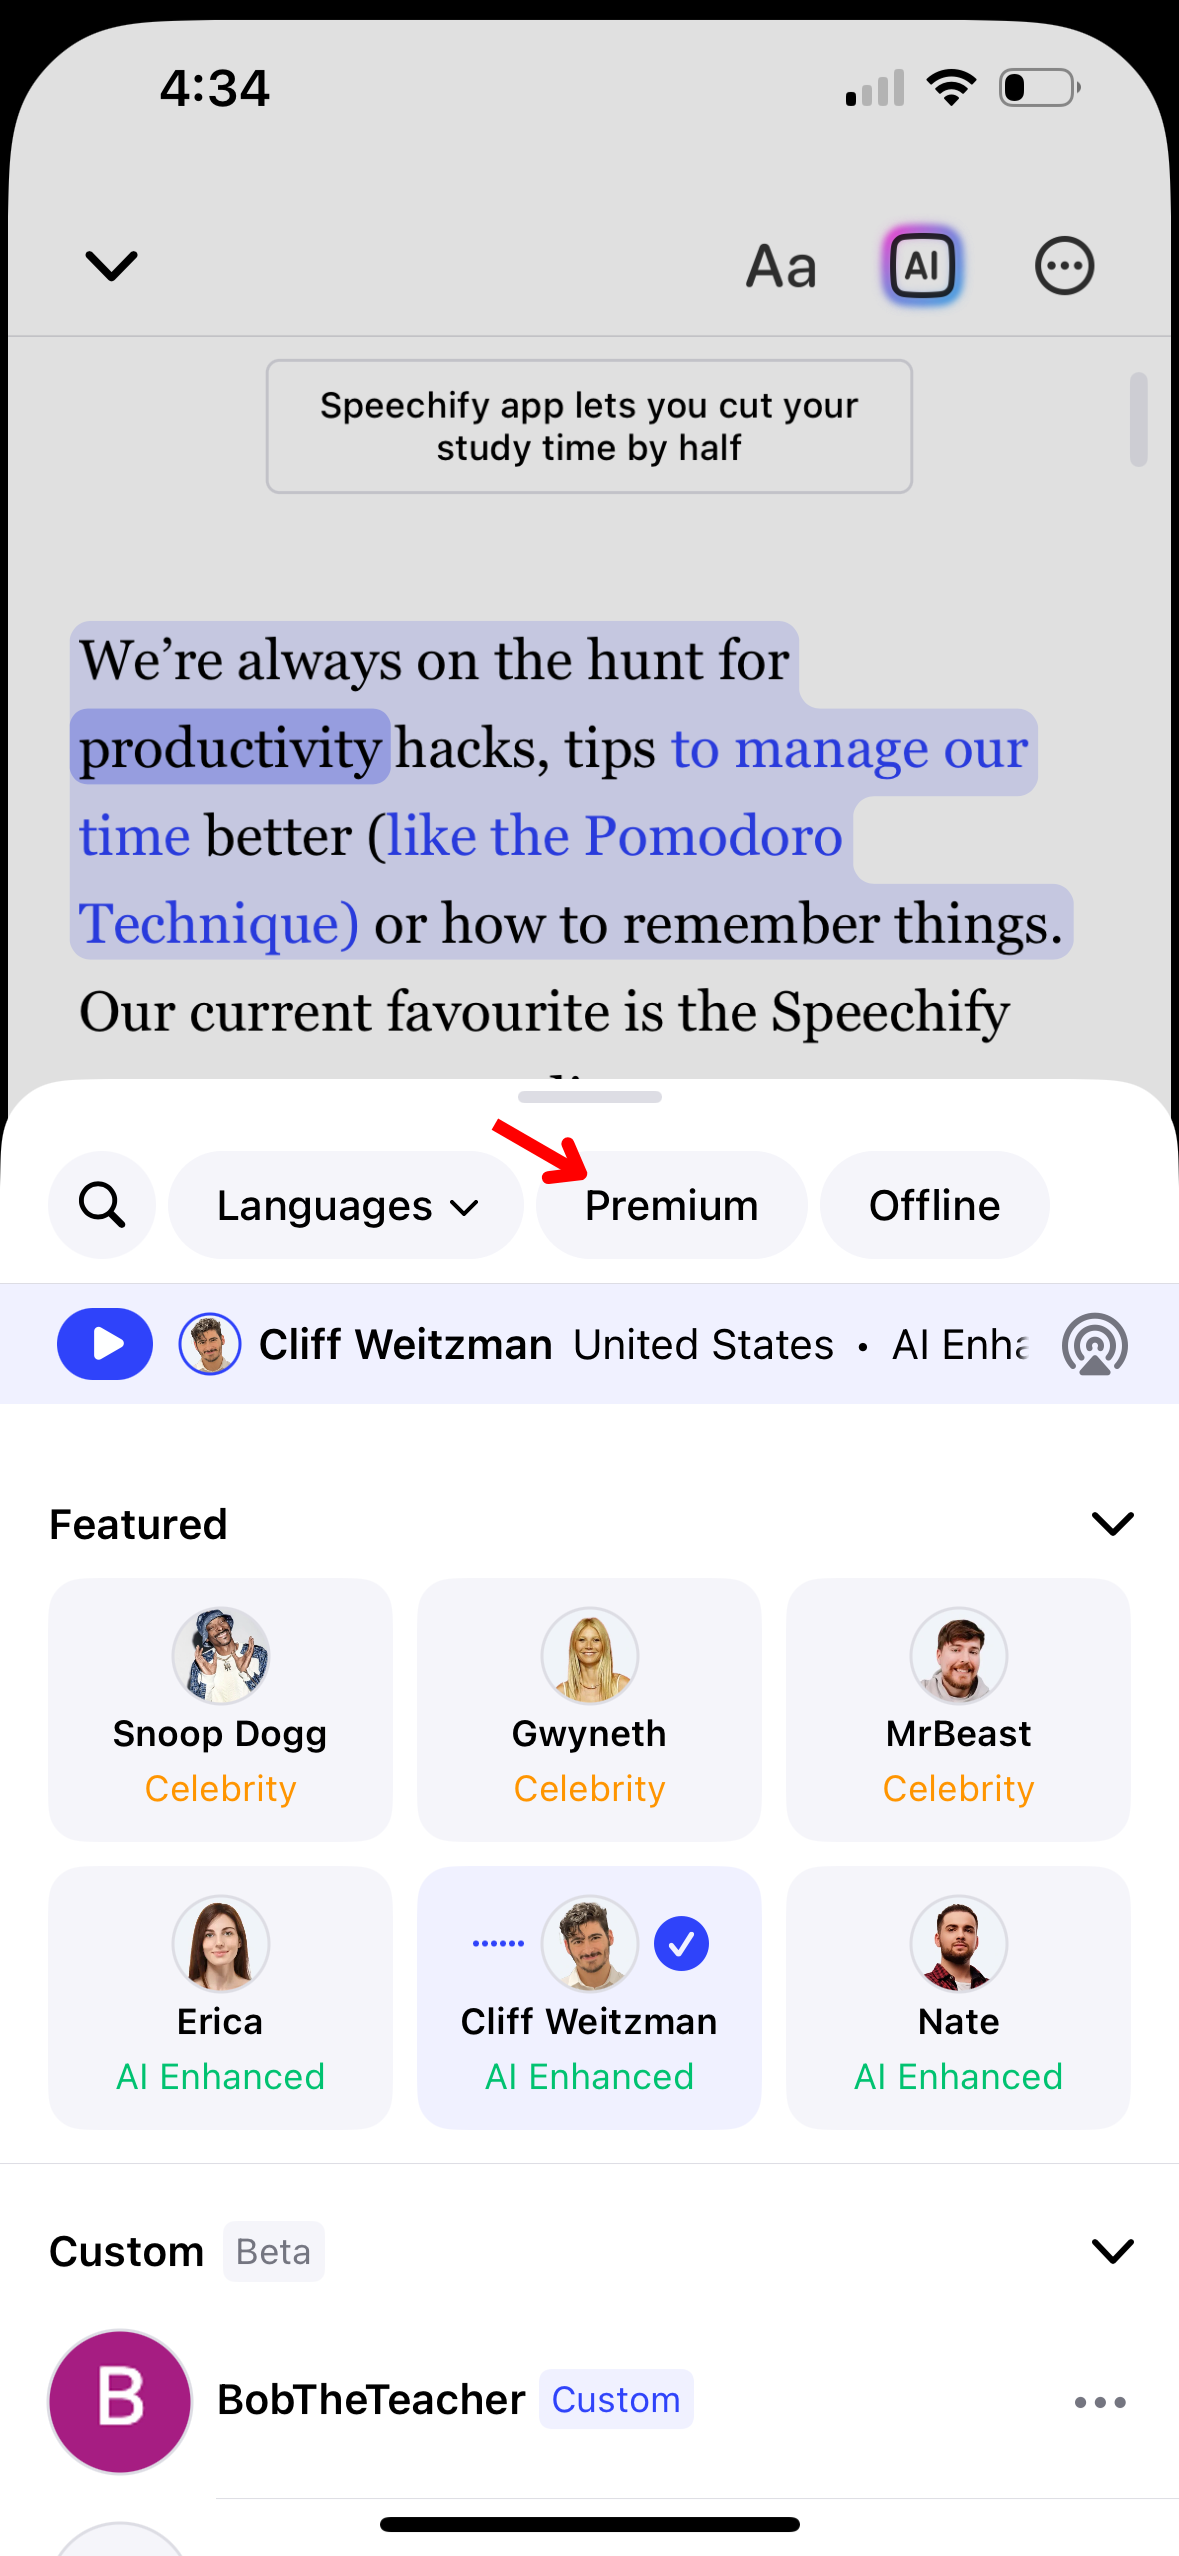
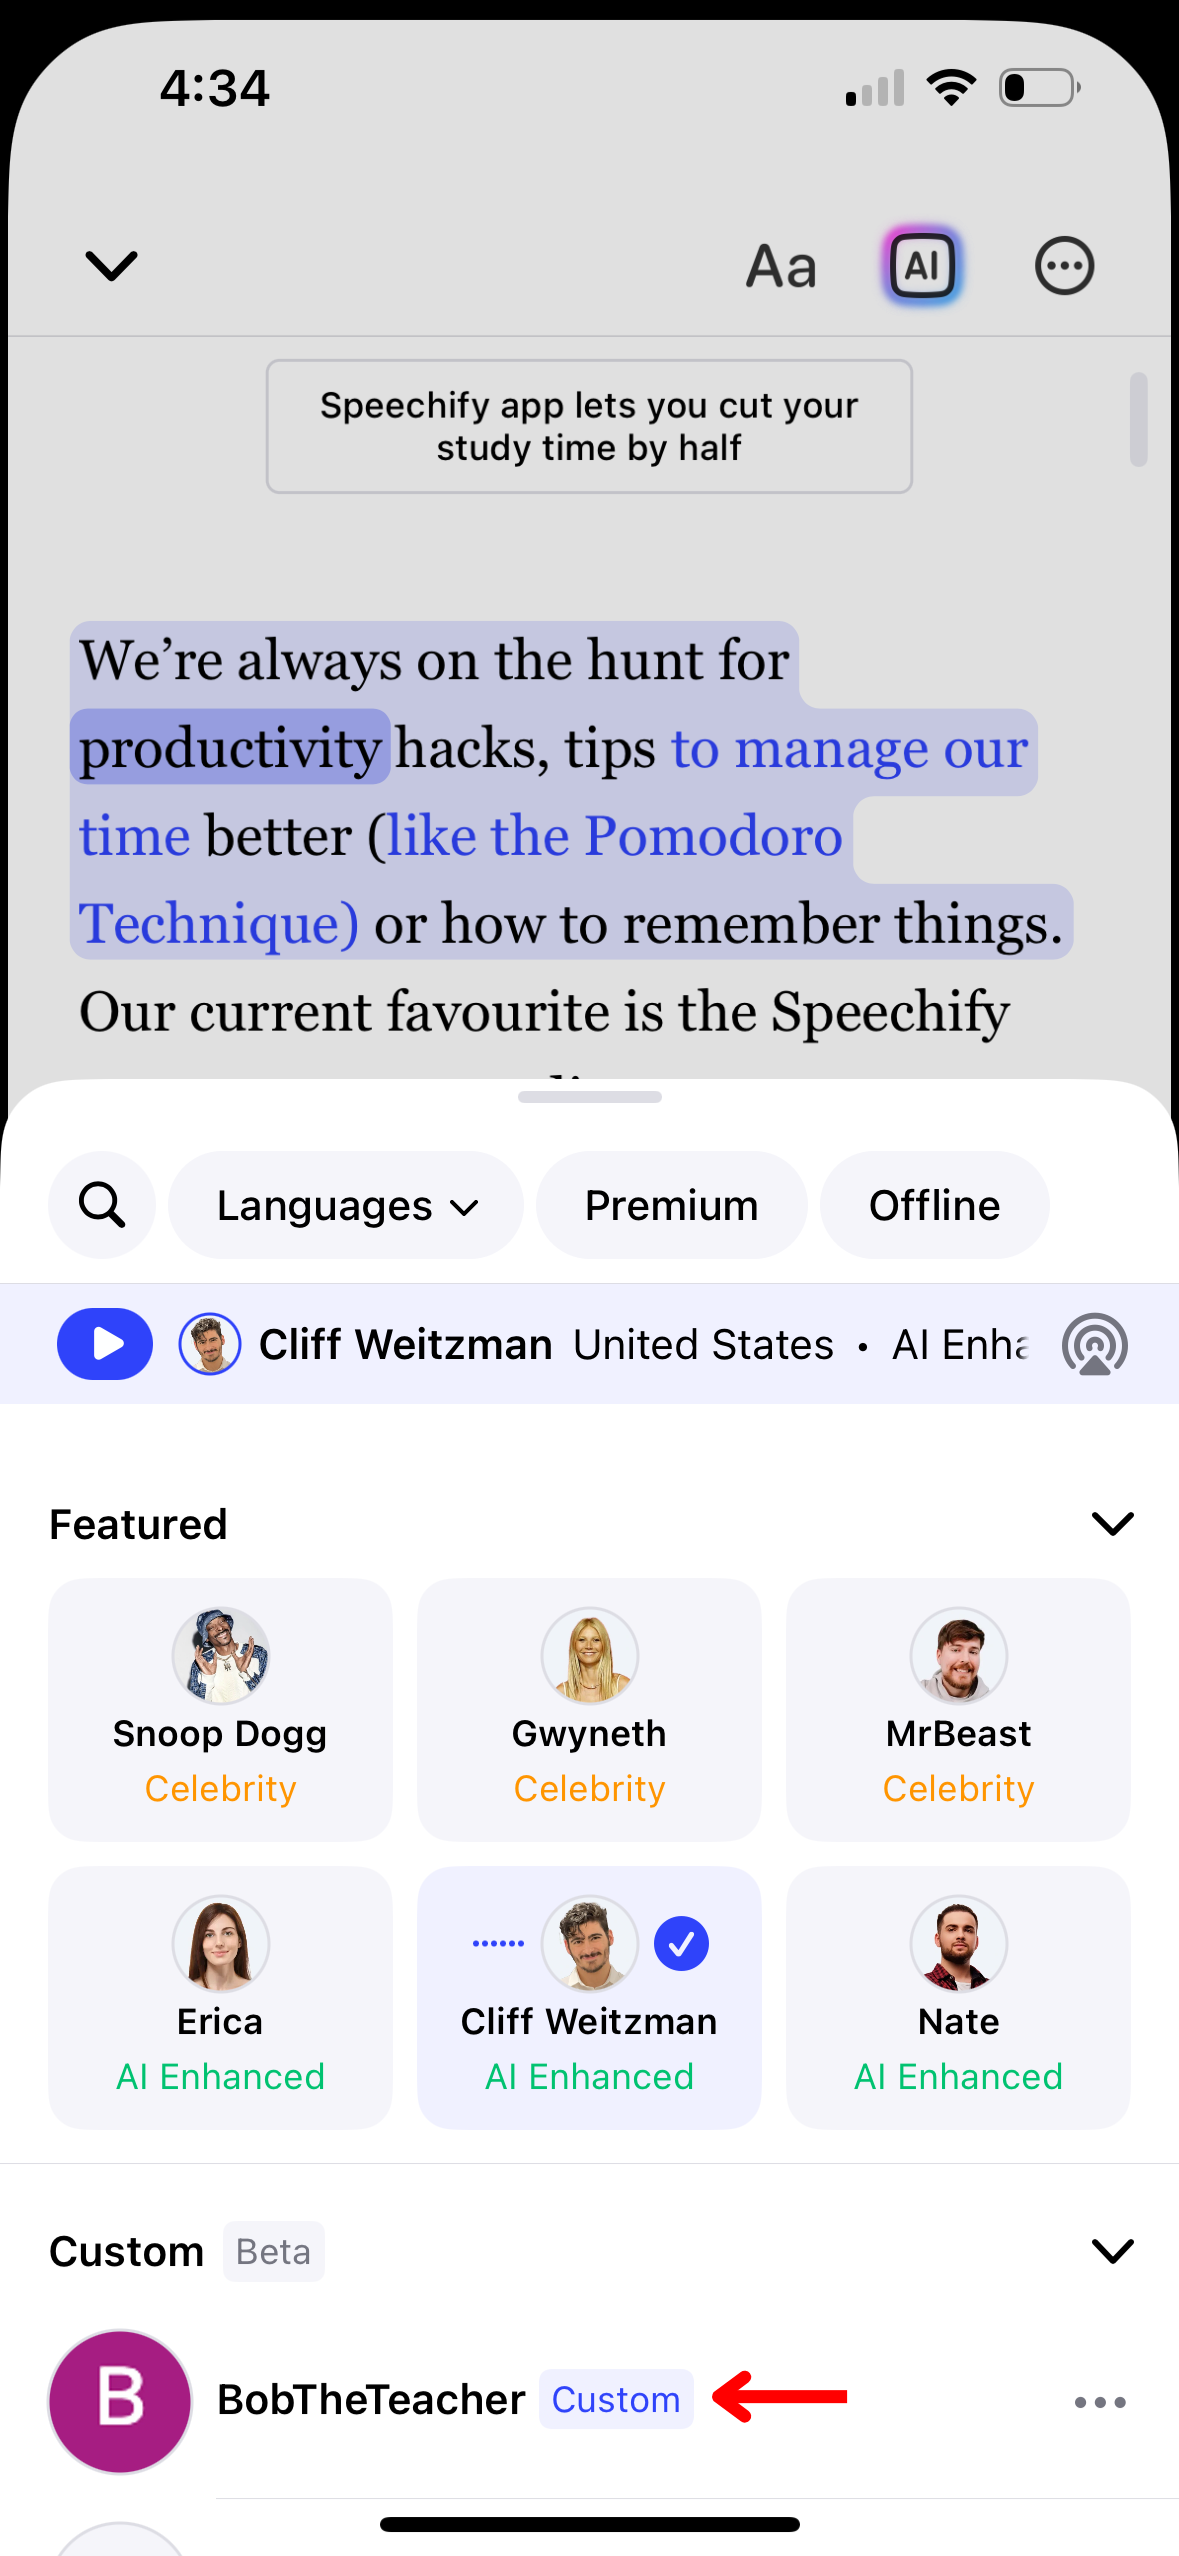
- Click the voice icon in the bottom left.
- Tap “Custom.”
- Choose from your custom voices.
How to Change the Language on the Speechify iOS App
Speechify supports over 60 languages. To switch between languages, follow these steps:
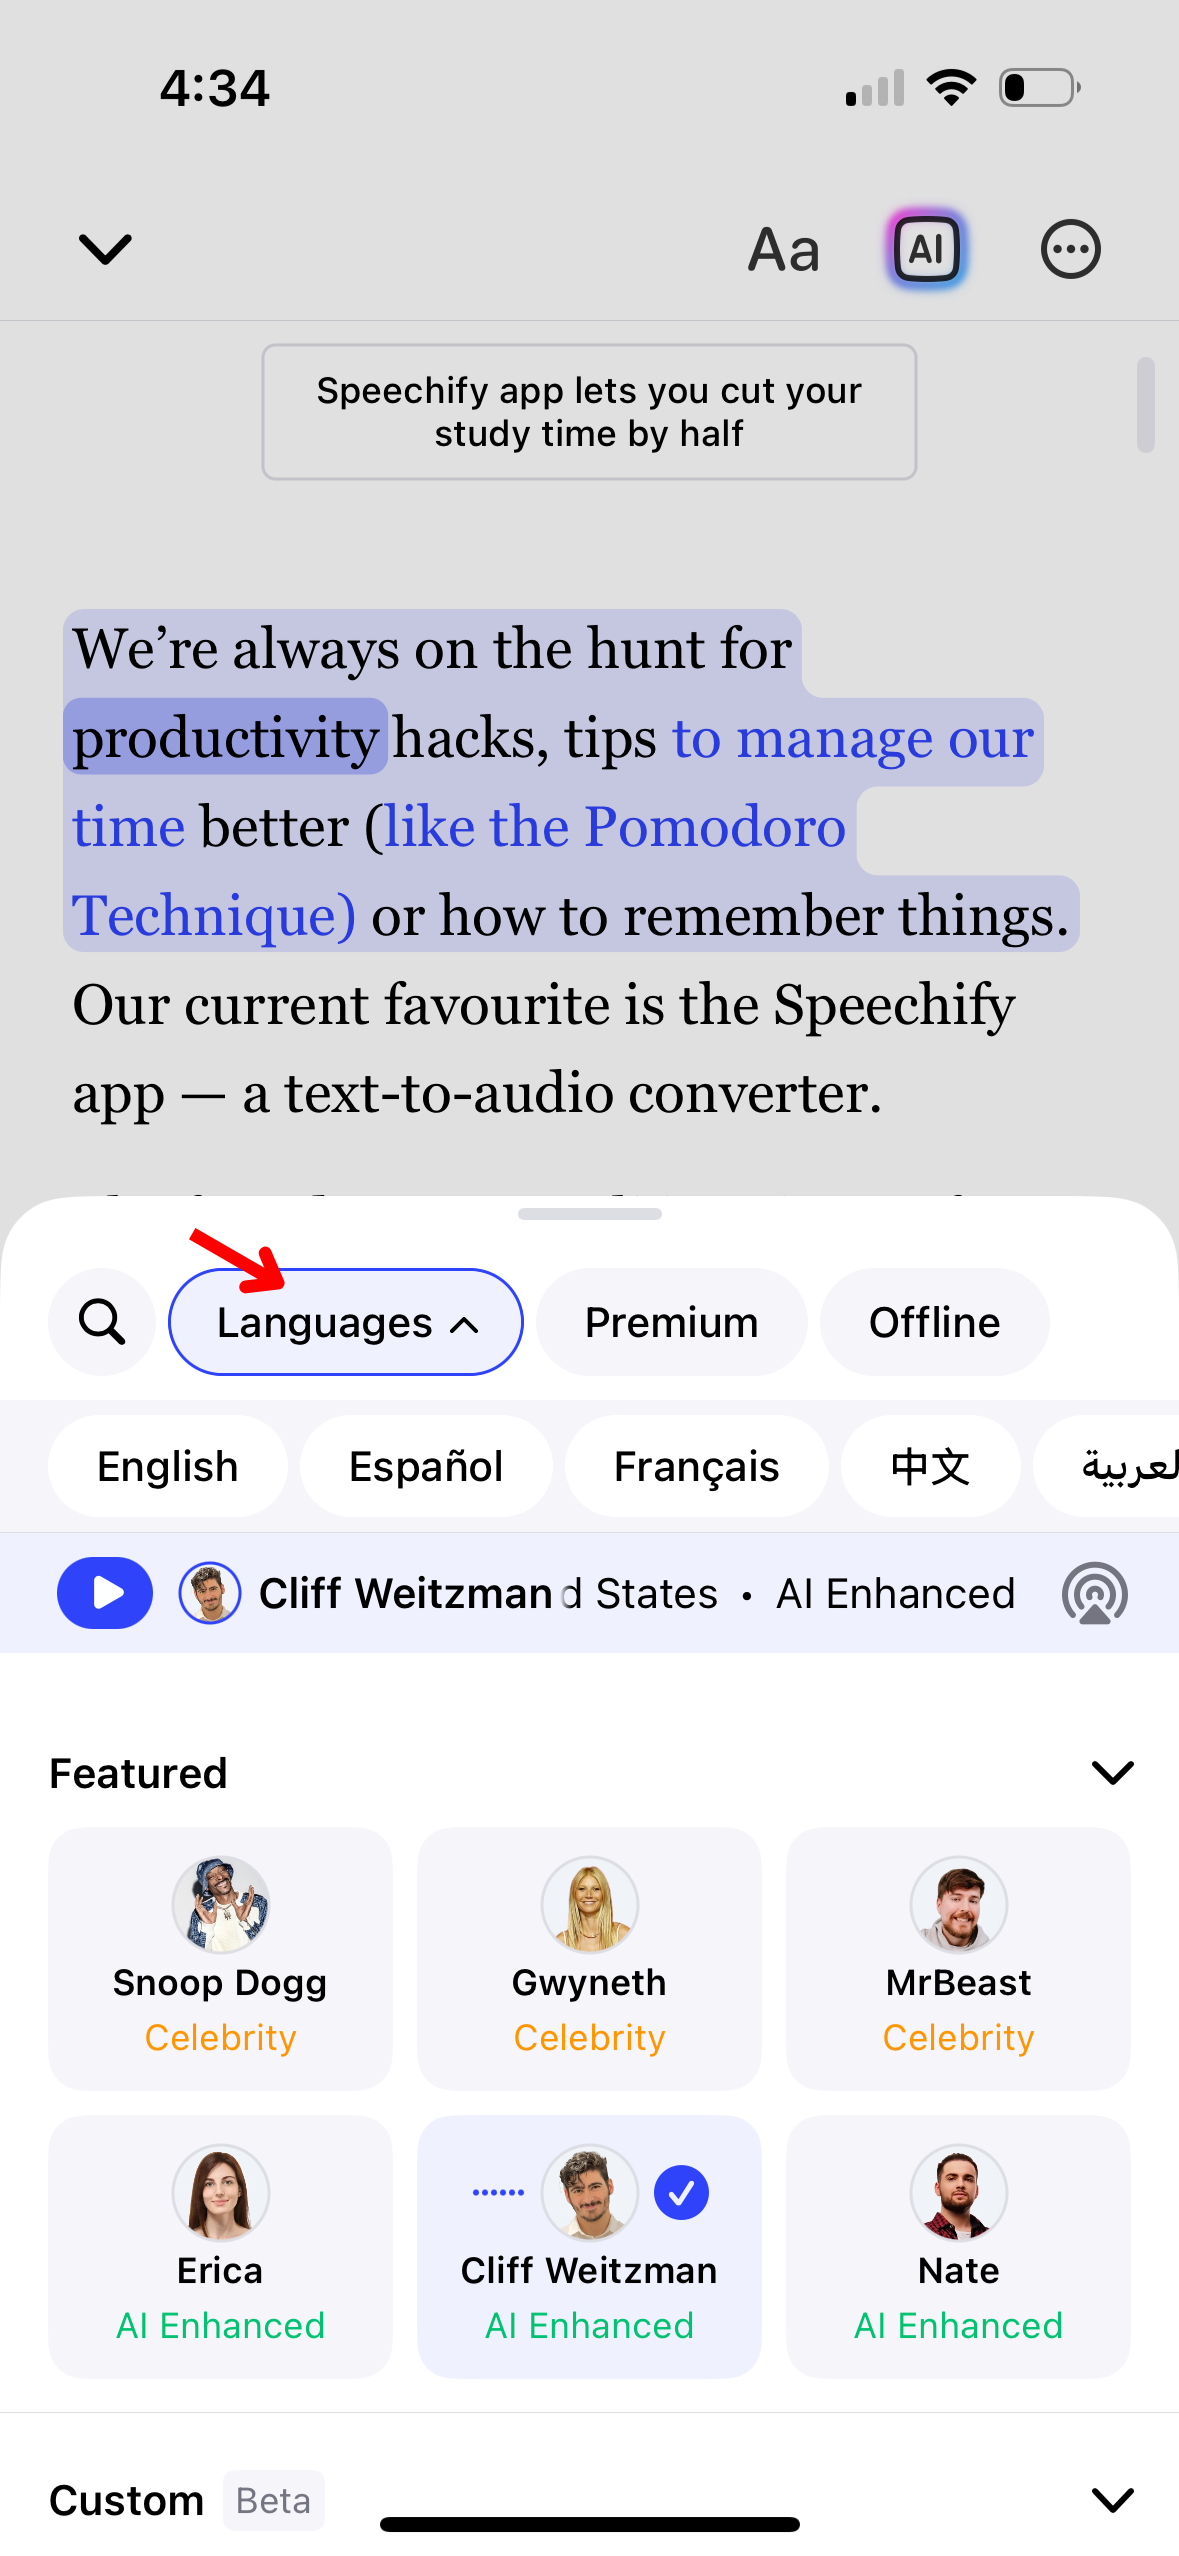
- Select the voice icon in the bottom left.
- Tap “All Voices.”
- Choose from 60+ languages..
How to Change the Reading Speed on the Speechify iOS App
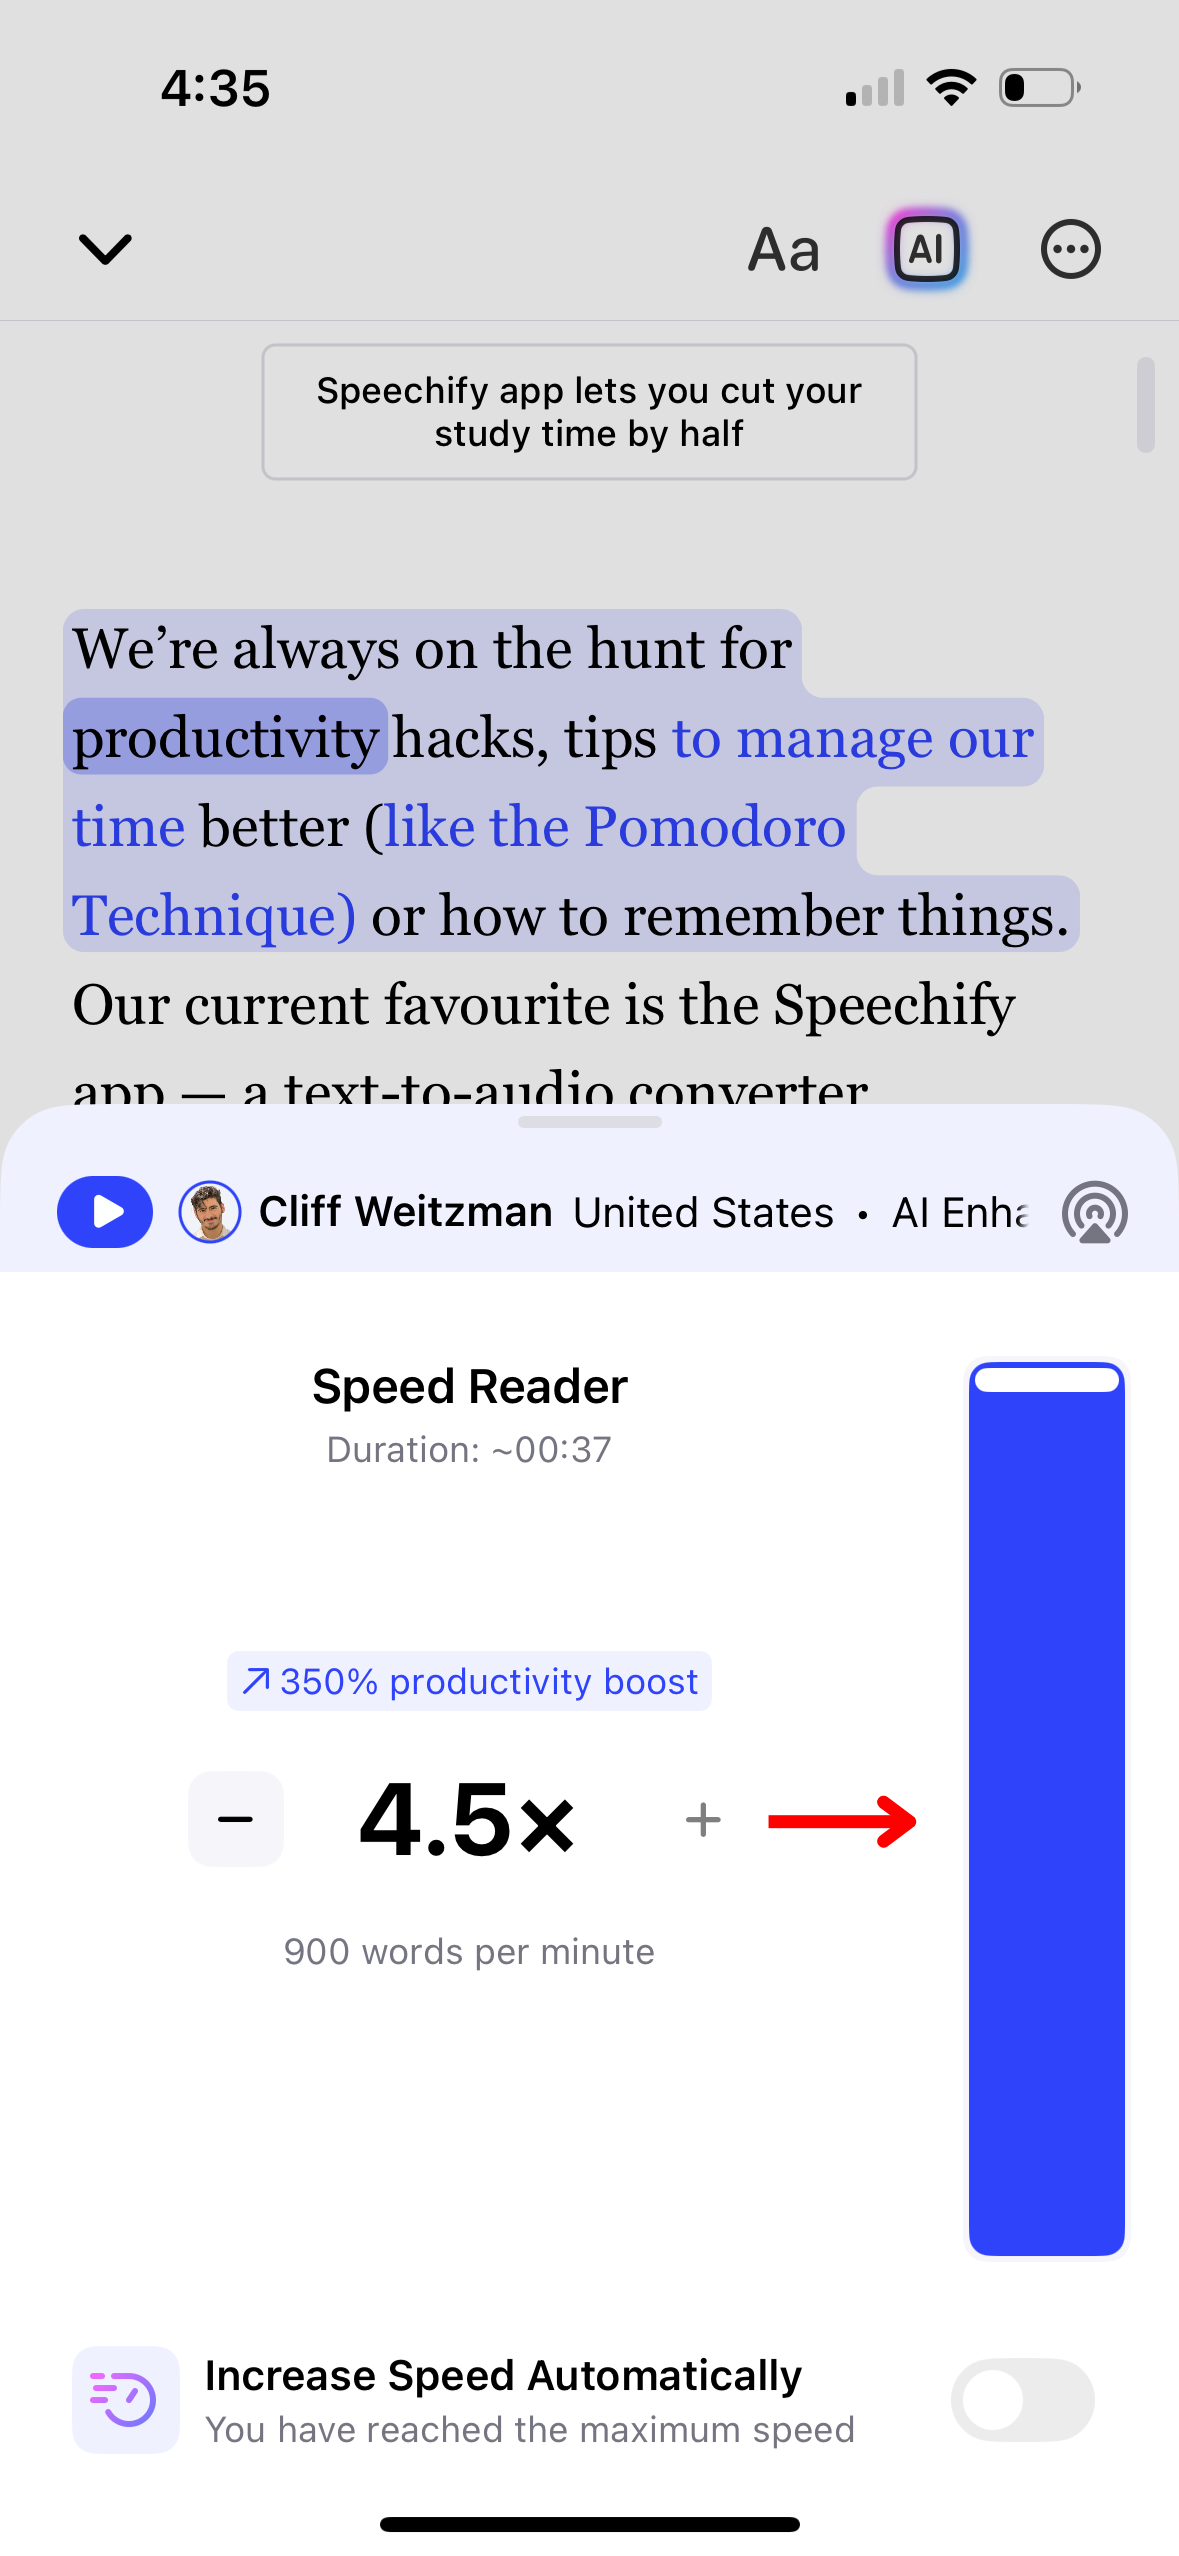
Adjusting the reading speed in Speechify can help match the speech output to your listening comfort and comprehension. Here’s how to modify it:
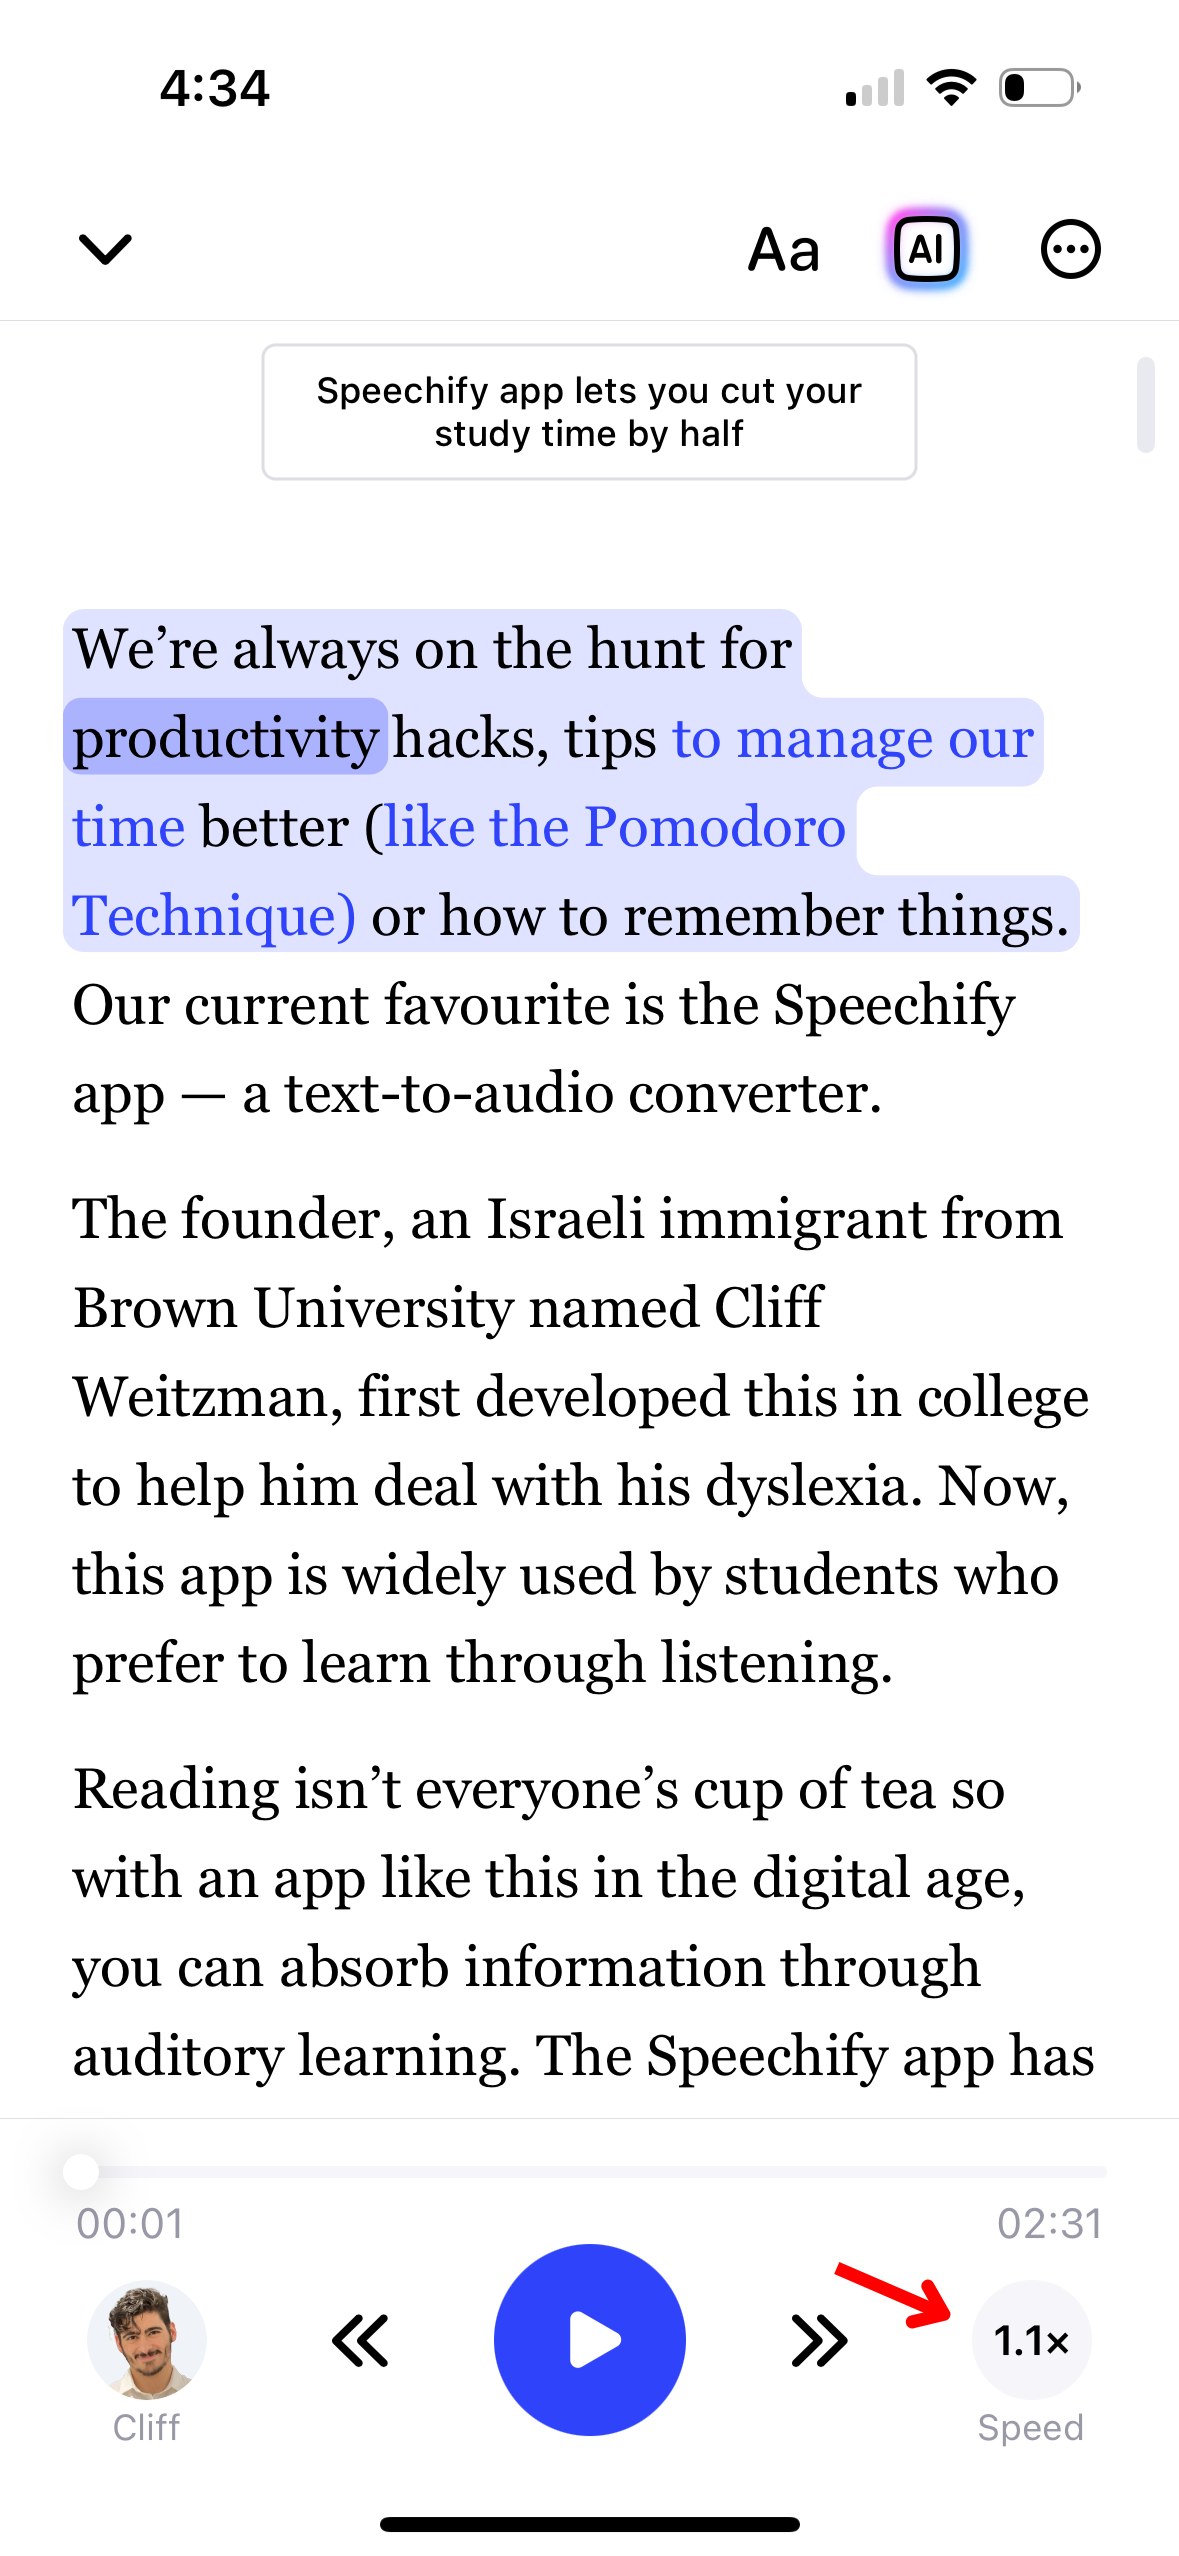
- Click the 1x icon on the bottom right.
- Adjust your reading speed. You can choose any reading speed between .5x (100 words per minute) and 4.5x (900 words per minute).
How to use Offline Listening on the Speechify iOS App
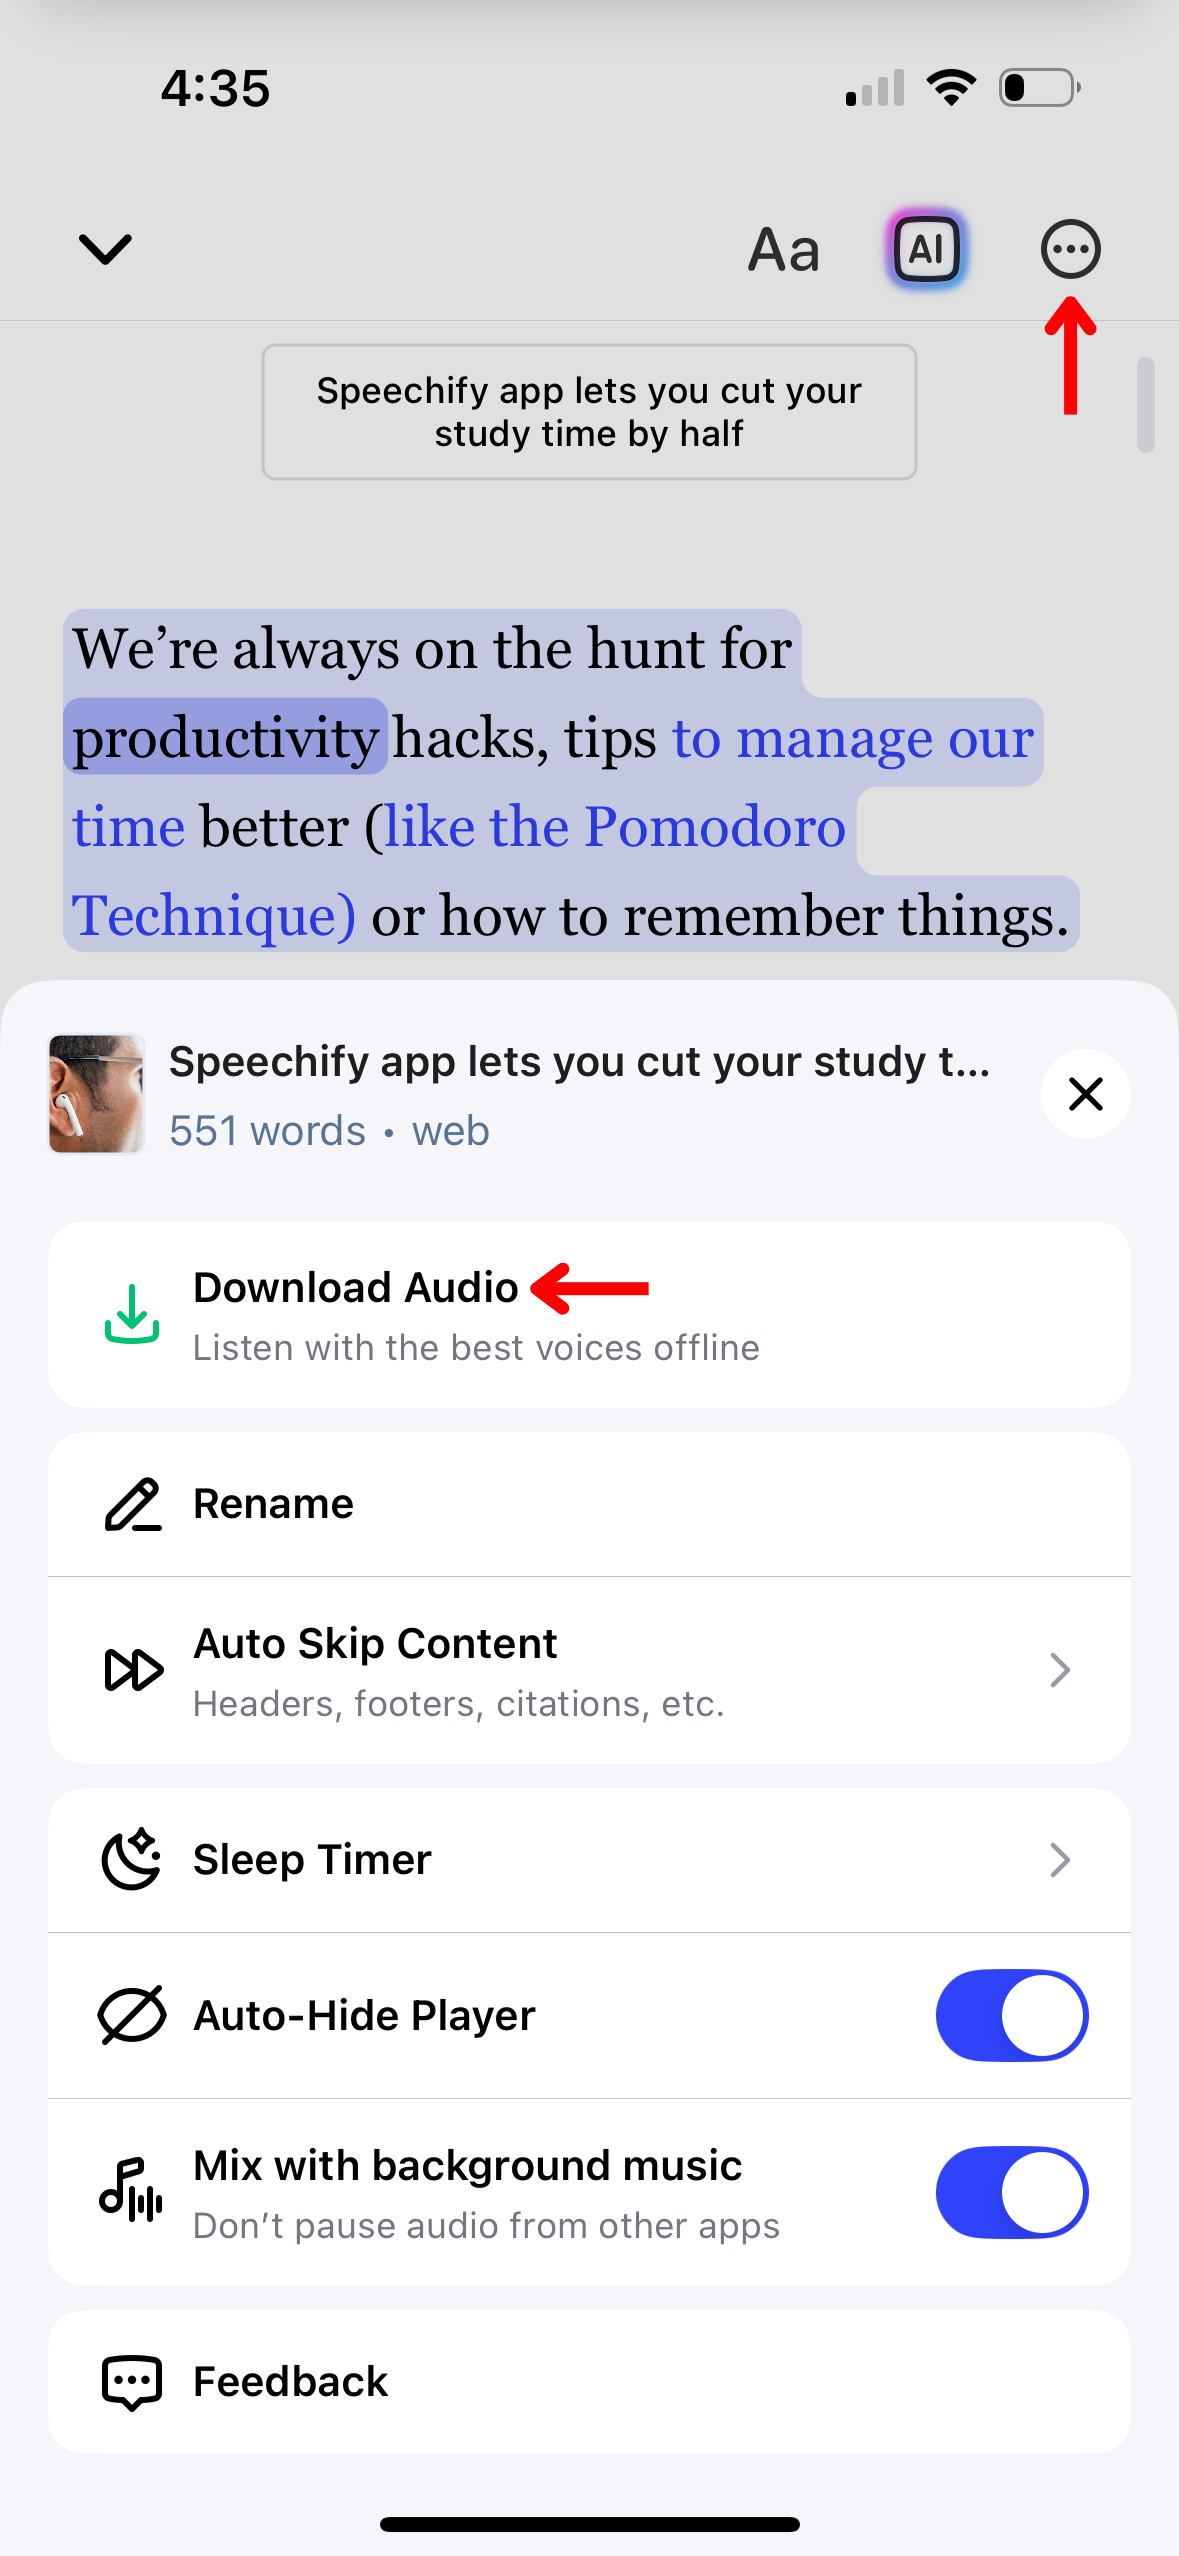
To enjoy Speechify content without needing an internet connection, activate offline listening by following these instructions:
- Tap the 3 dots in the right-hand corner.
- Select a language.
- Choose an AI voice.
- Press “Continue.”
- Download in MP3 for offline listening.
How to use AI Chat on the Speechify iOS App
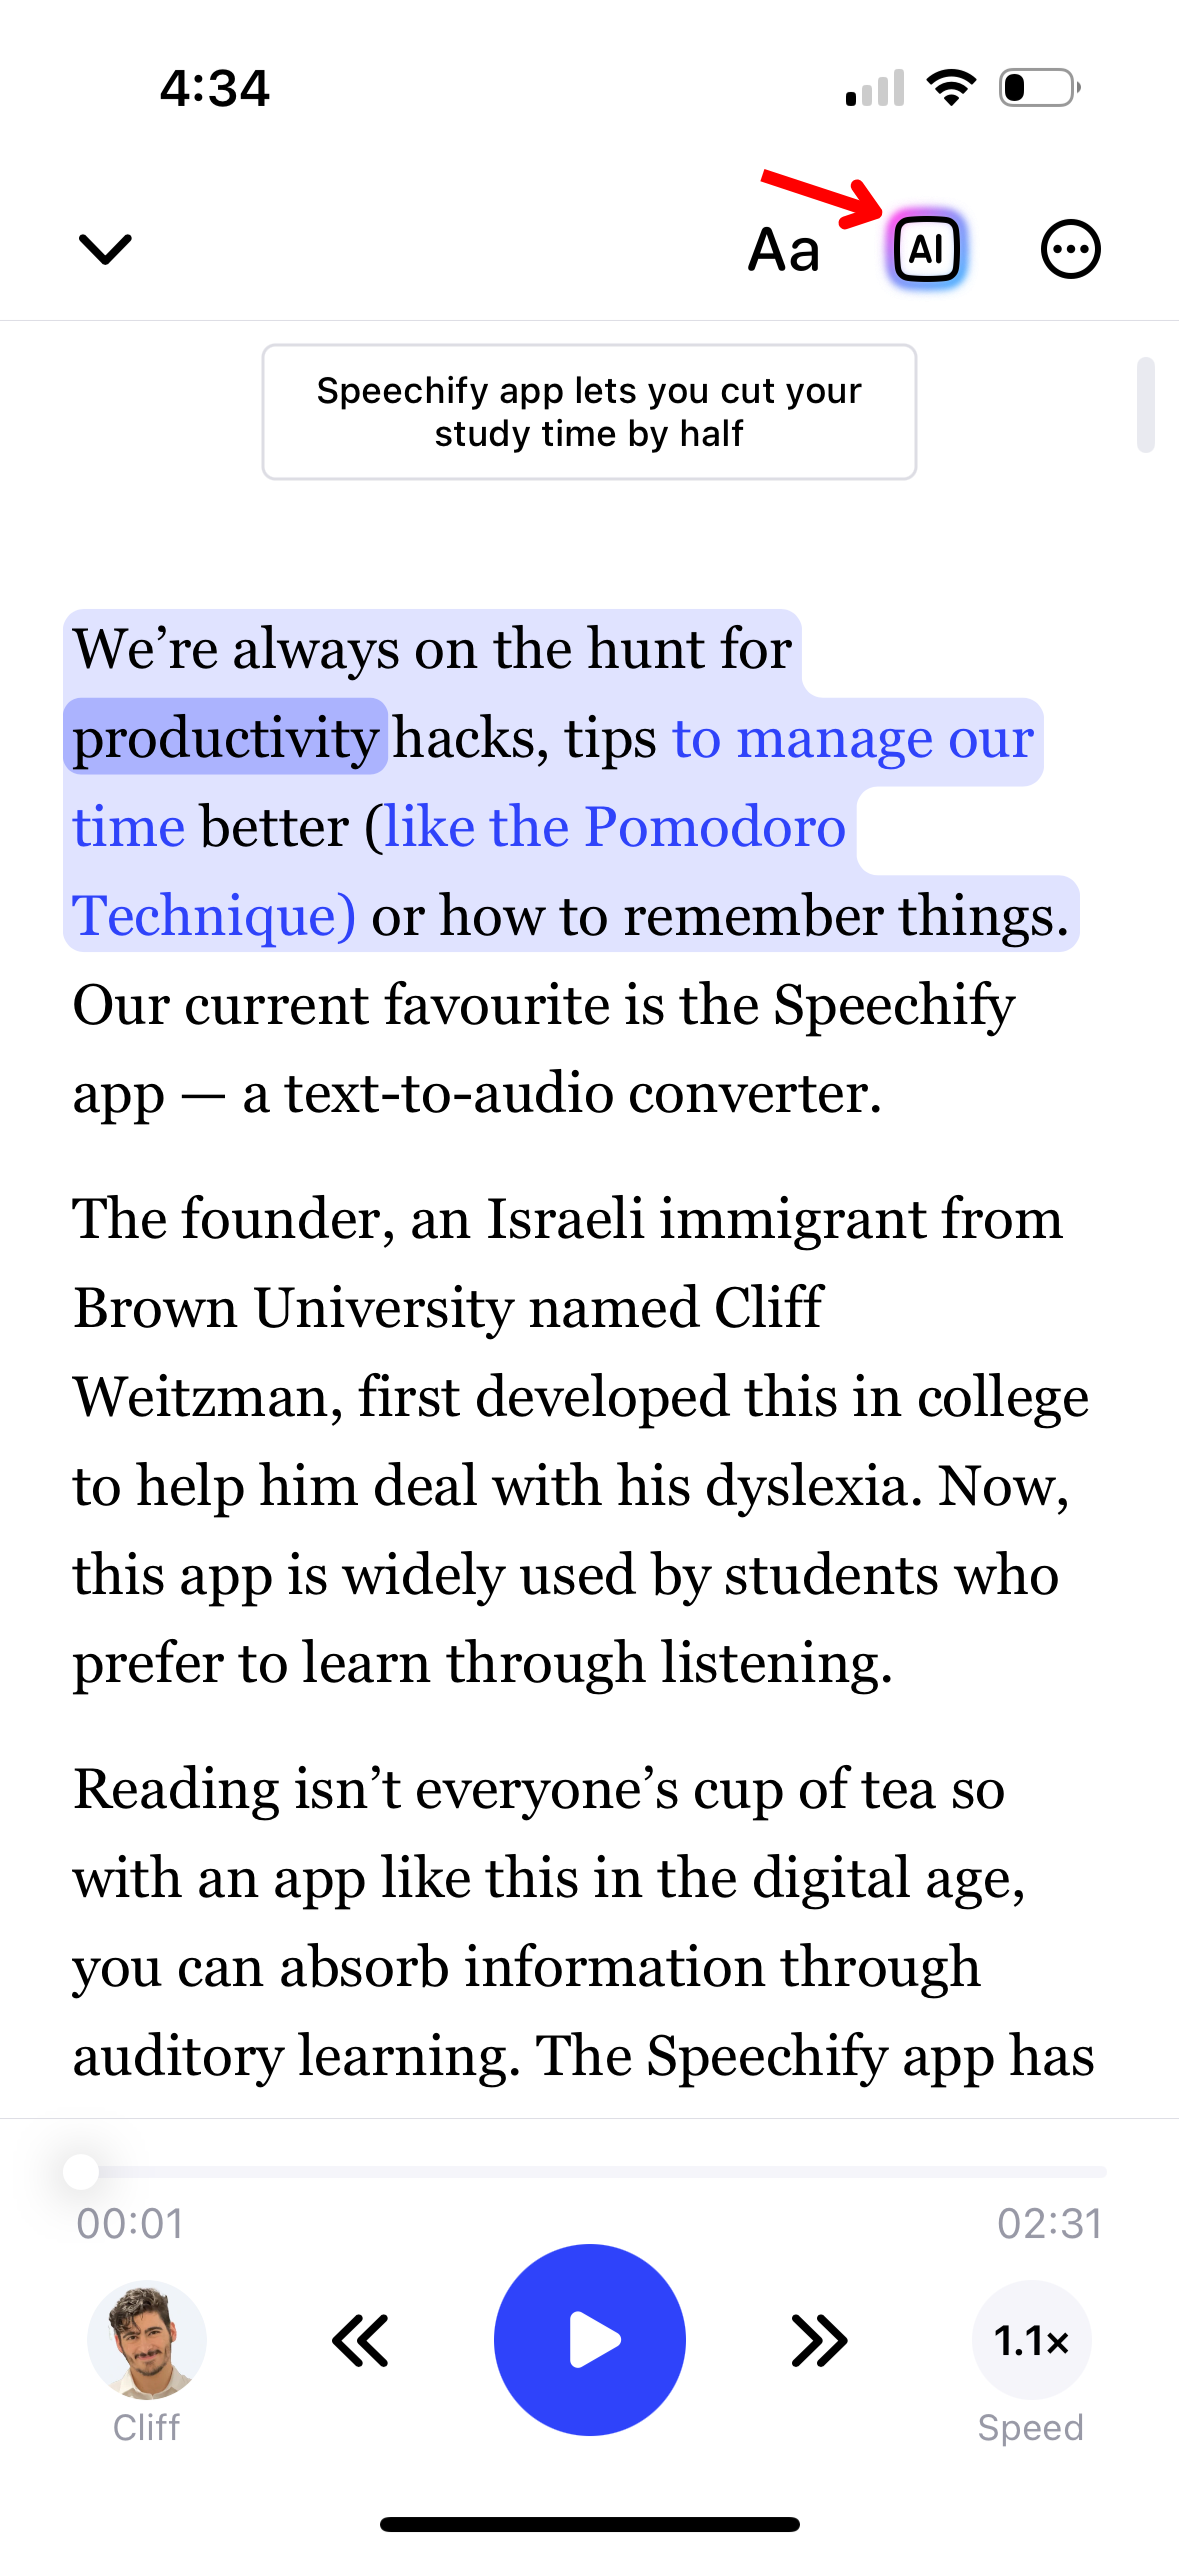
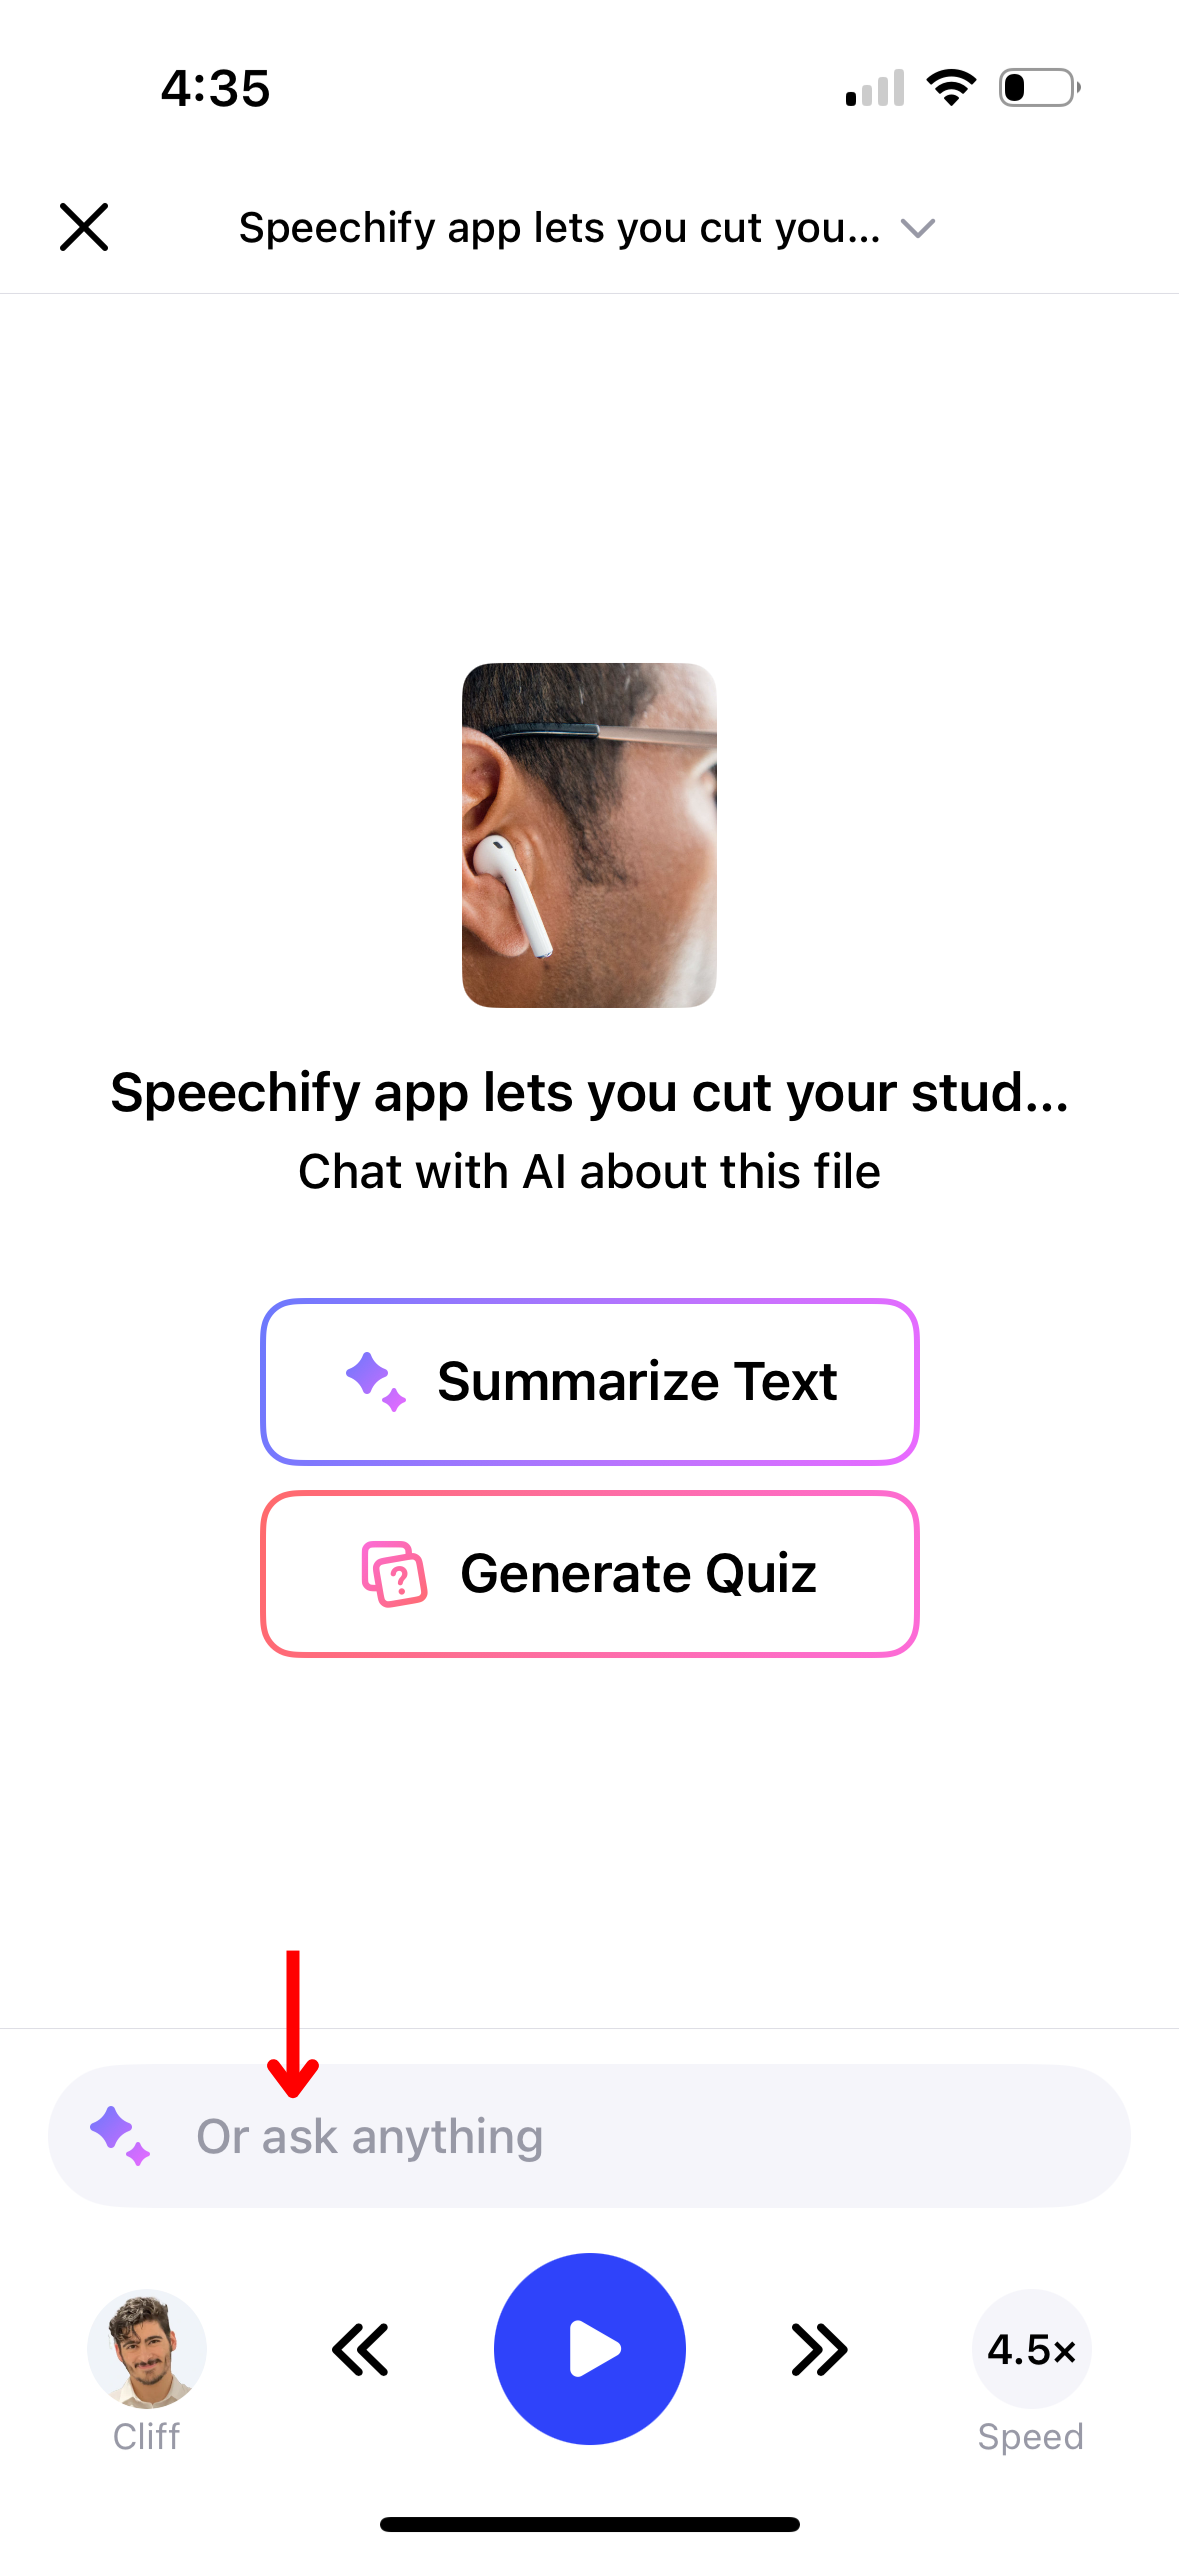
Engage interactively with your text using the AI Chat feature in Speechify. To begin, follow these steps:
- Click the AI icon on the right top toolbar.
- Type in a question in the chat bar.
- Press enter.
- Enjoy your instant answer or ask another question.
How to use AI Summaries on the Speechify iOS App
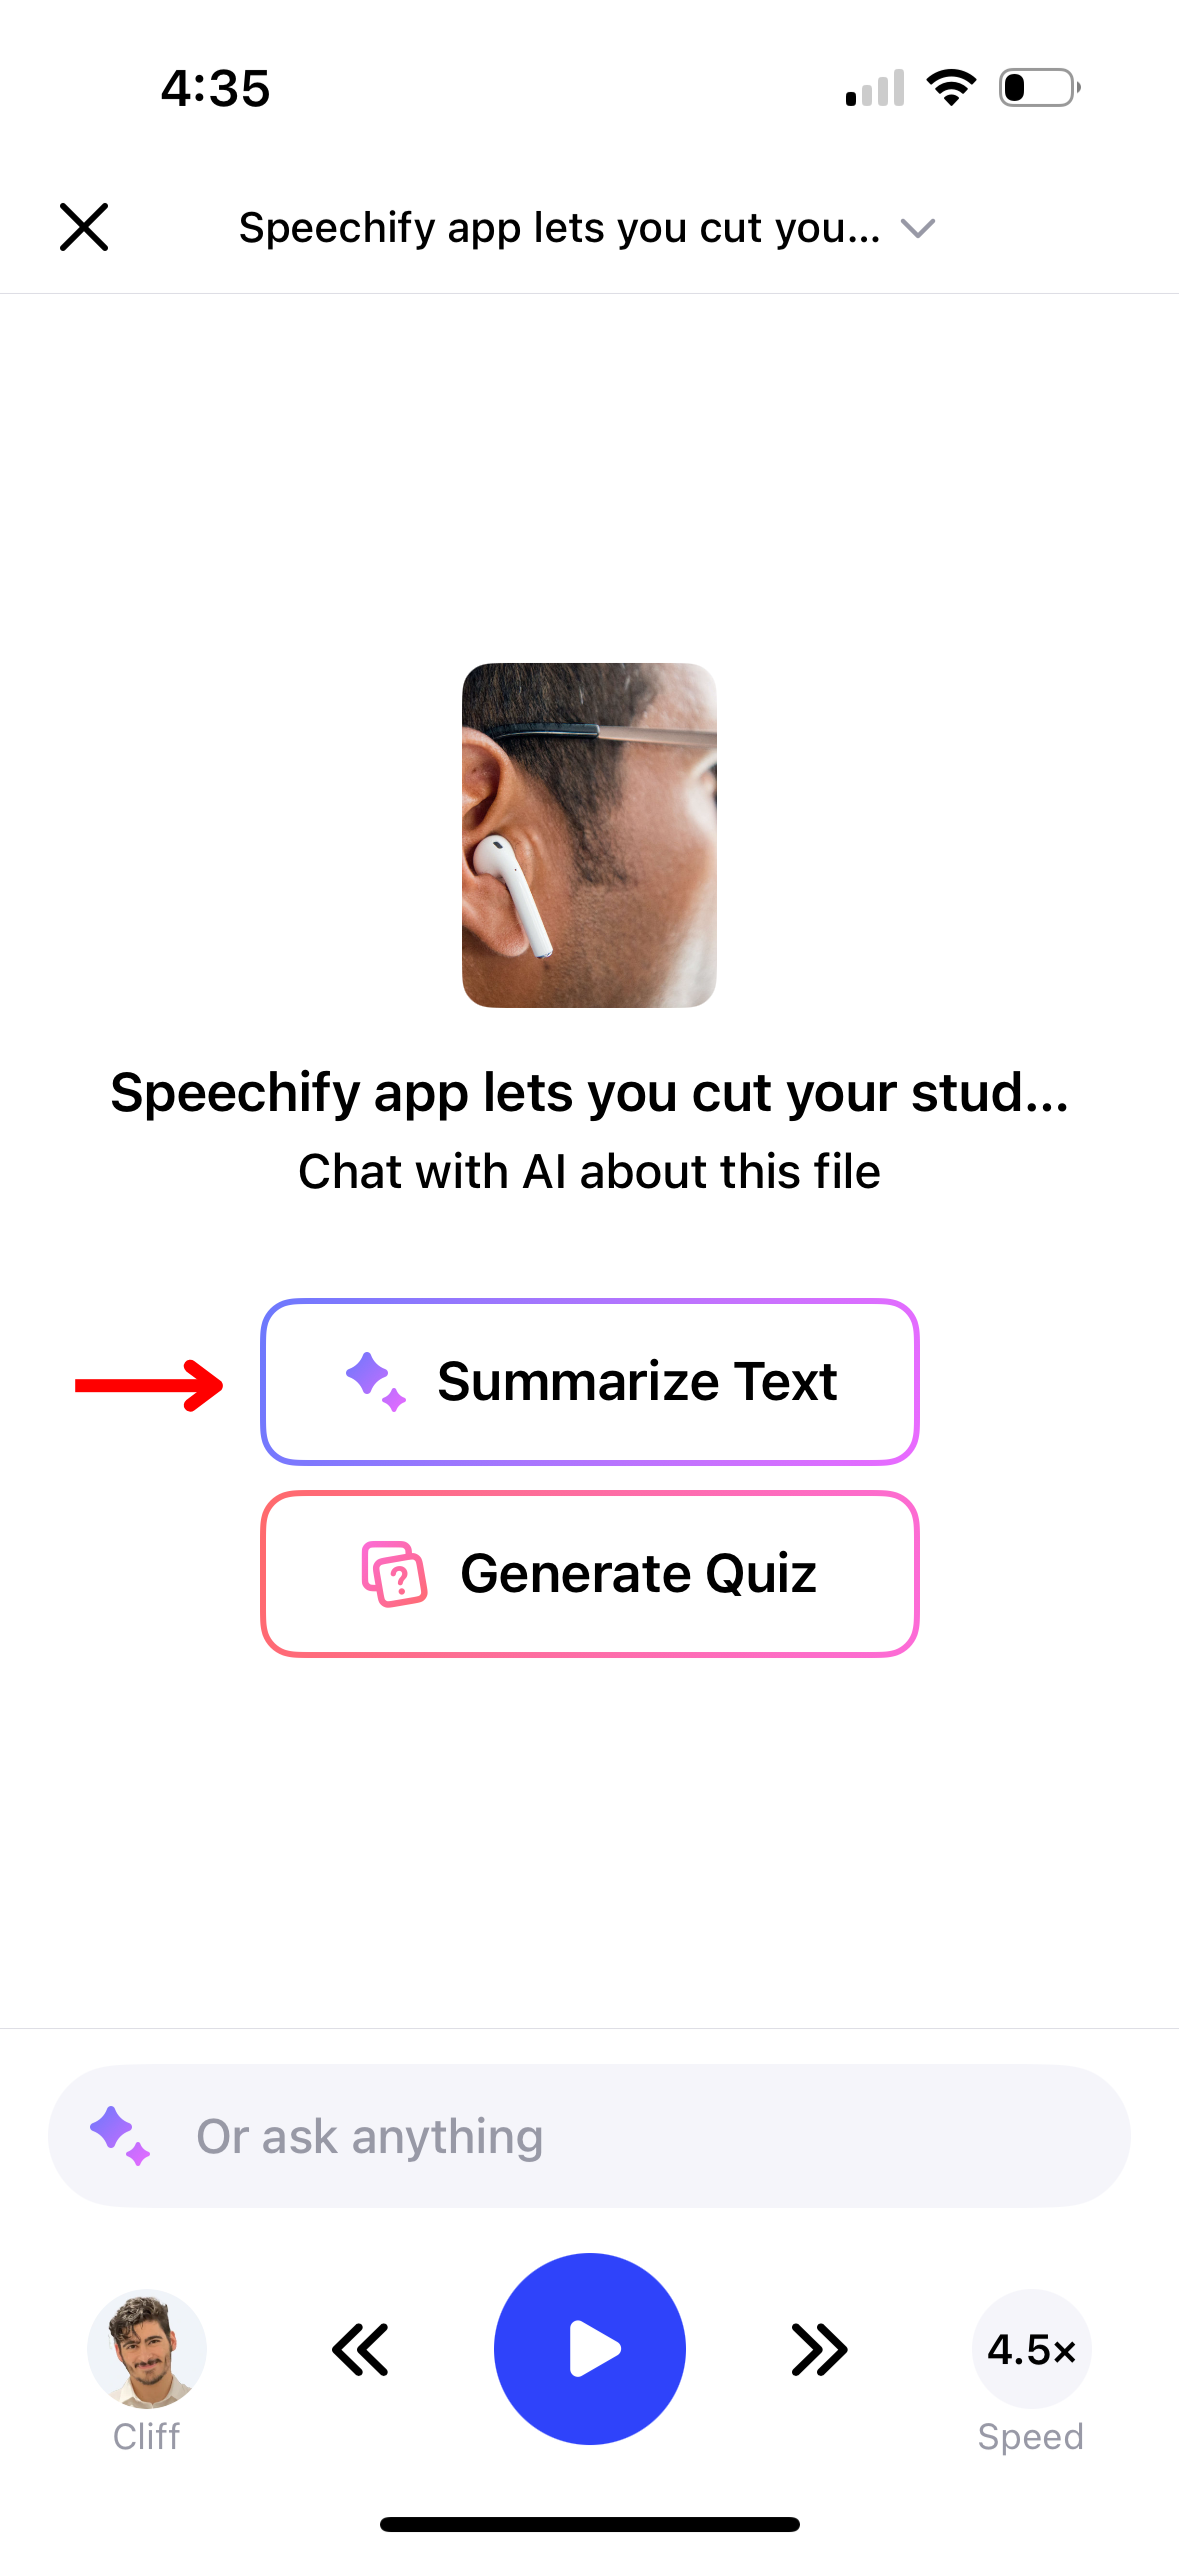
AI summaries in Speechify can help you grasp the main points of lengthy documents quickly. Here’s how to activate this feature:
- Select the AI icon on the right top toolbar.
- Press “Summarize Text.”
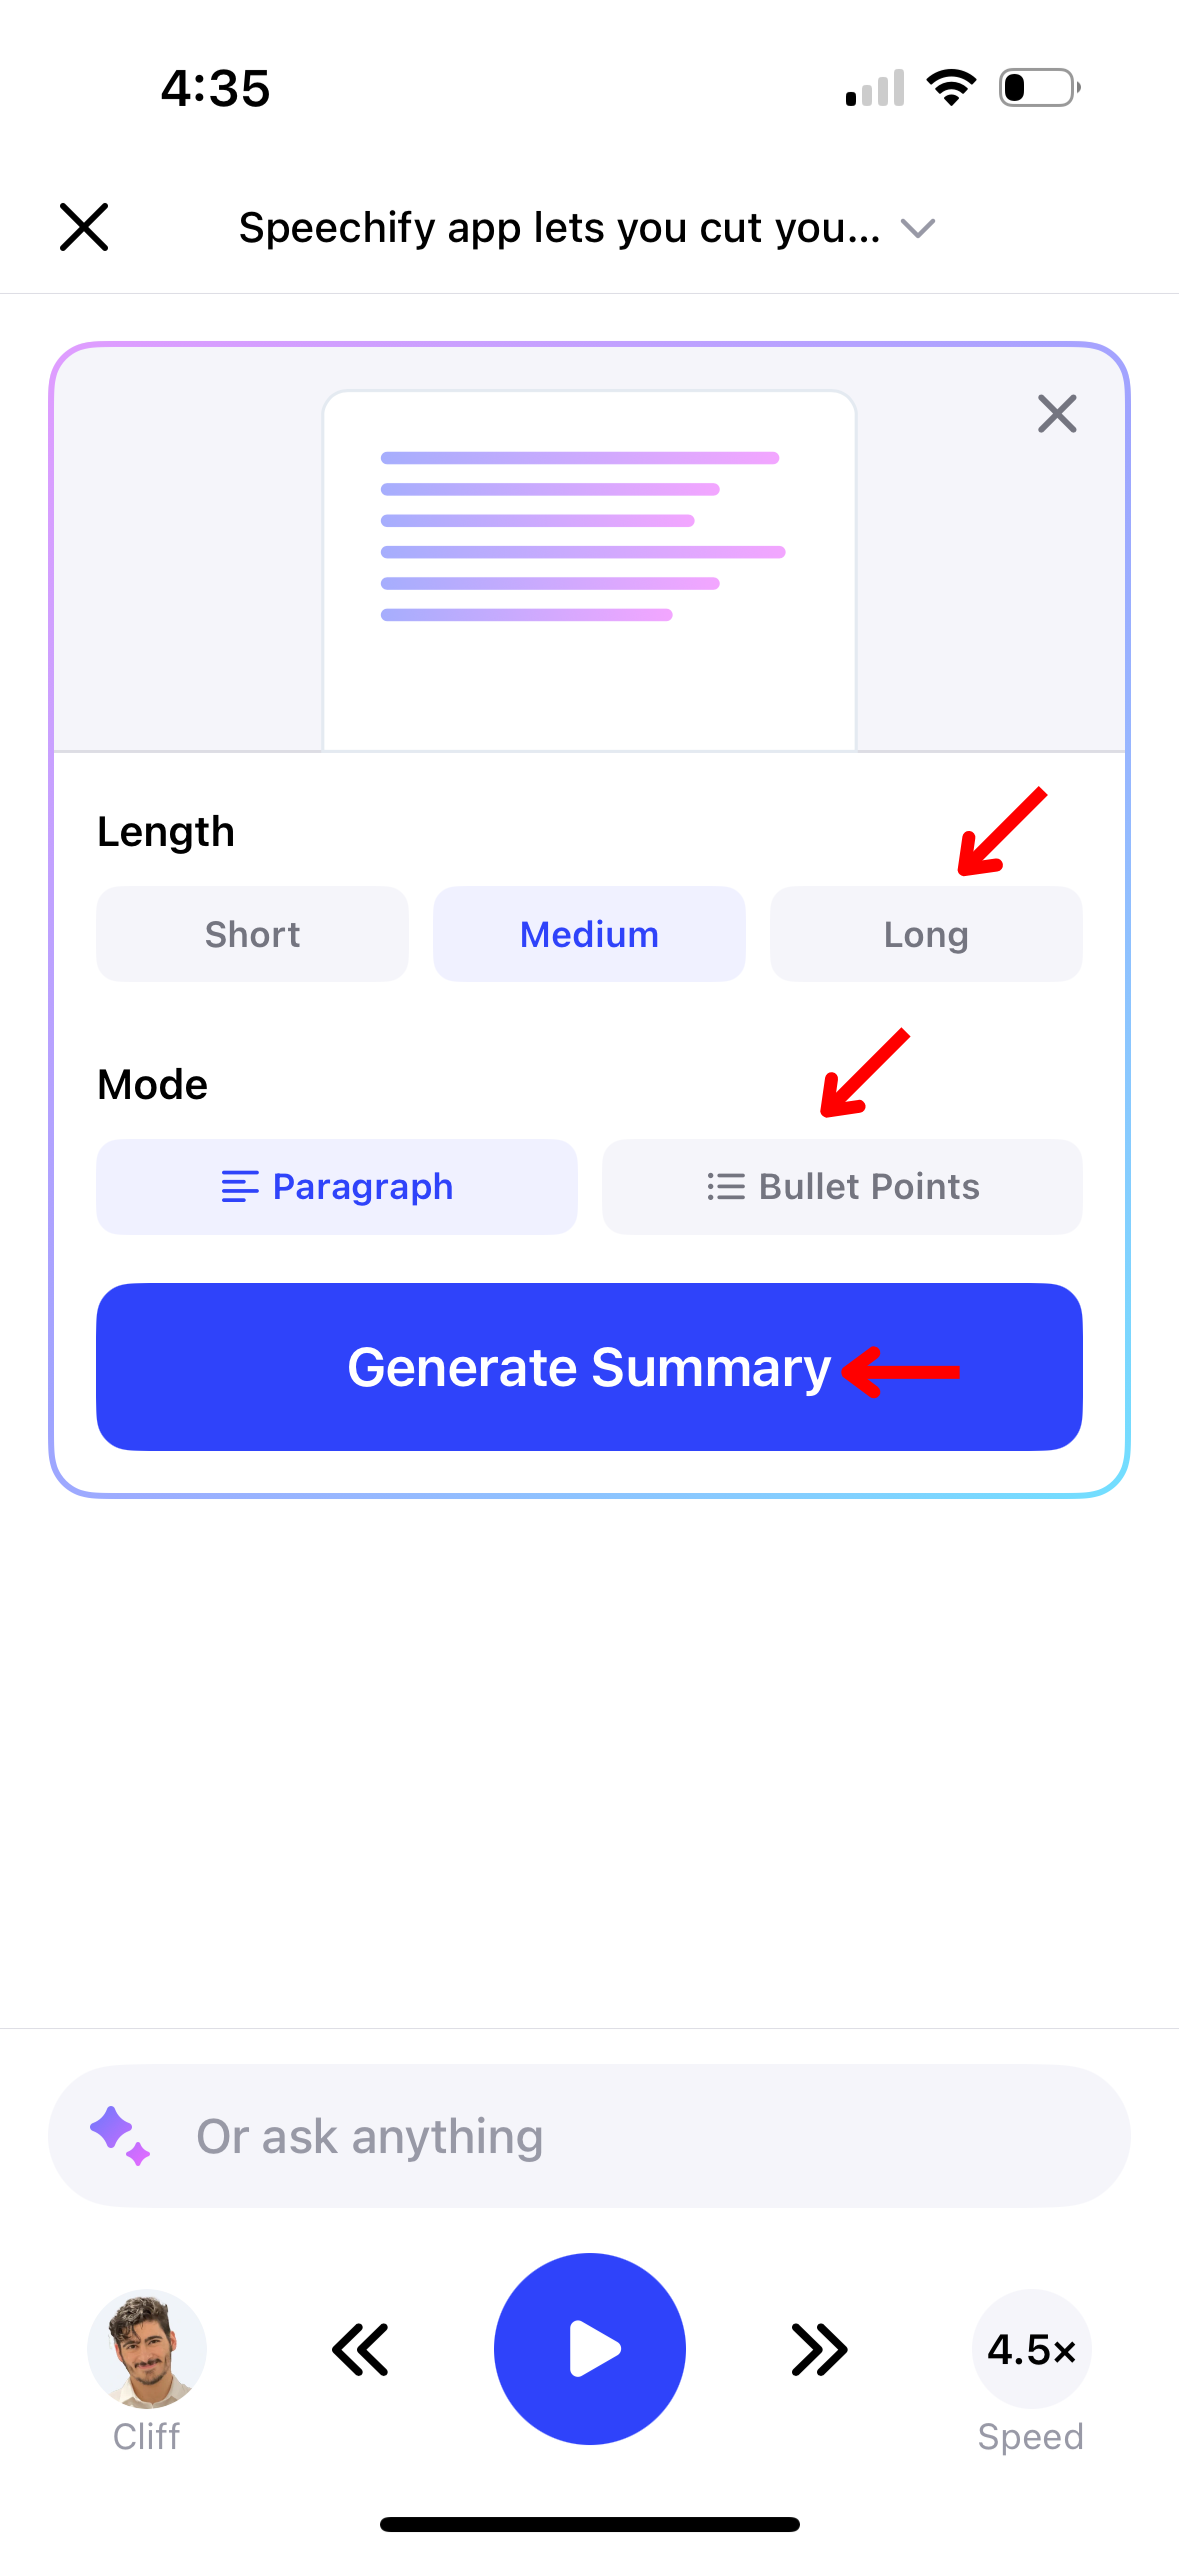
- Choose the length of the summary from paragraph or bullet points.
- Select which pages you would like summarized.
- Generate the summary.
How to use AI Quiz on the Speechify iOS App
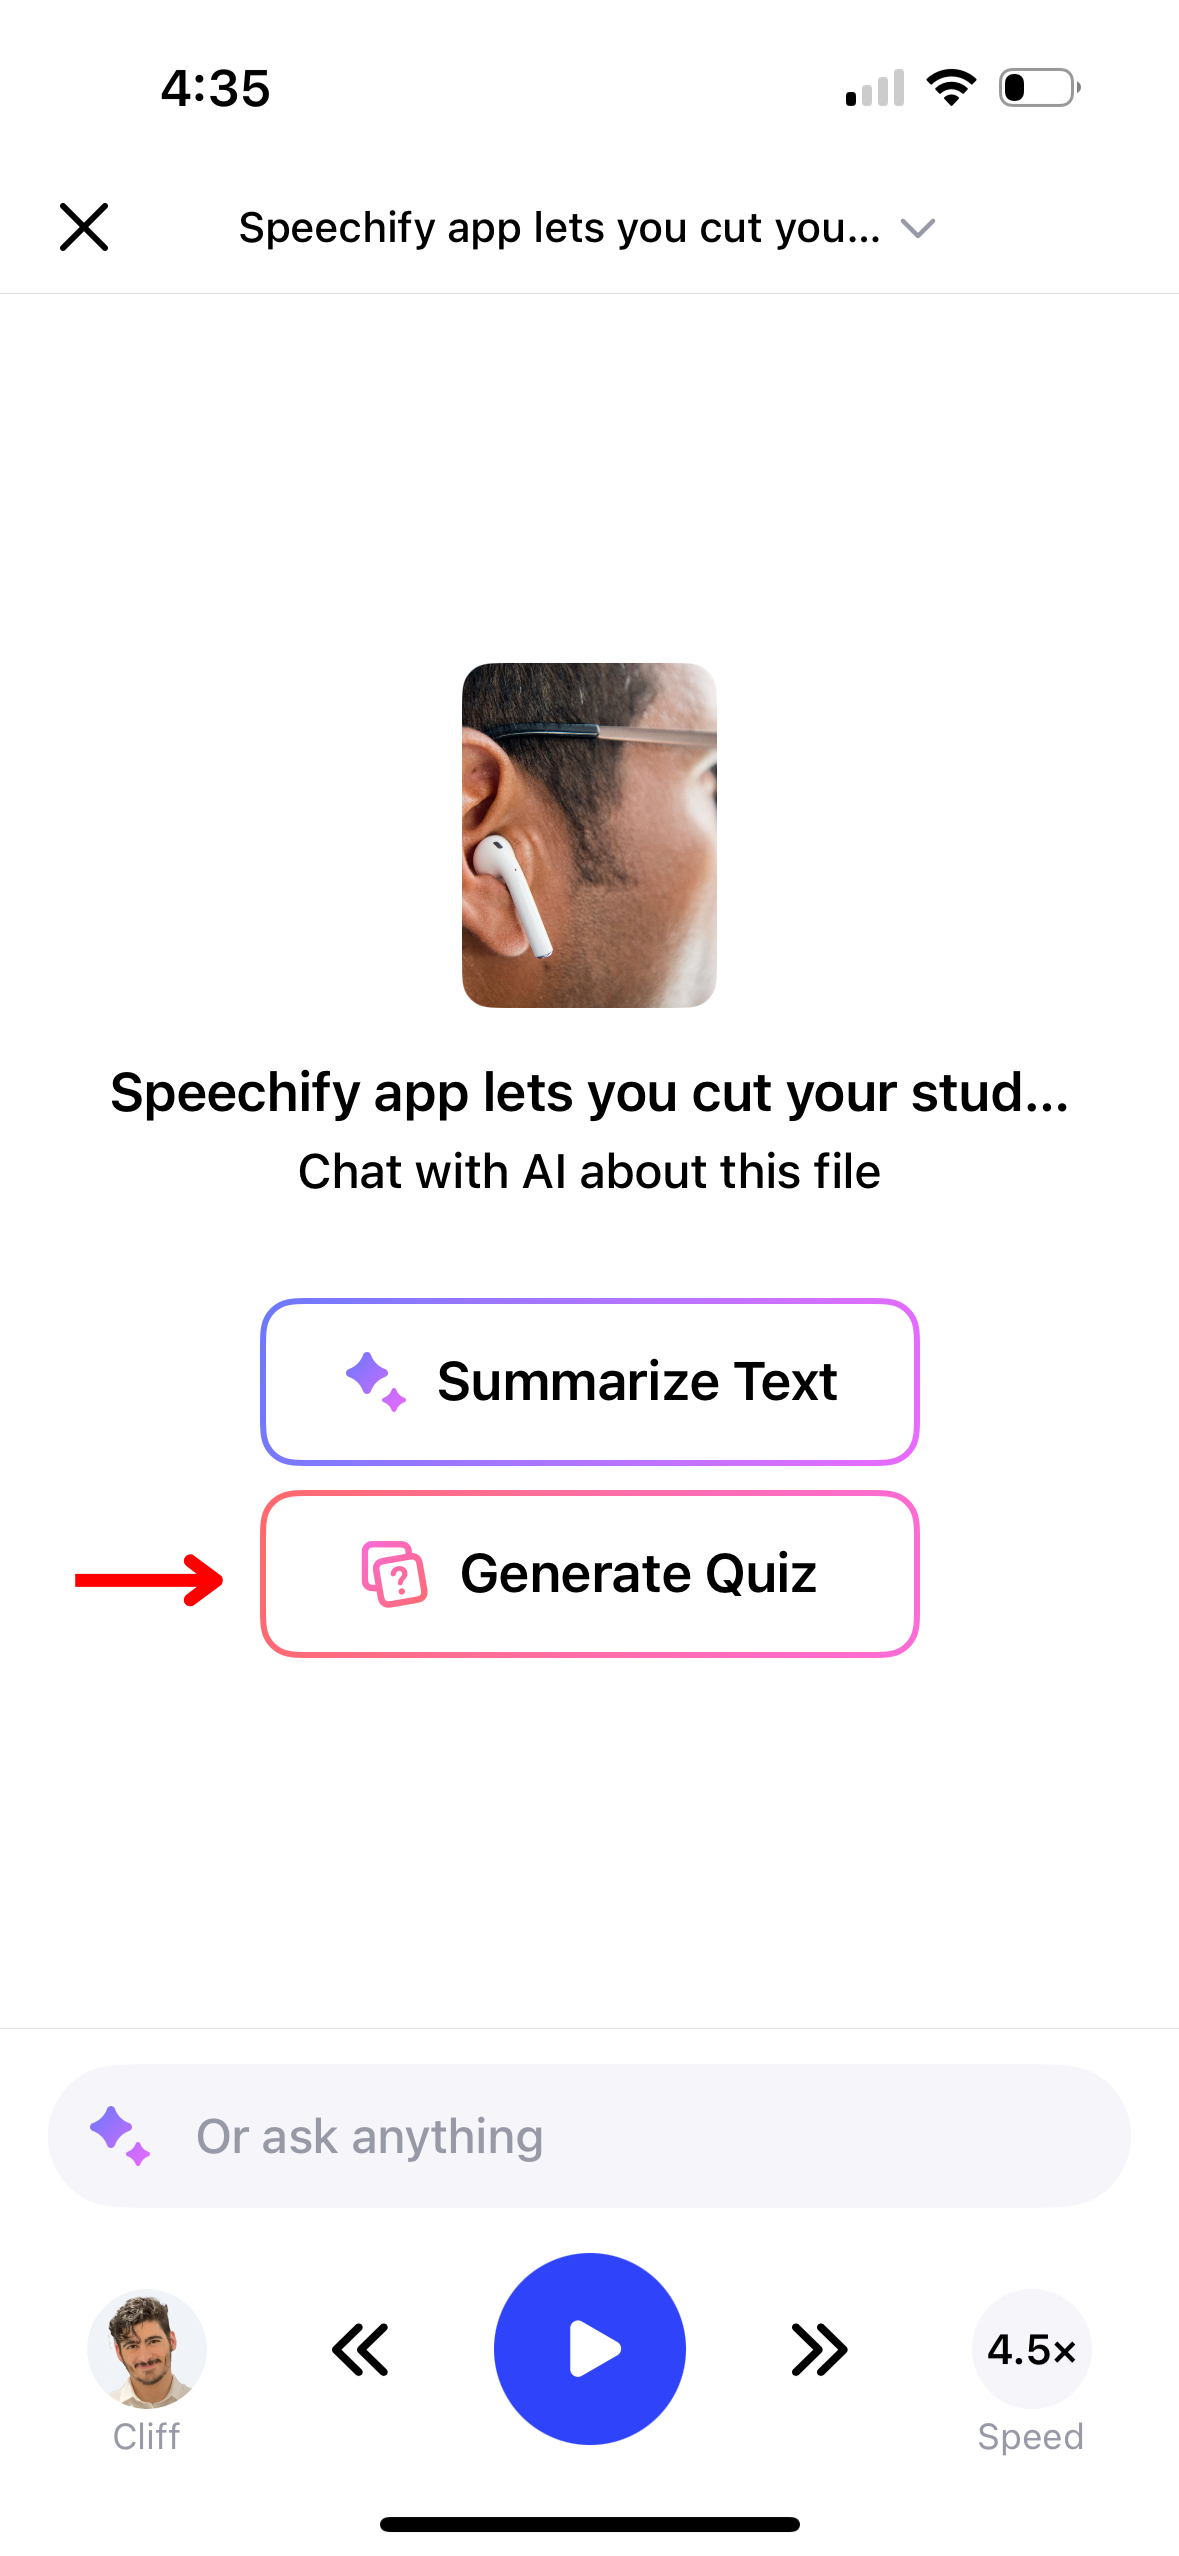
Enhance your learning and retention by creating quizzes with AI in Speechify. To make a quiz, follow these steps:
- Click the AI icon on the right top toolbar.
- Press “Generate a Quiz.”
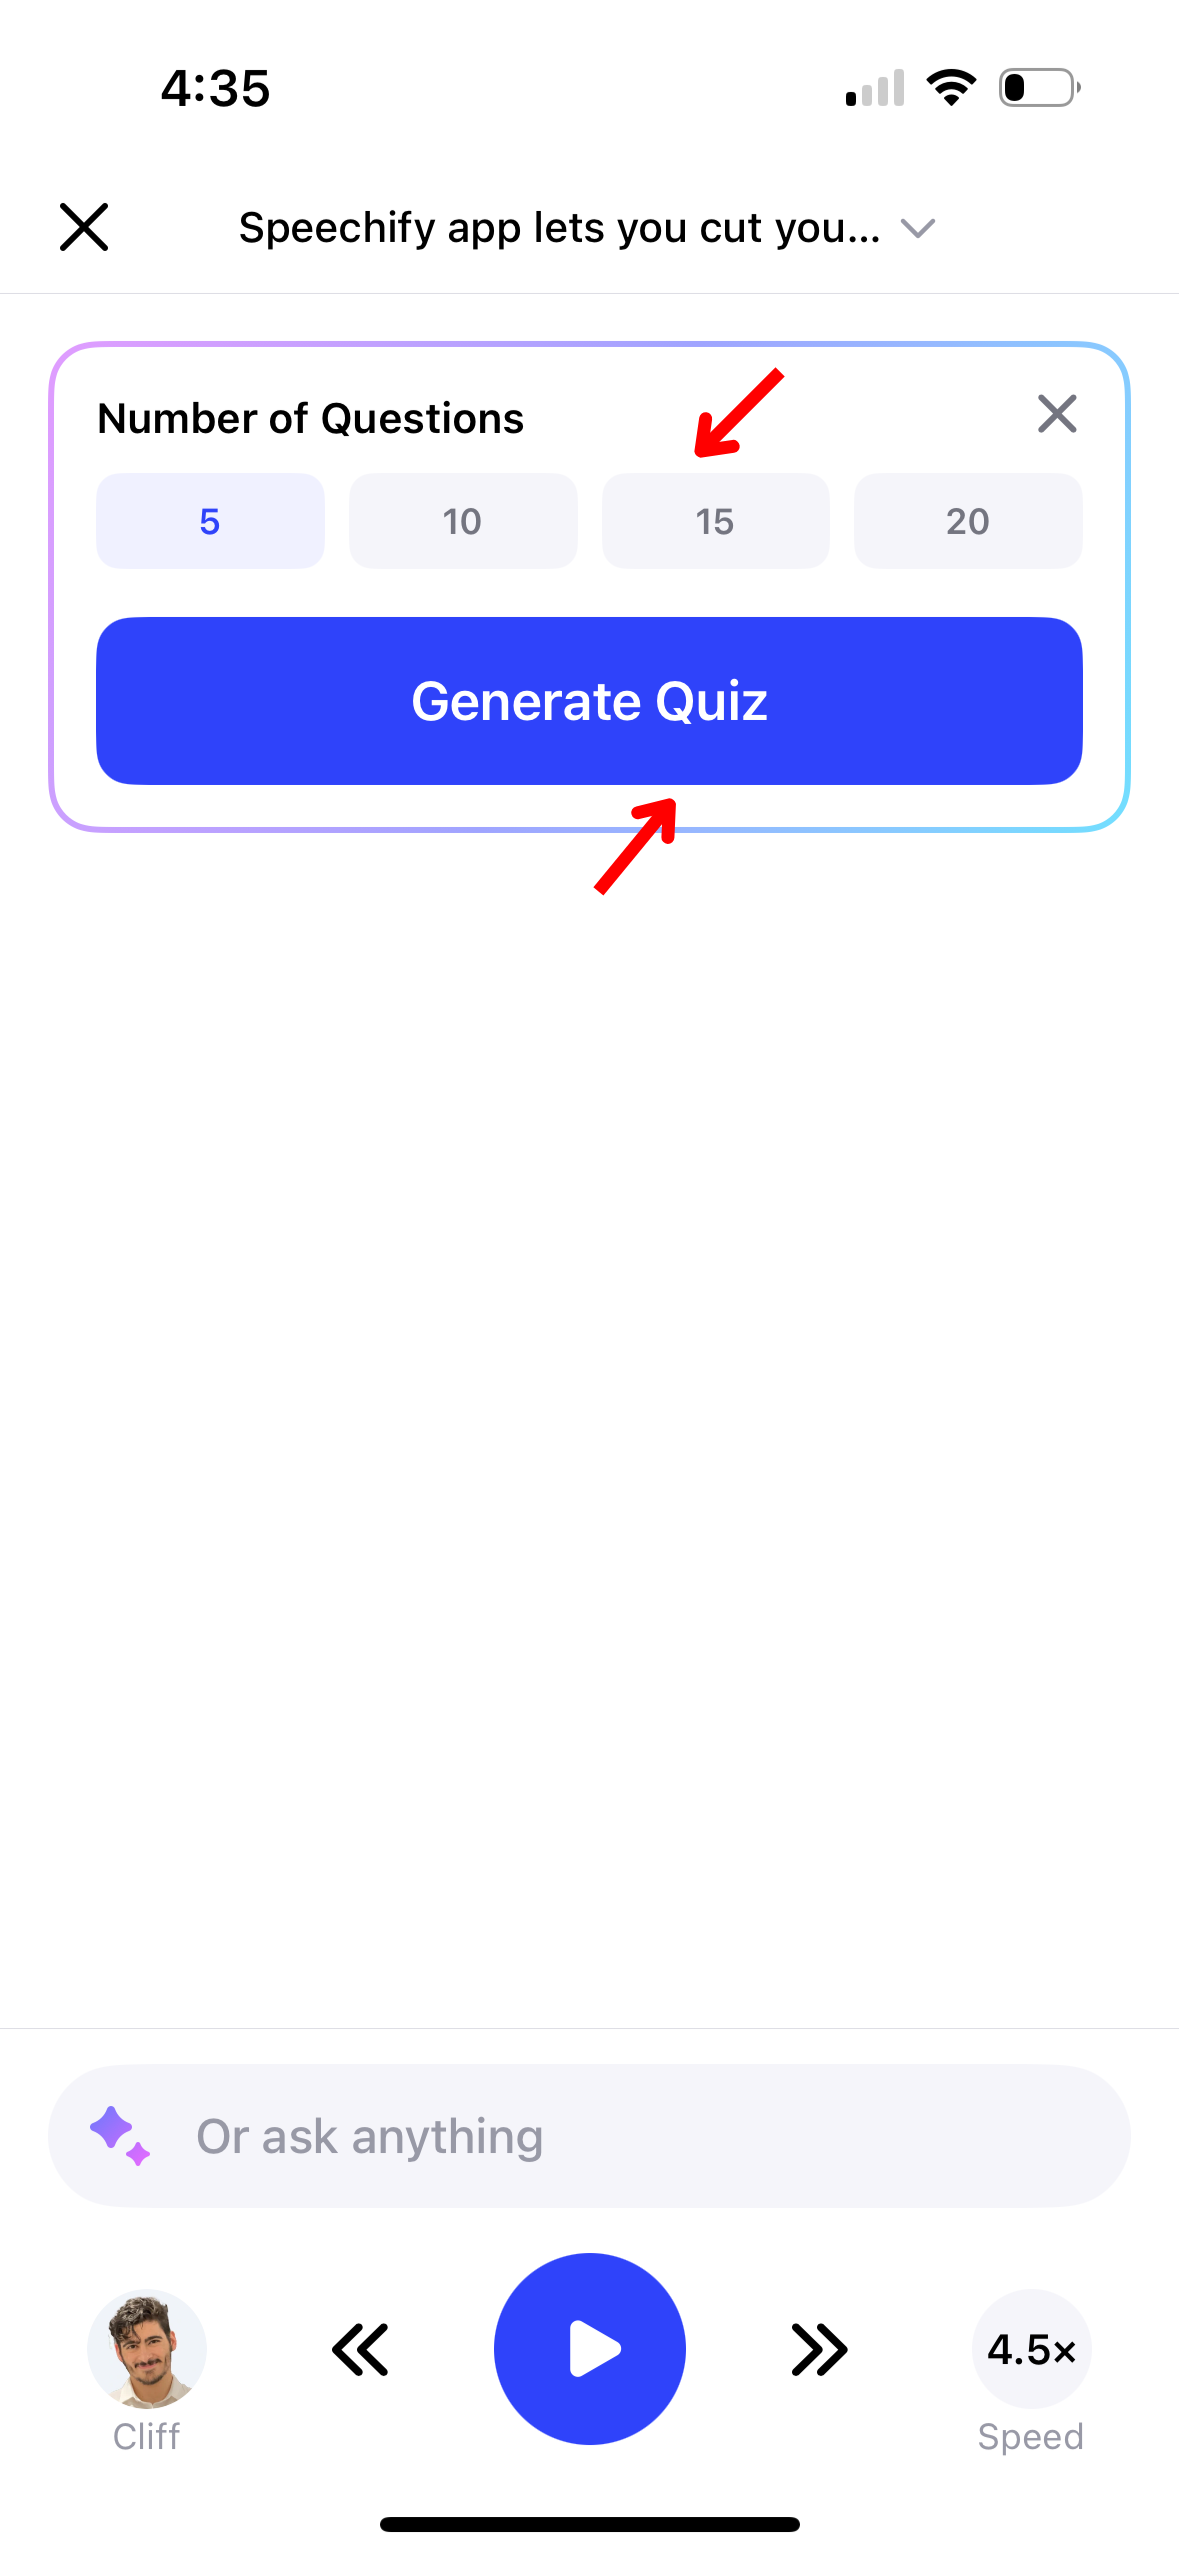
- Select whether you would like the quiz to be based on all pages in the document or select pages of the document.
- Choose whether you would like a 5, 10, 15, or 20 question quiz.
- Select which pages you would like summarized.
- Generate the quiz.
How to Enable Dark Mode on the Speechify iOS App
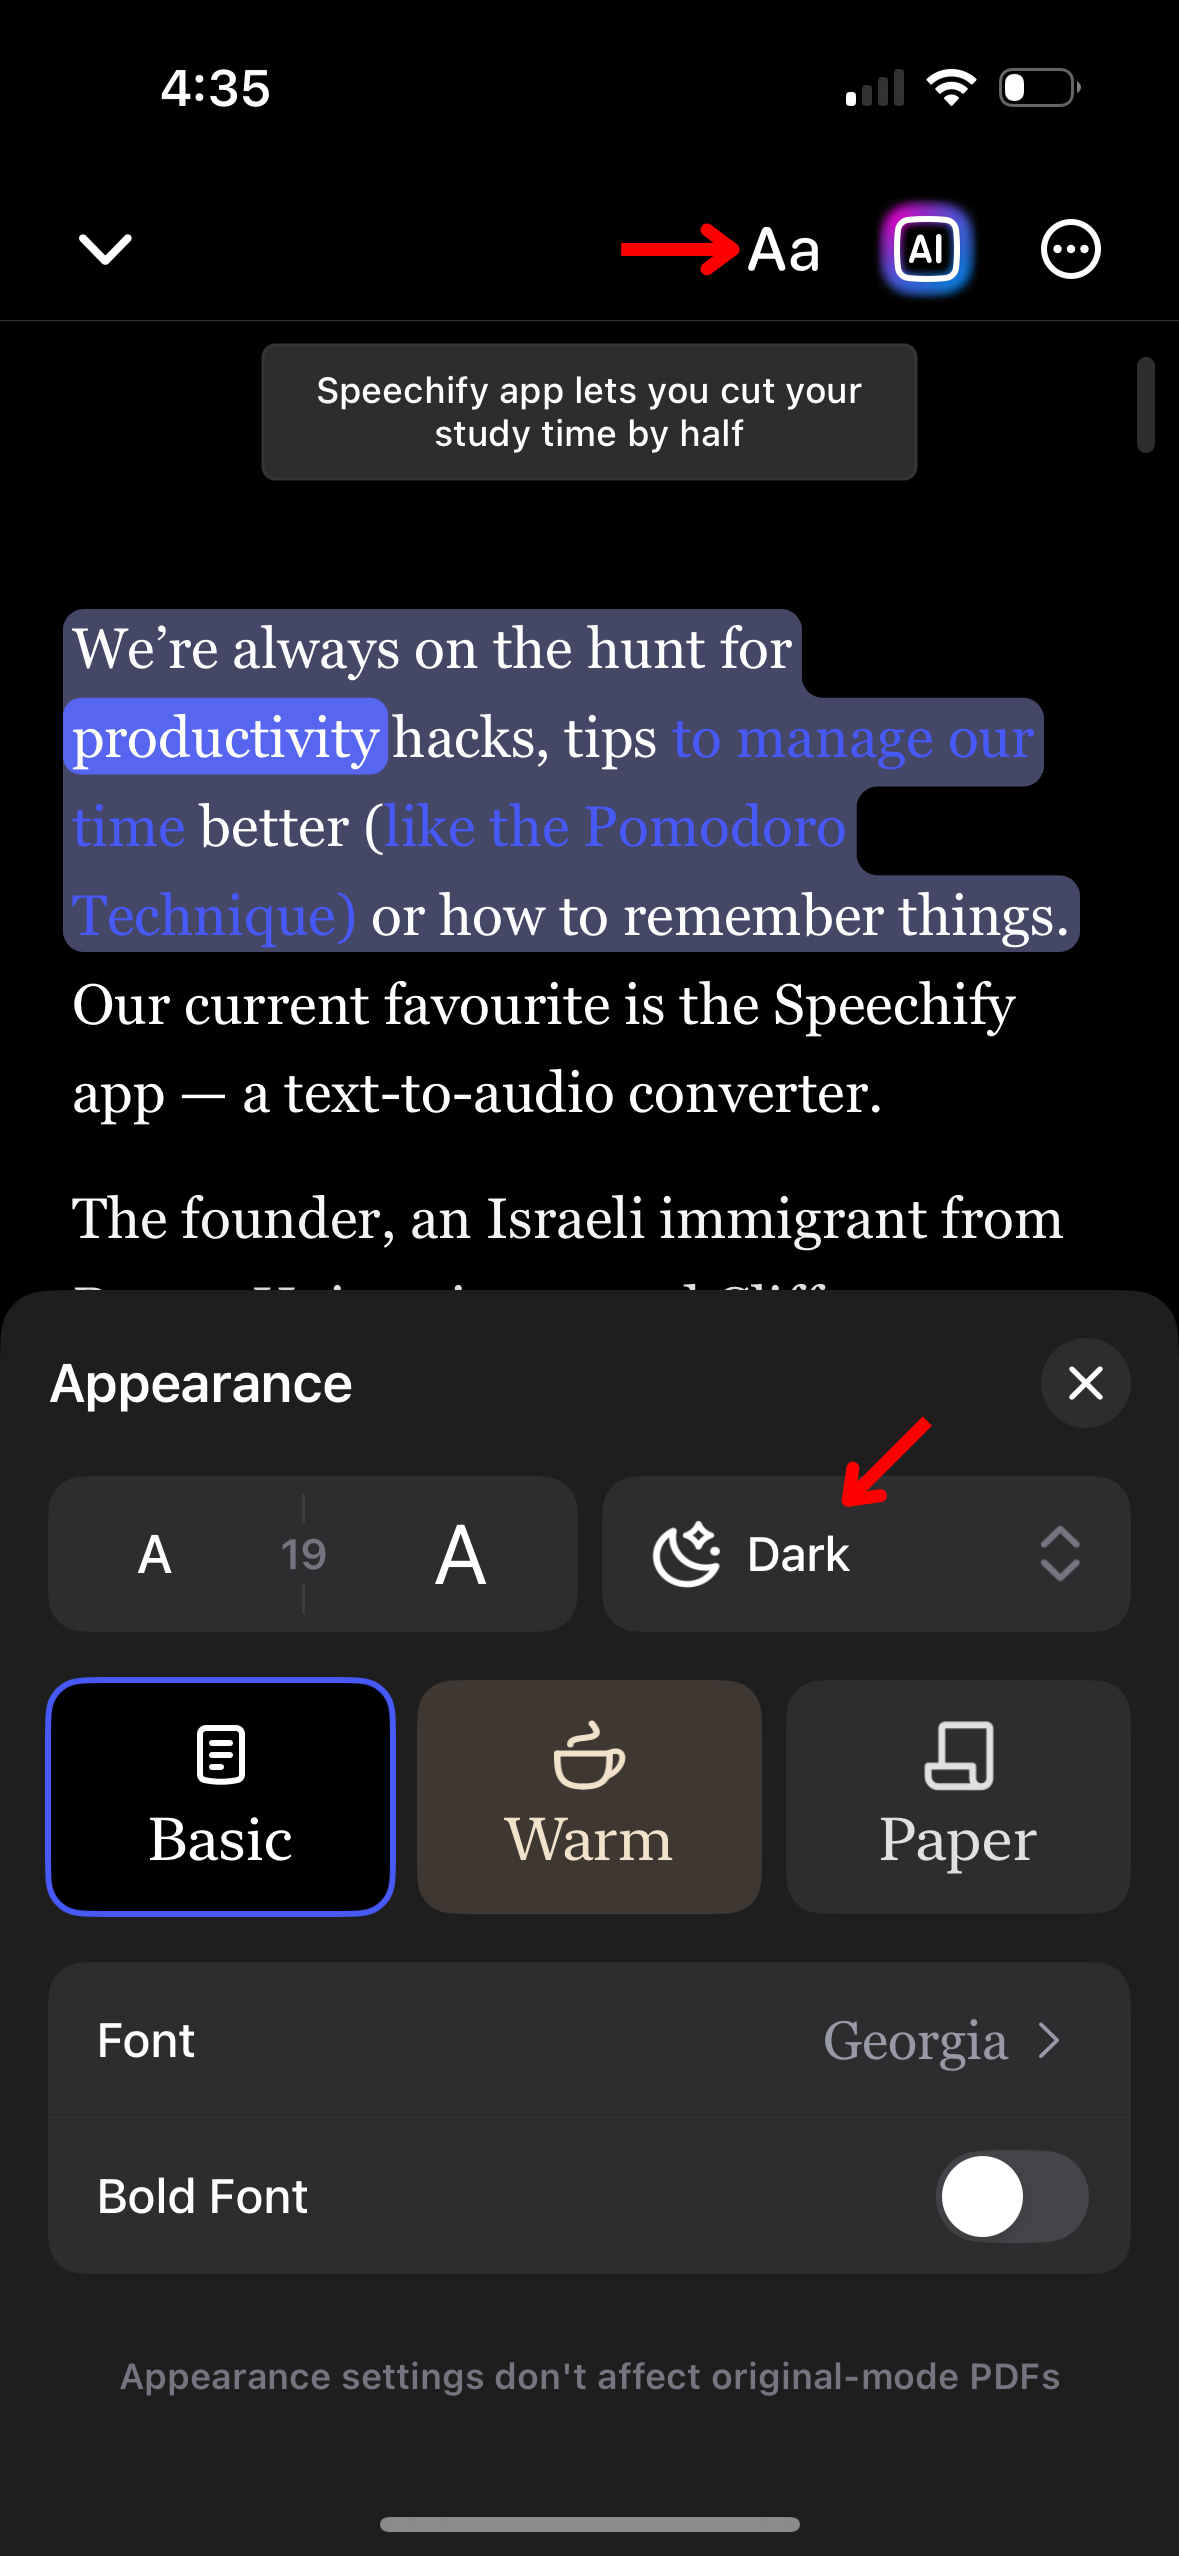
Reduce eye strain in low-light conditions by switching to dark mode in Speechify. Here’s how to enable it:
- Tap Aa in the toolbar in the top right.
- Click Dark.
How to Change the Appearance of the Speechify iOS App
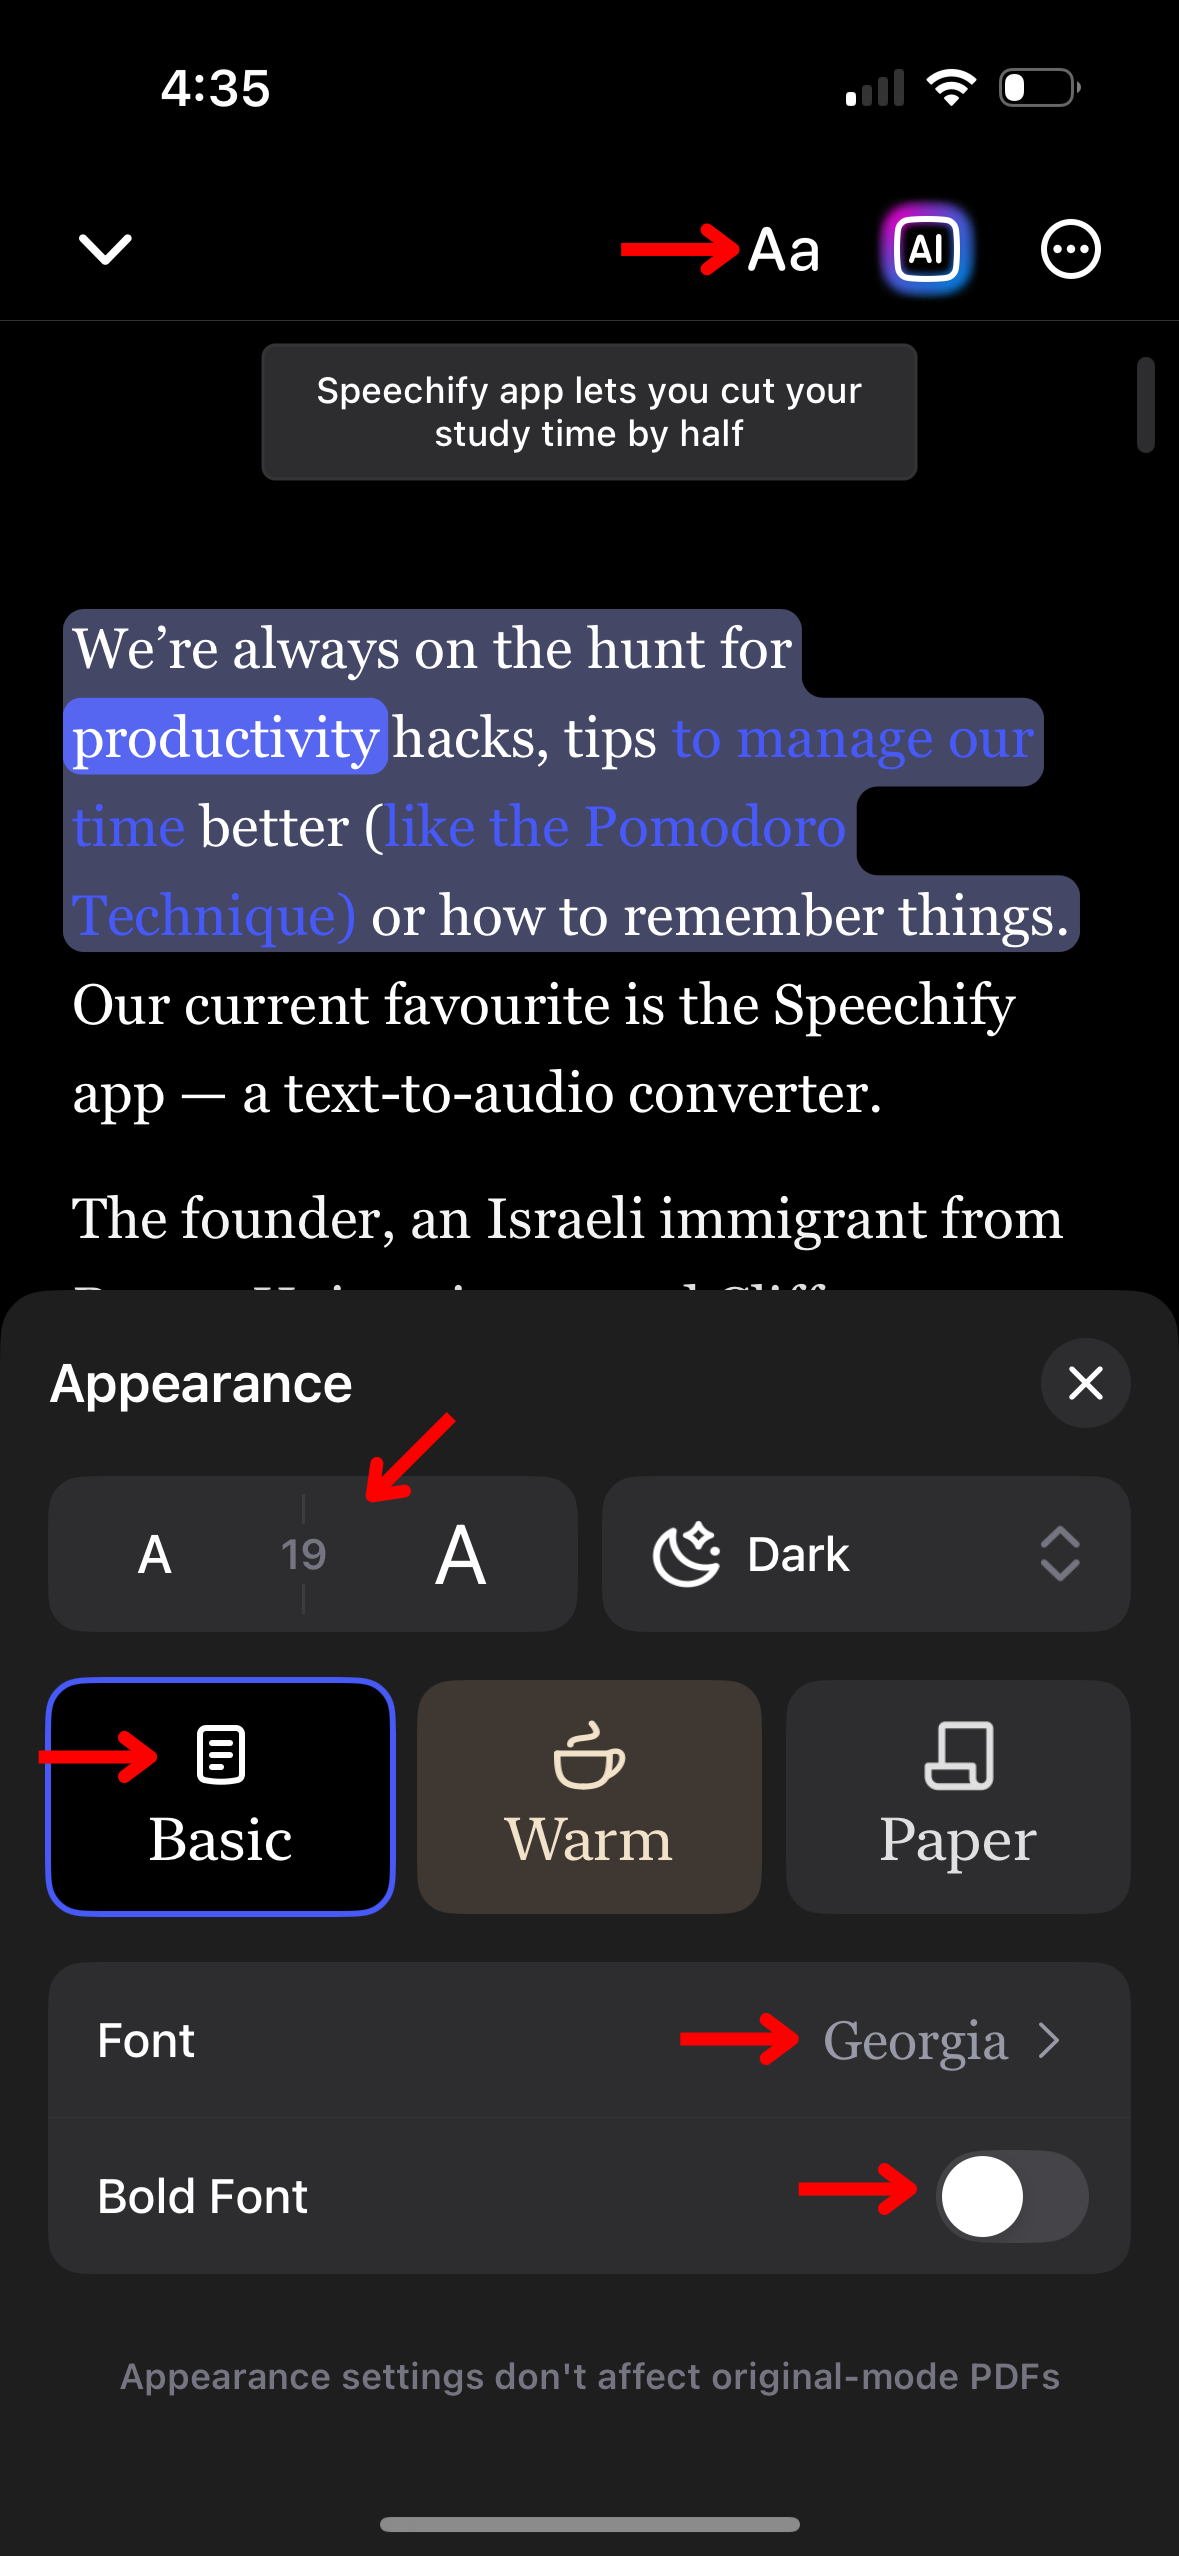
Customize the visual interface of Speechify to suit your preferences by changing the app's appearance. Follow these steps to modify the theme, font size, and color scheme to enhance your reading experience:
- Tap Aa in the toolbar in the top right.
- Change the font size by changing the number in the middle of the two As.
- Choose from Basic, Warm, or Paper to change the background.
- Change the font under “Font.”
- Toggle on Bold Font.
How to Skip Content on the Speechify iOS App
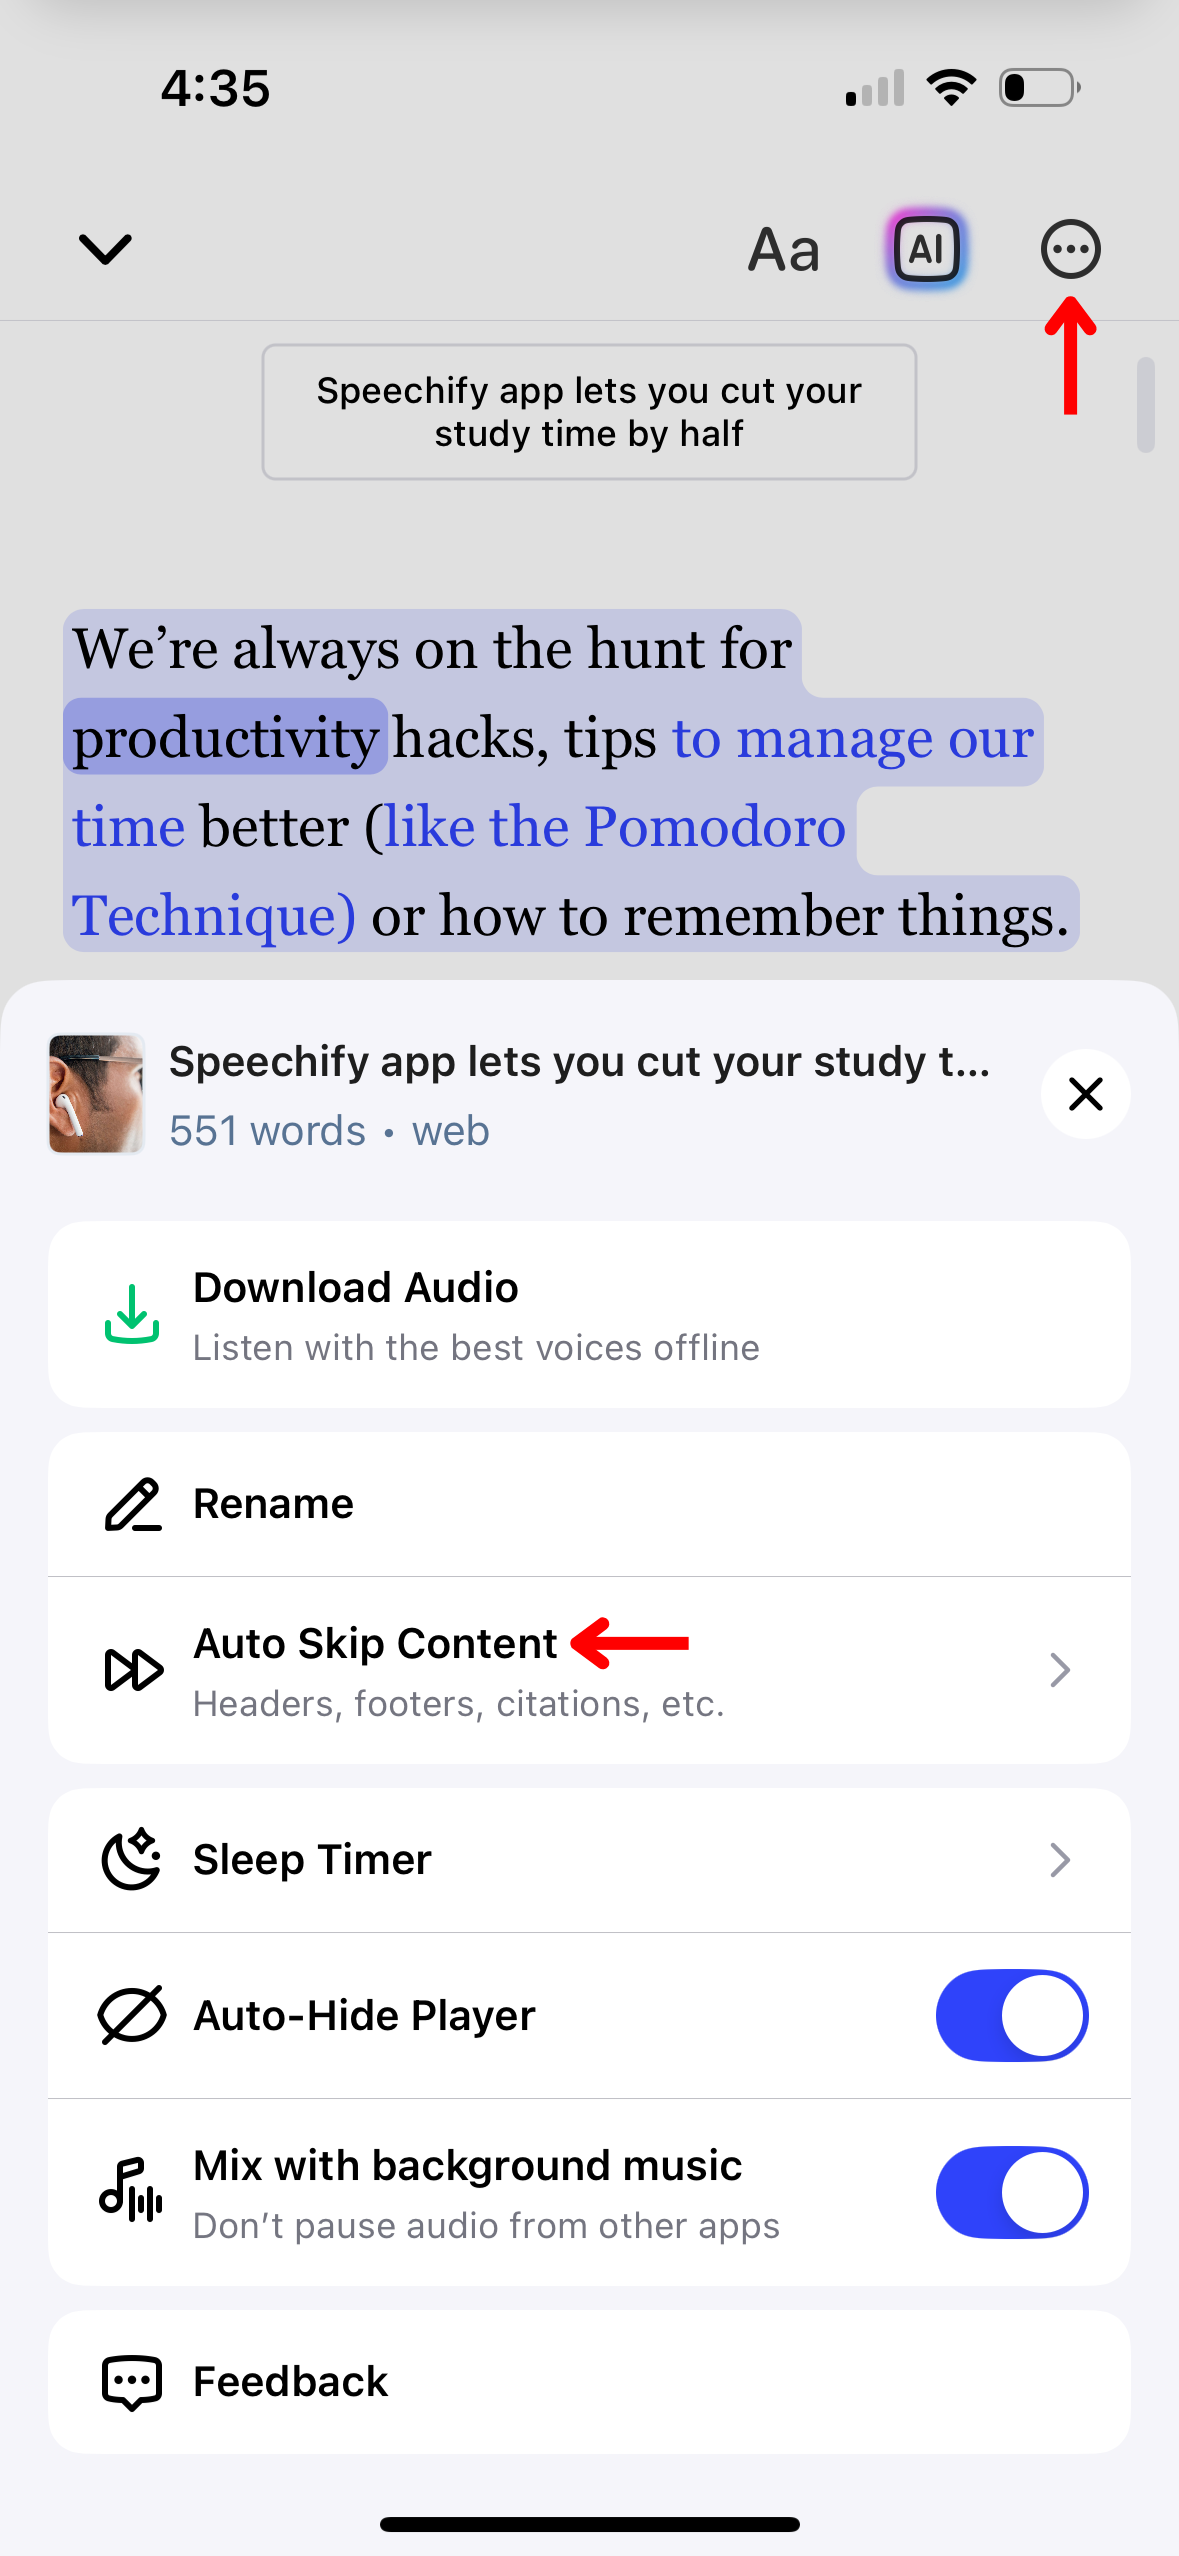
Avoid unnecessary sections such as headers and footers in Speechify to streamline your listening experience. Set up content skipping with these steps:
- Tap the 3 dots in the top right hand corner of the screen.
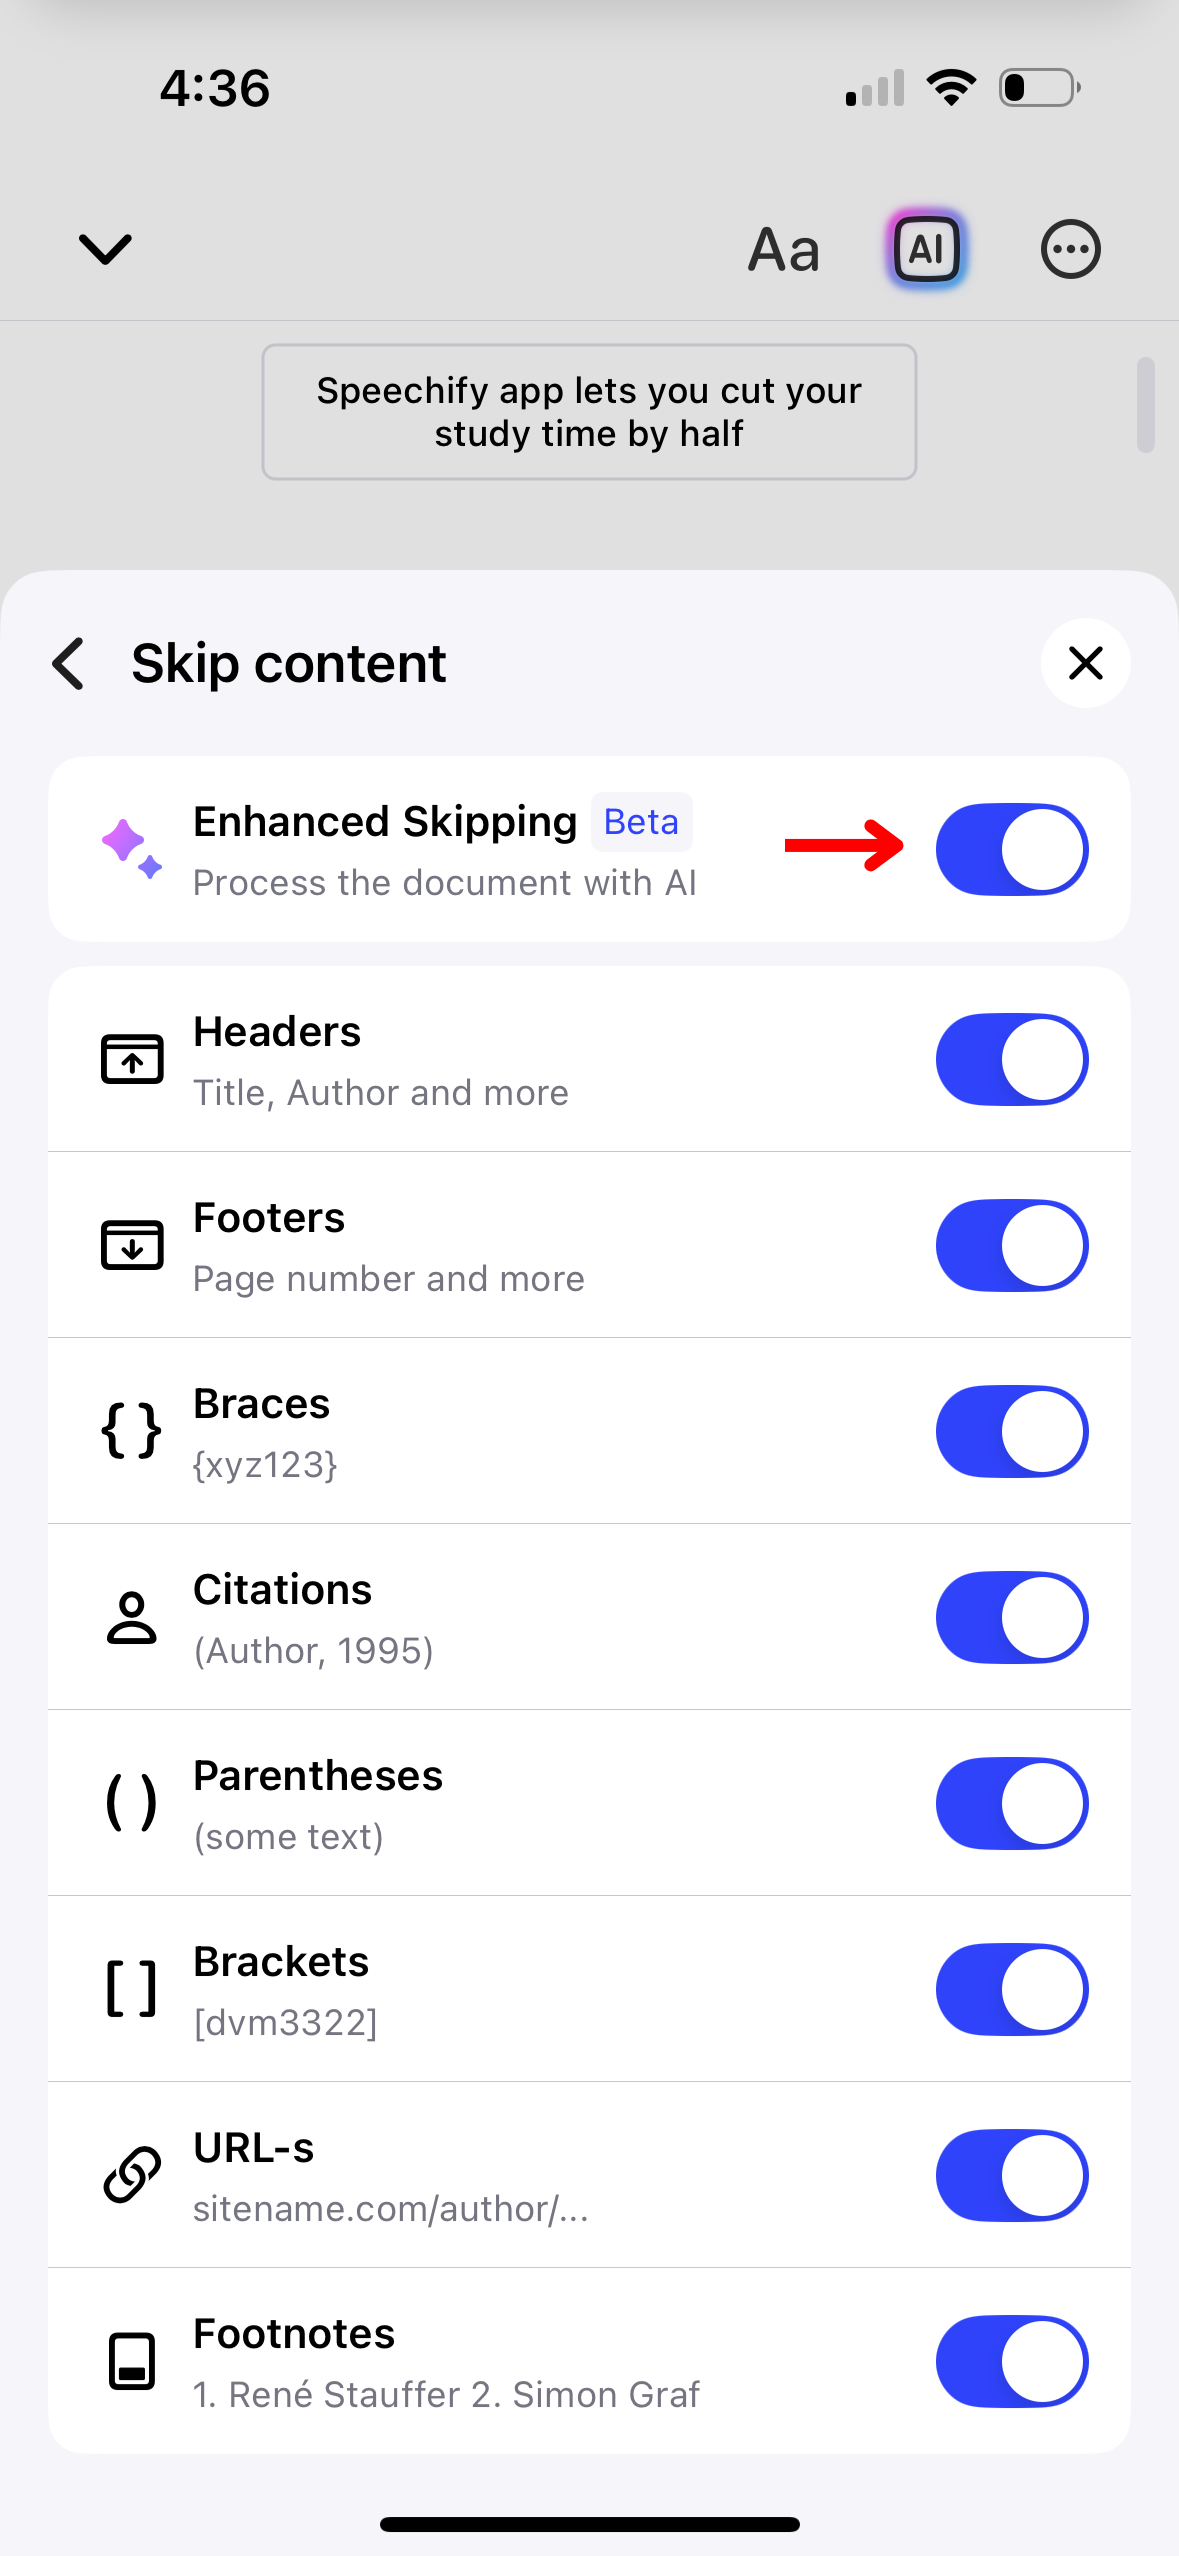
- Toggle on “Enhanced Skipping” to auto-skip all extra content or toggle on/off the following to customize your skipping experience:
- Headers
- Footers
- Footnotes
- Braces
- Citations
- Parentheses
- Brackets
- URLS
How to use the Sleep Timer on the Speechify iOS App
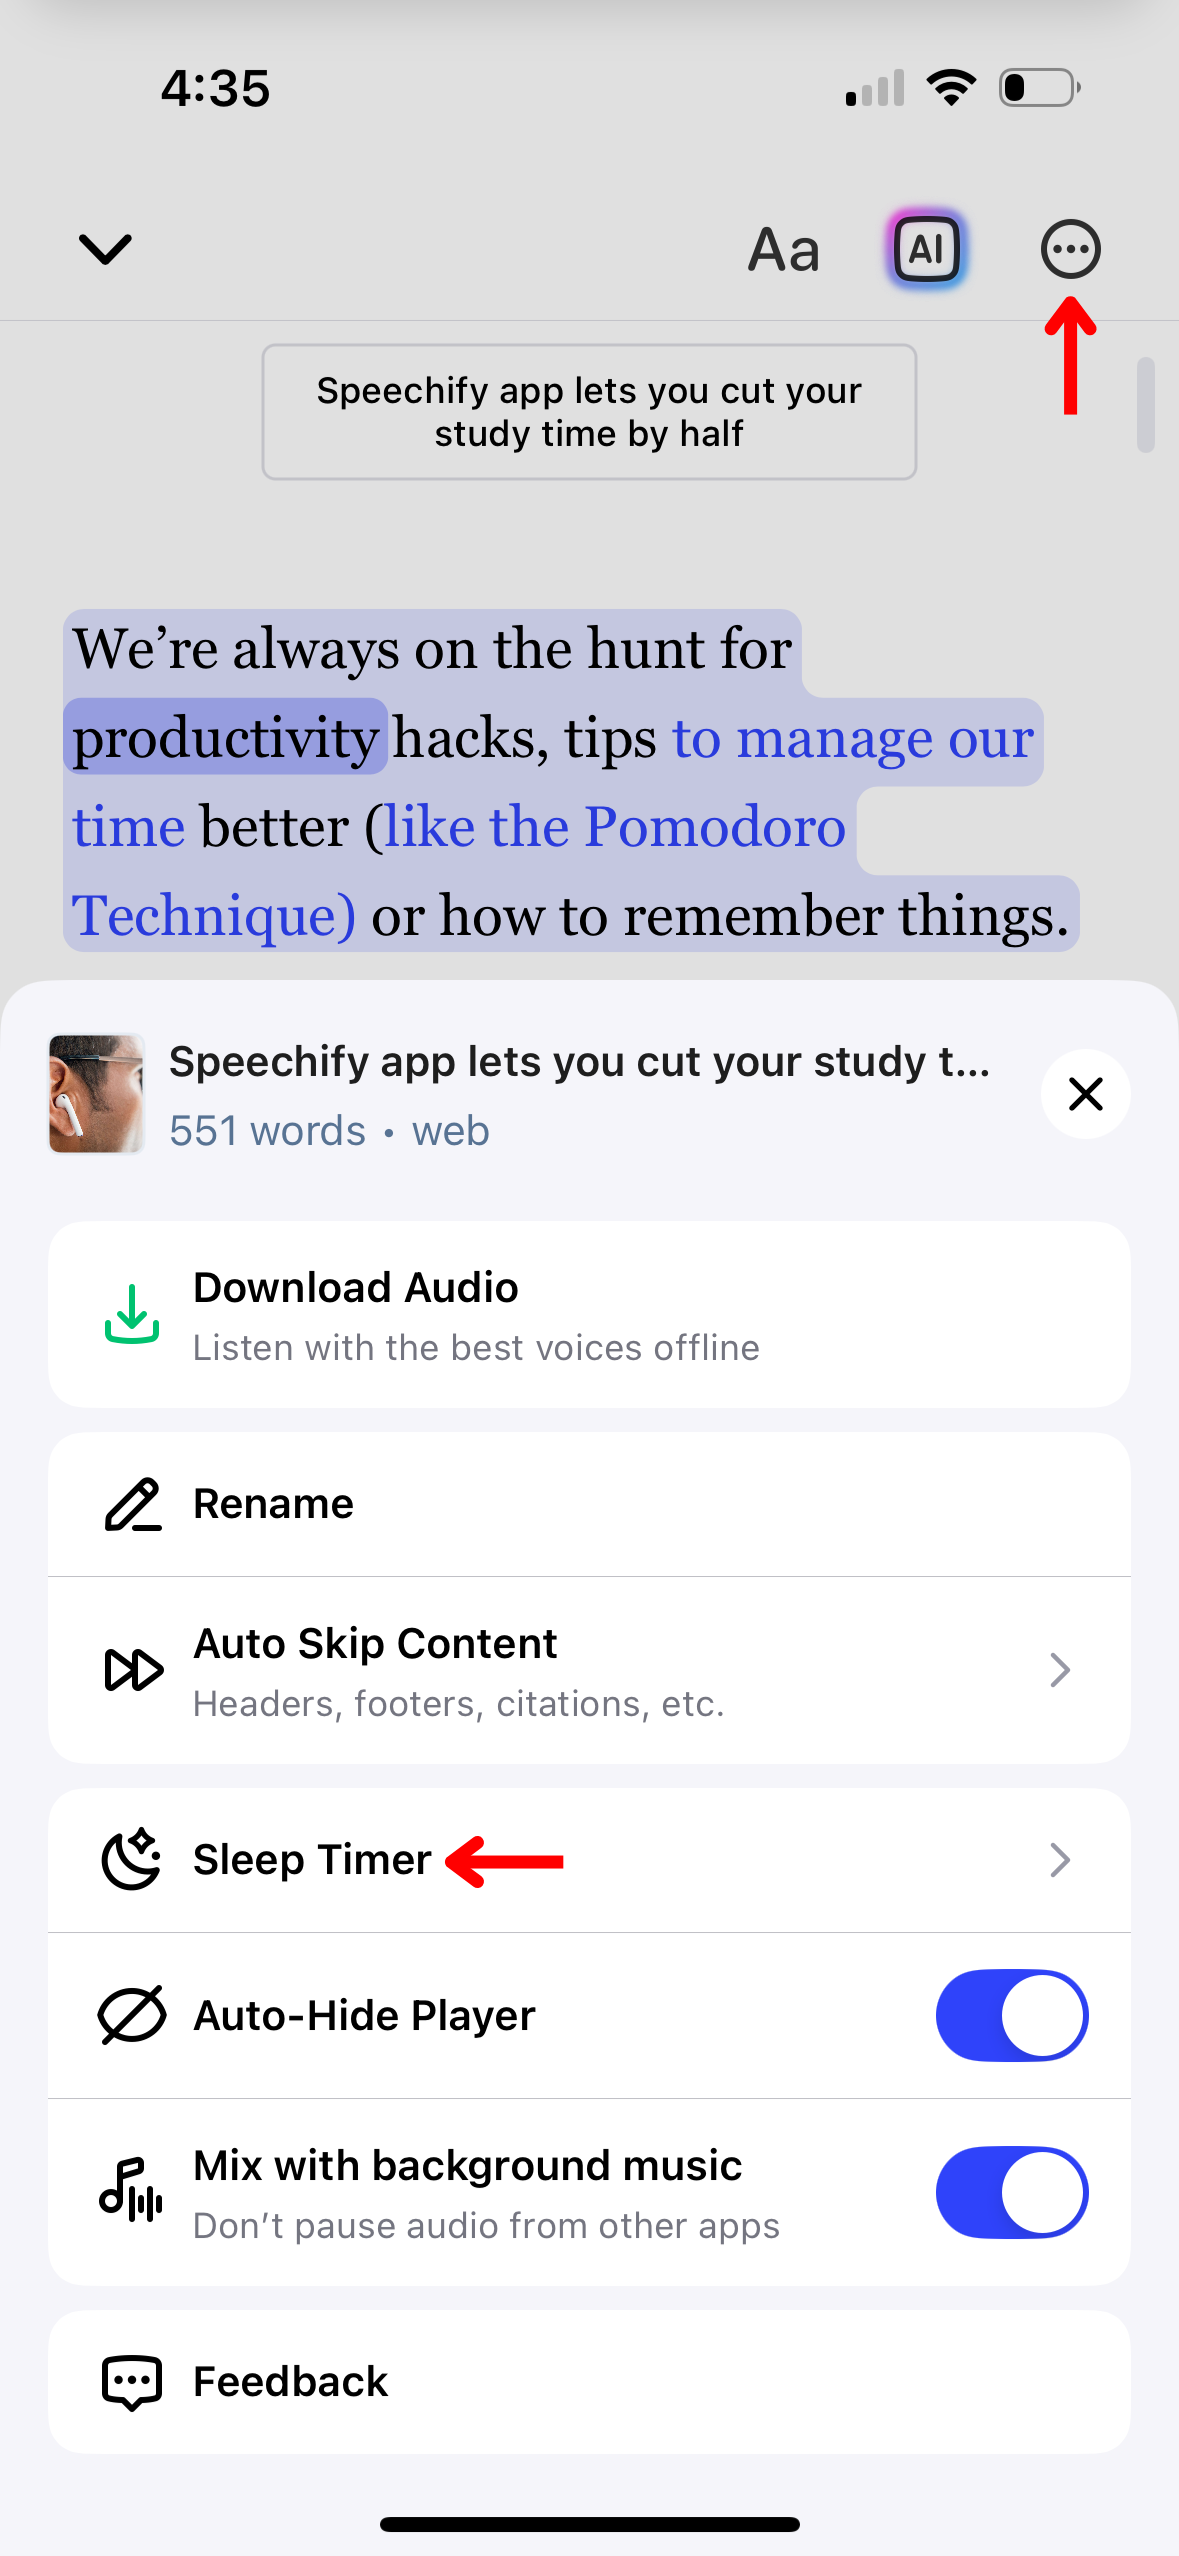
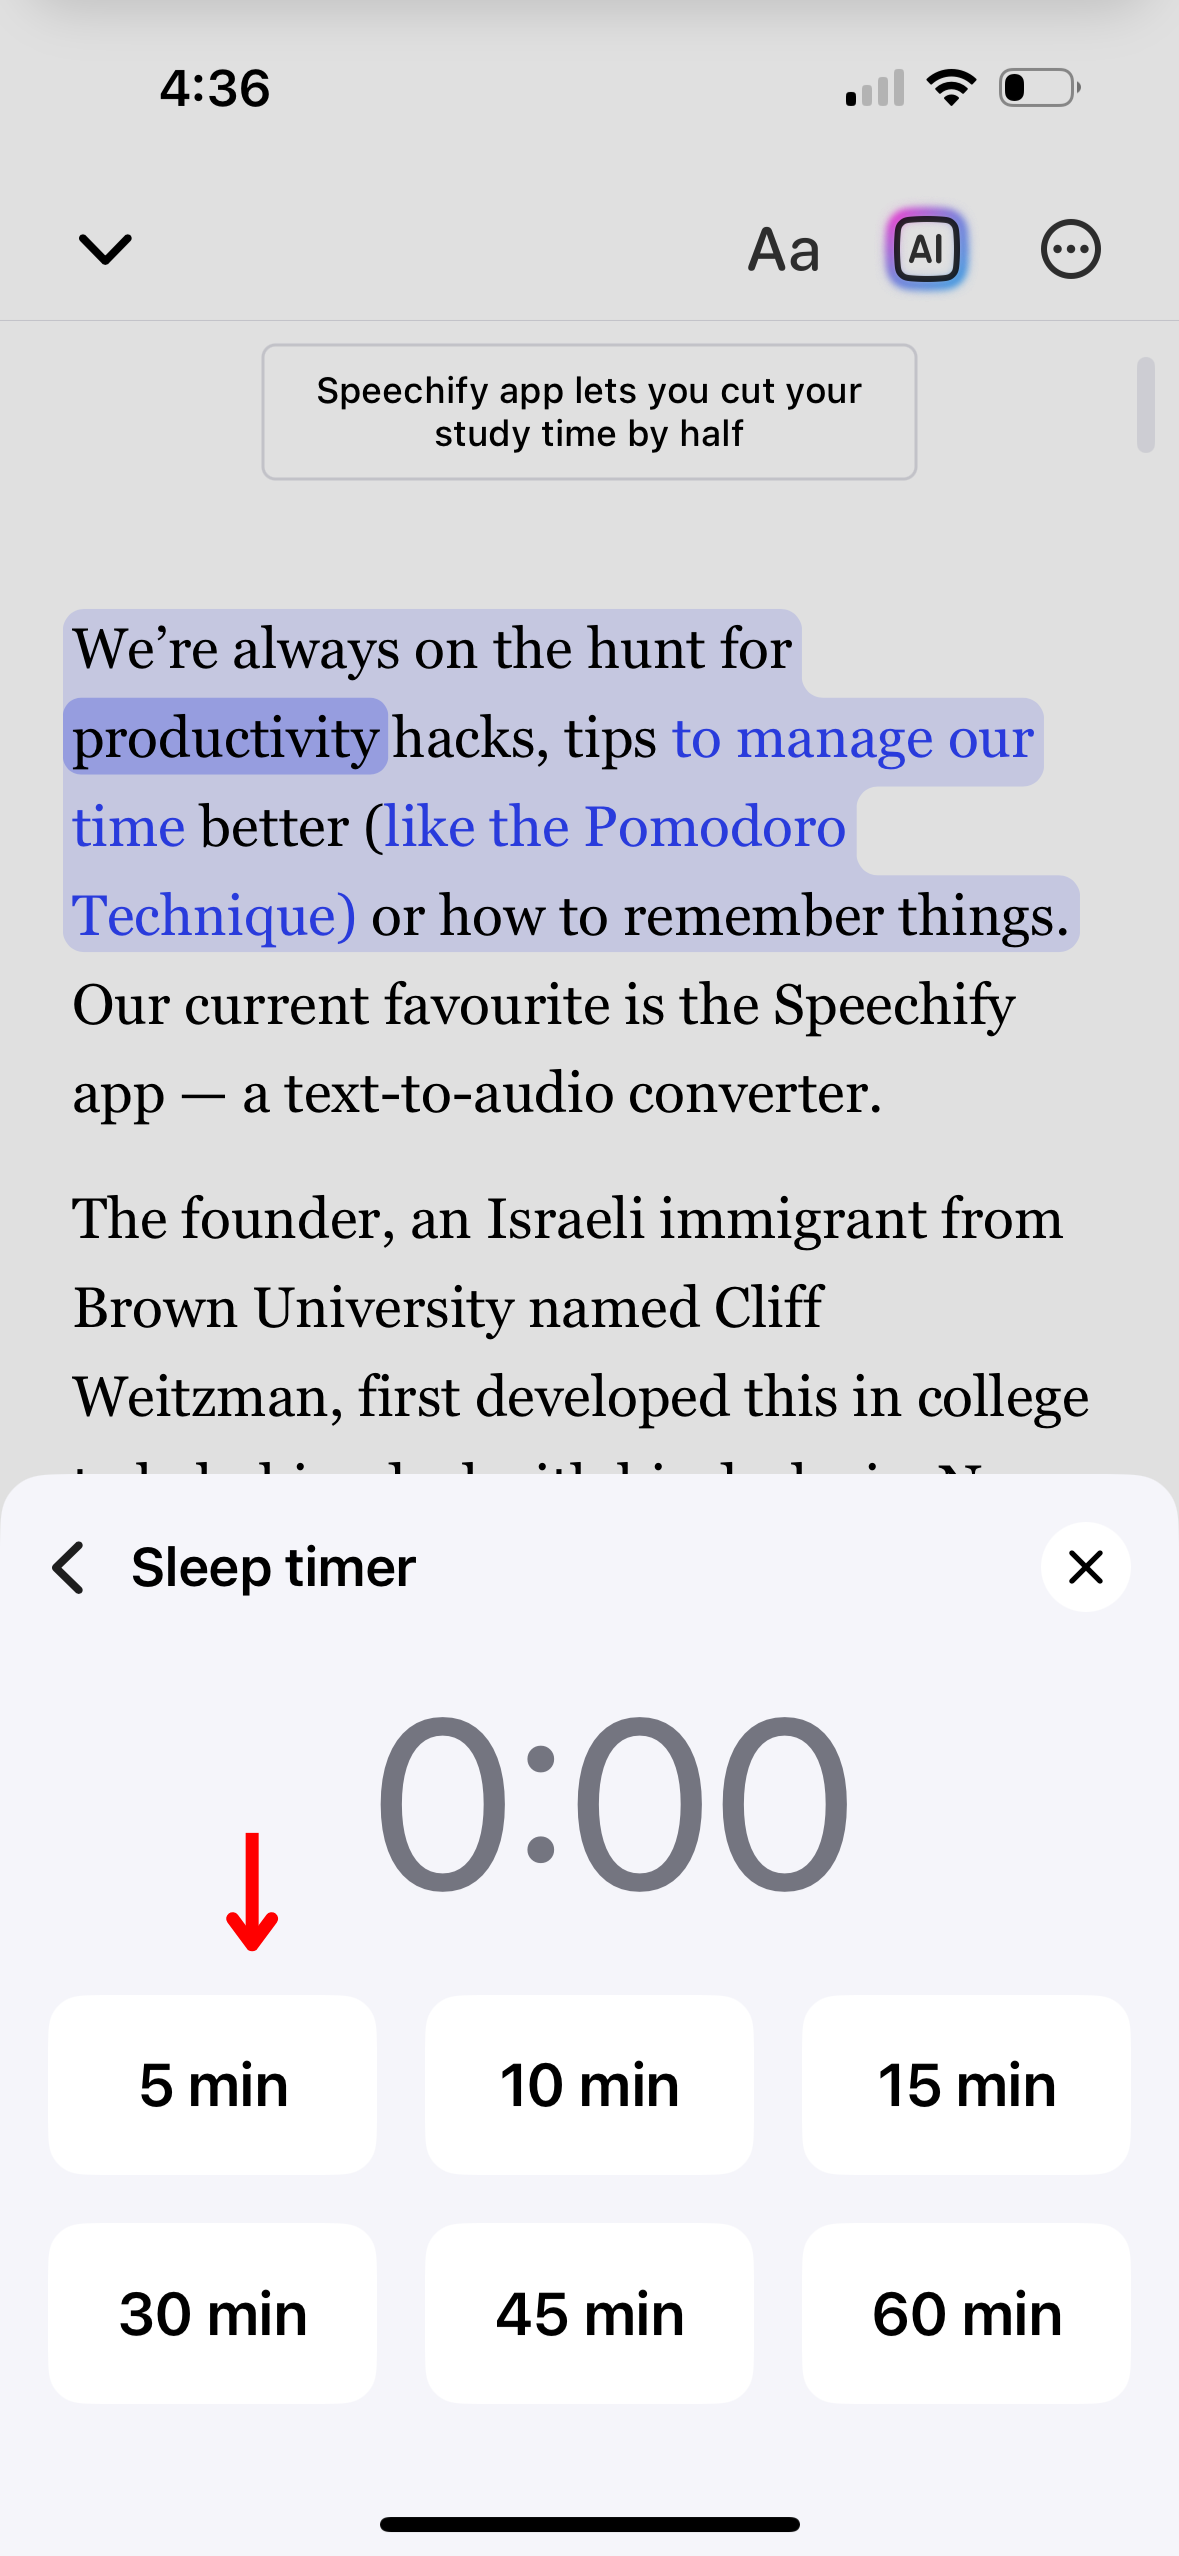
Set a sleep timer in Speechify to automatically stop playback after a predetermined time, ideal for listening as you drift off to sleep. To activate the sleep timer:
- Click the 3 dots in the top right-hand corner.
- Select “Sleep Timer.”
- Set the timer to 5, 10, 15, 30, 45 or 60 minutes.
How to Mix with Background Music on the Speechify iOS App
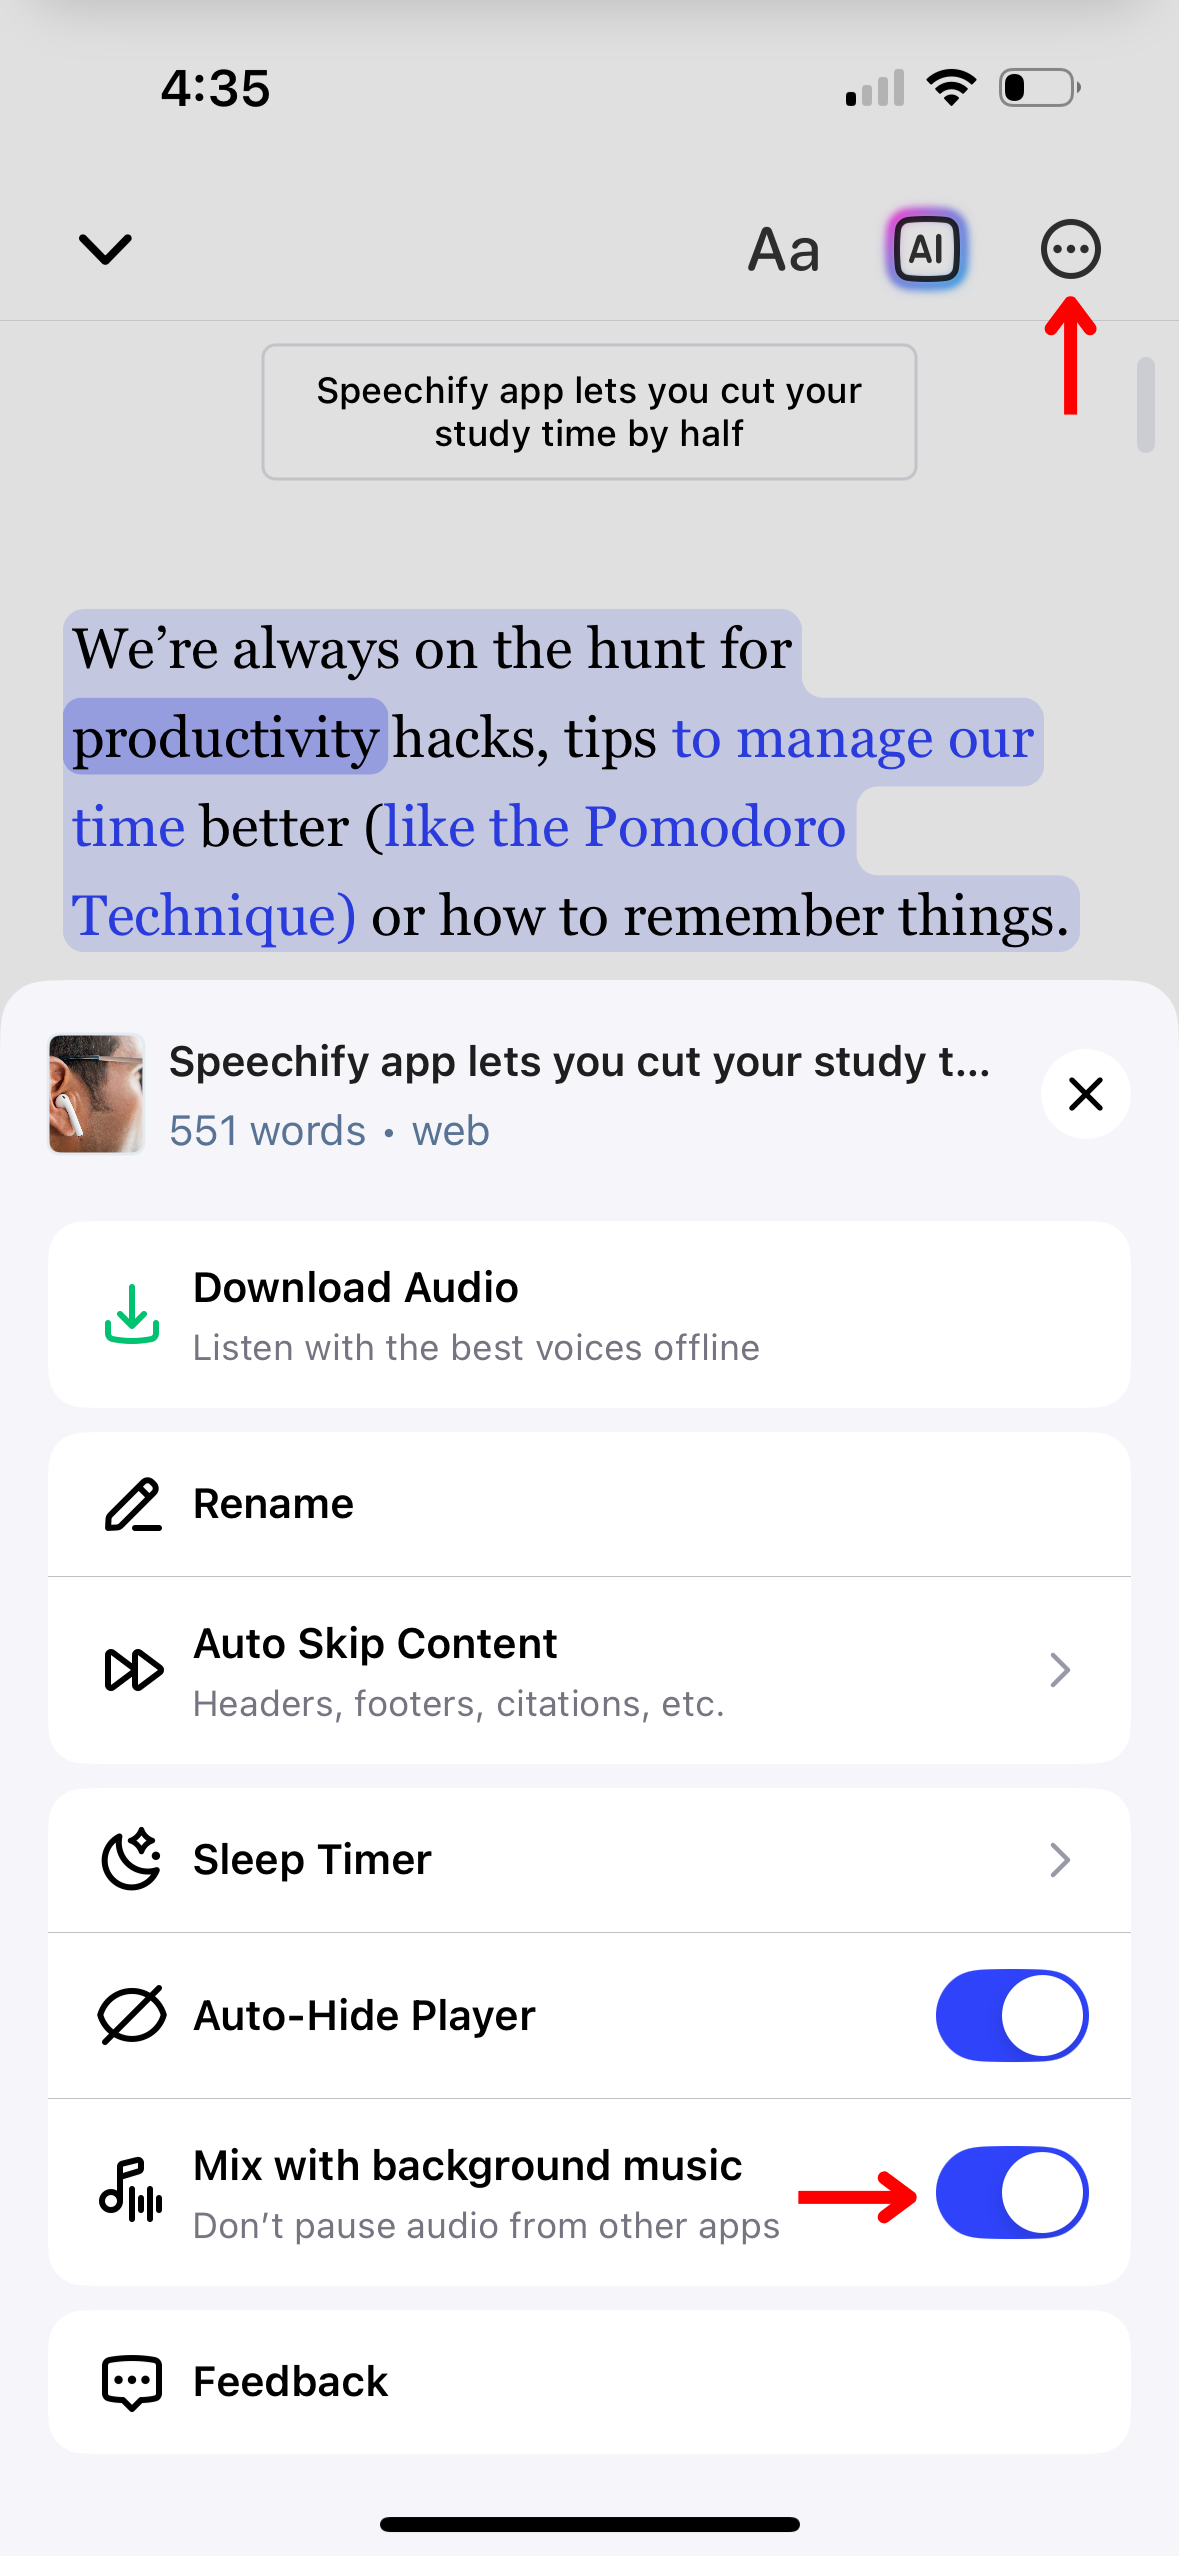
Continue listening to your music without interruption by mixing Speechify playback with background music. Follow these steps to ensure Speechify doesn’t pause your other apps:
- Tap the 3 dots in the top right-hand corner.
- Toggle on “Mix with Background Music.”
How to Access Support on the Speechify iOS App
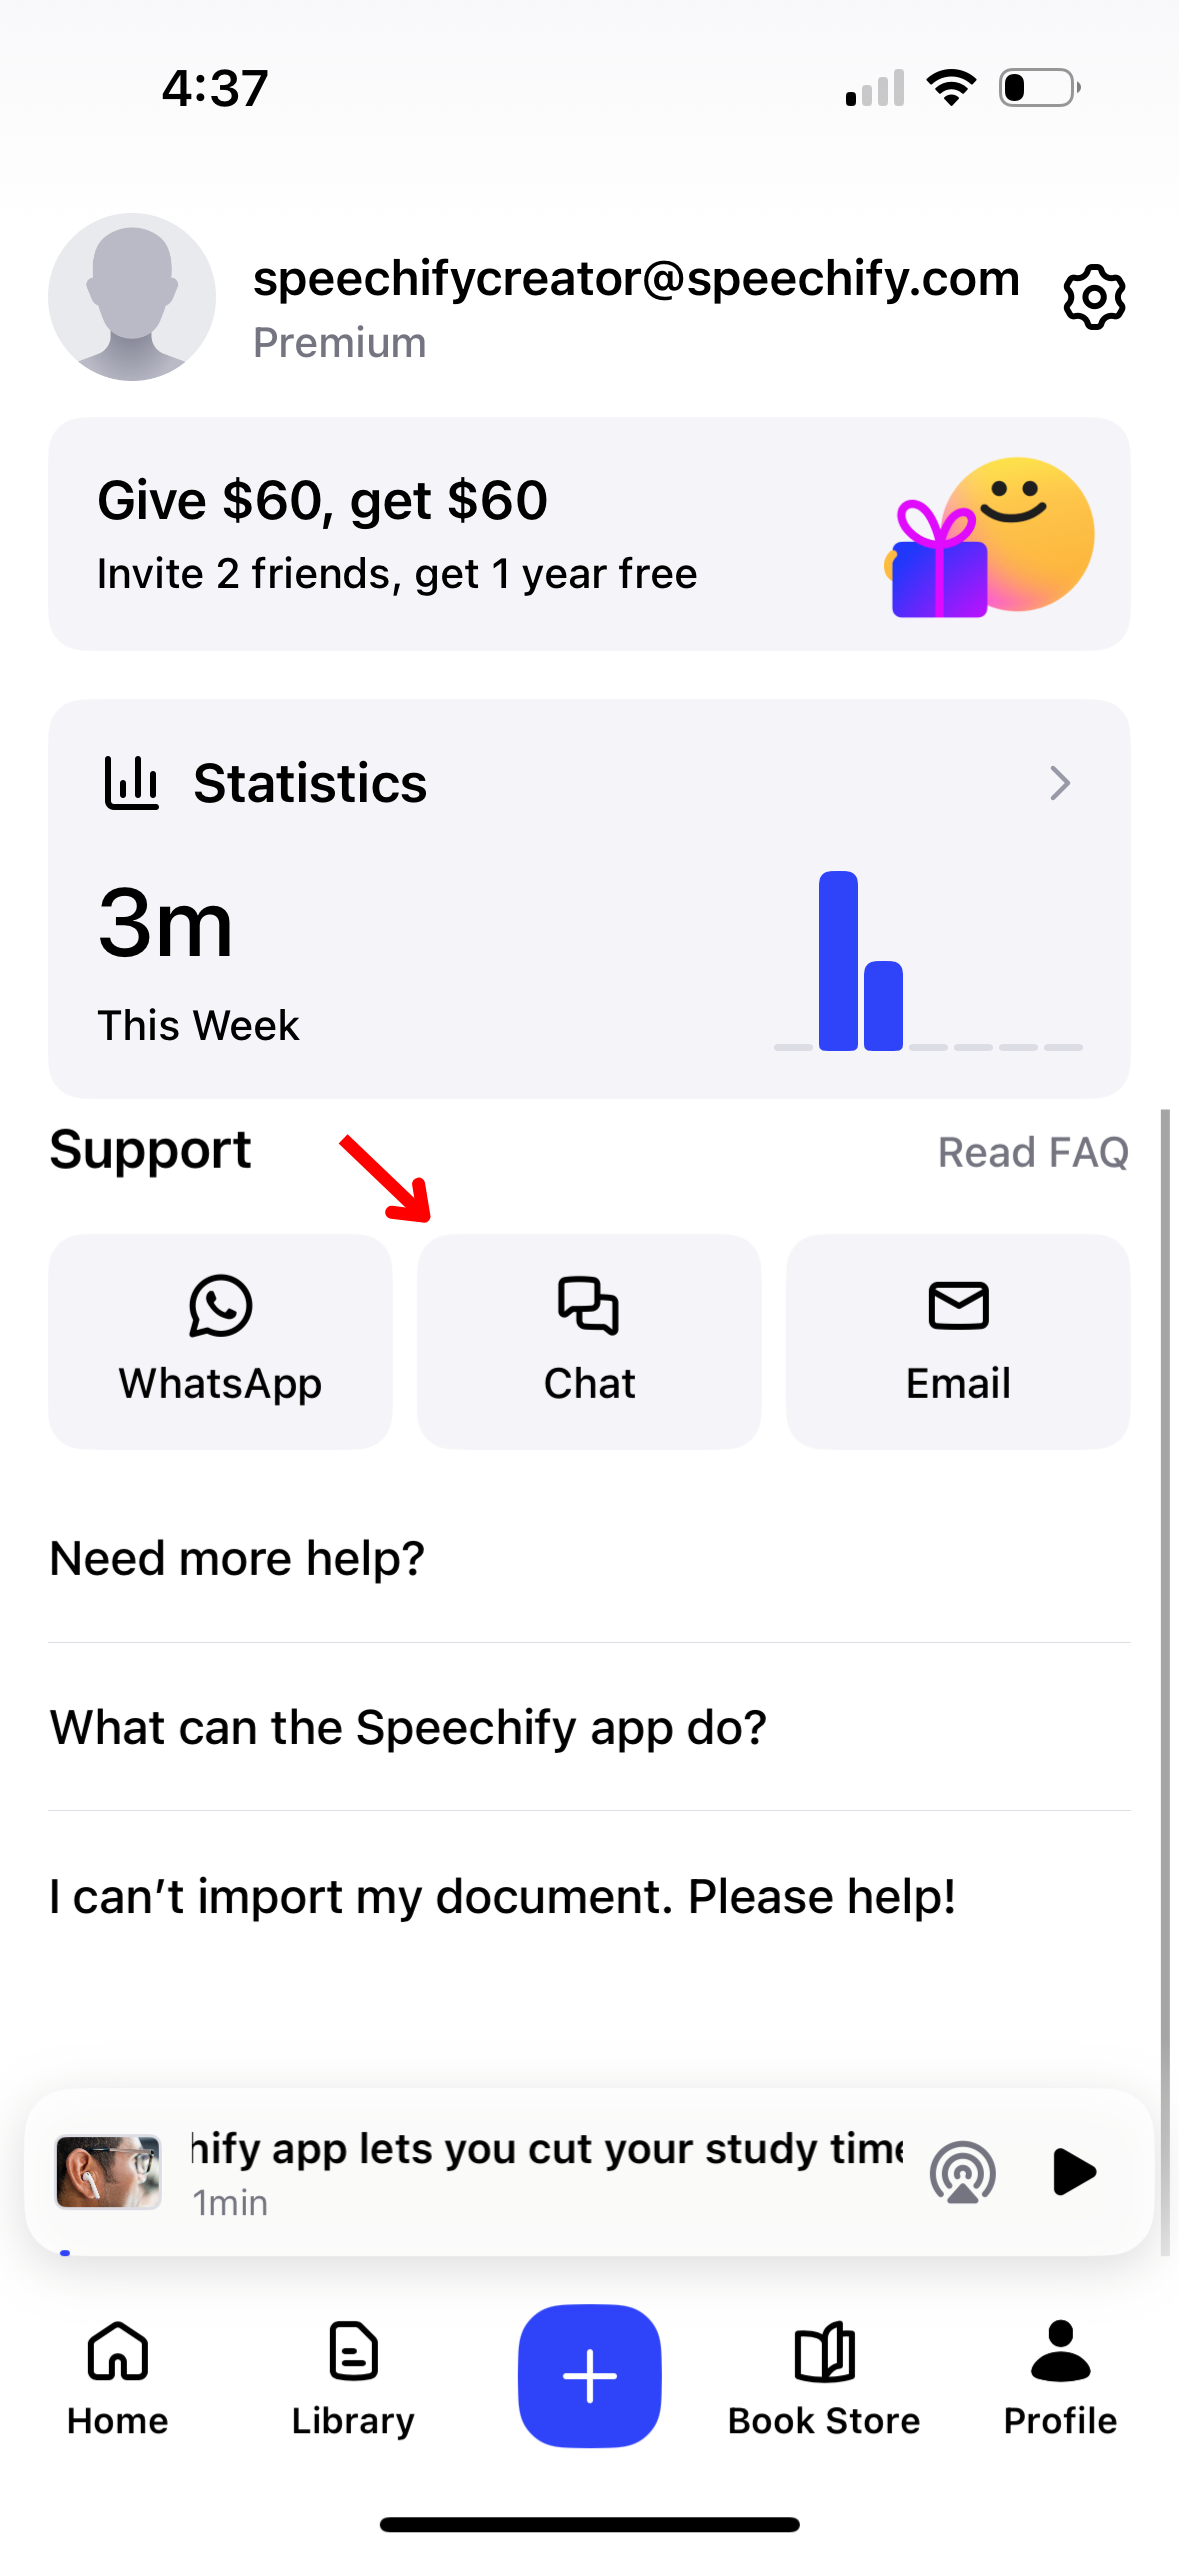
For further help with Speechify, reach out to our support team or visit our Help Center. Here’s how:
- Select the Profile button in the bottom right-hand corner.
- Under “Support,” choose from WhatsApp, Chat, or Email support.