Whether you're looking to enhance your videos, podcasts, or e-learning modules, our ultimate guide to creating AI voice overs in Speechify Studio will walk you through everything from setting up your first project to customizing voice characteristics to suit your specific needs. Get ready to transform your text content into engaging auditory experiences with ease and precision.
How to Start a New Voice Over Project on Speechify Studio
Speechify Studio allows you to creatively enhance your media with high-quality, tailored audio that can captivate your audience and effectively convey your message across different markets. Here’s how to get started:
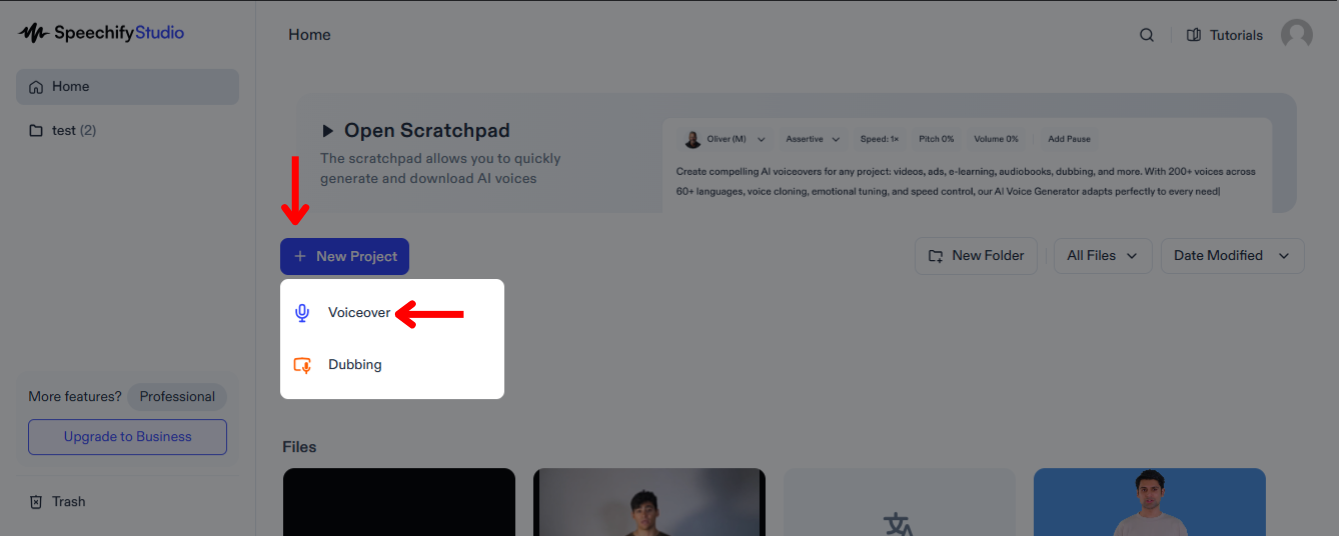
- Select “New Project” on the Speechify Studio Home screen.
- Choose “Voice Over.”
How to Upload a Script on Speechify Studio Voice Over
The first step to creating an AI voice over is uploading a script. To do so:
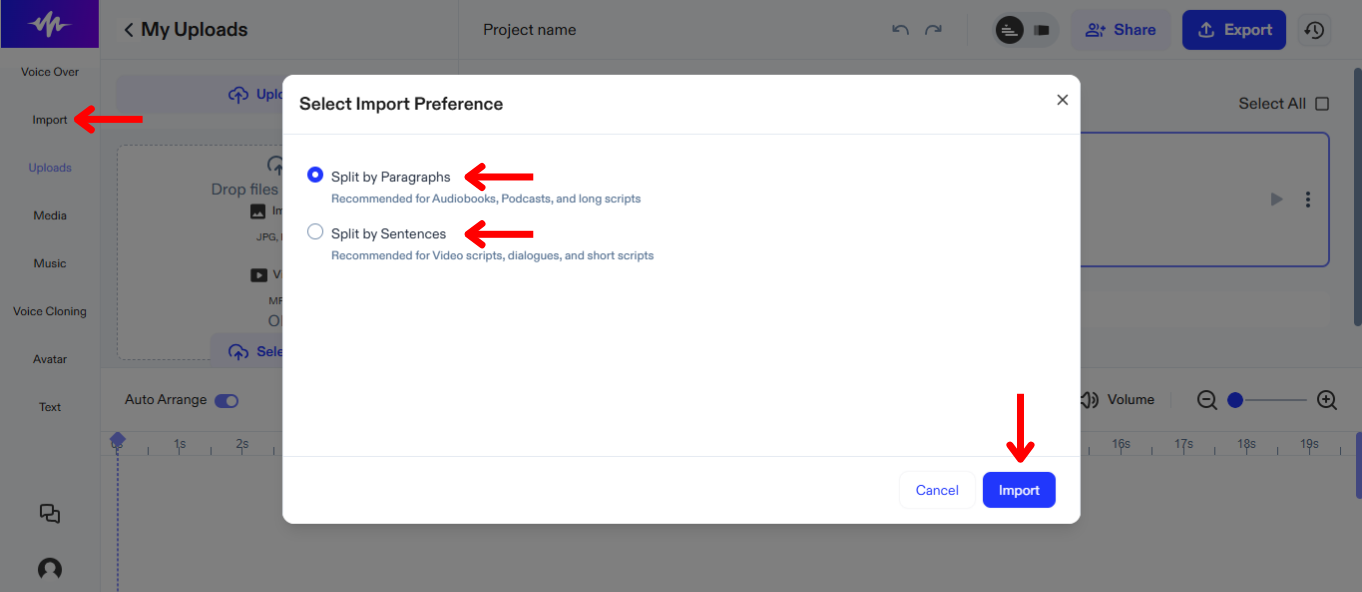
- Click “Import.”
- Upload Script.
- Choose to split the script by paragraph or split the script into sentences on the timeline.
- Tap “Import.”
- Speechify Studio will automatically generate an AI Voice over.
How to Change the AI Voice or Language on Speechify Studio Voice Over
You can assign different voices to different parts of your script and change voices at any time to find the perfect fit. To change the voice on Speechify Studio:
- Select “Voice Over” in the left-hand toolbar.
- Choose from 200+ lifelike AI voices across different languages.
How to Customize your AI Voice Over on Speechify Studio
Customizing your AI voice over on Speechify Studio allows you to perfectly match the tone, pace, and emotion of the narration to your video's content. Follow these steps to ensure your AI voice over will resonate well with your specific audience:
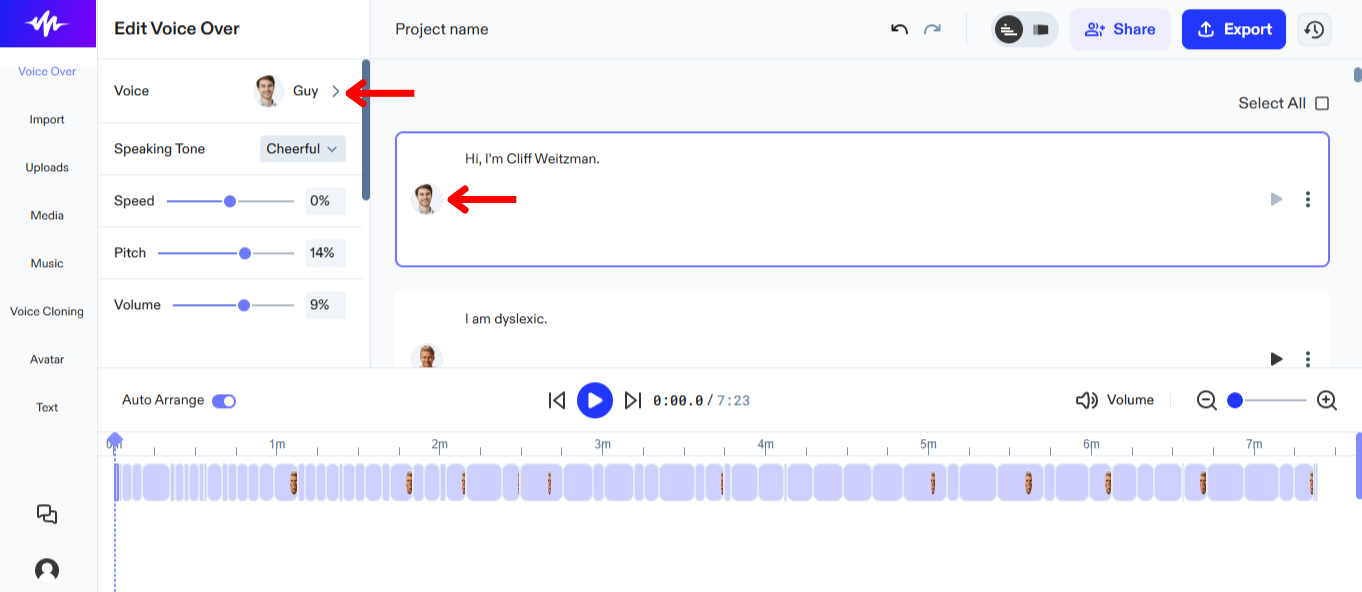
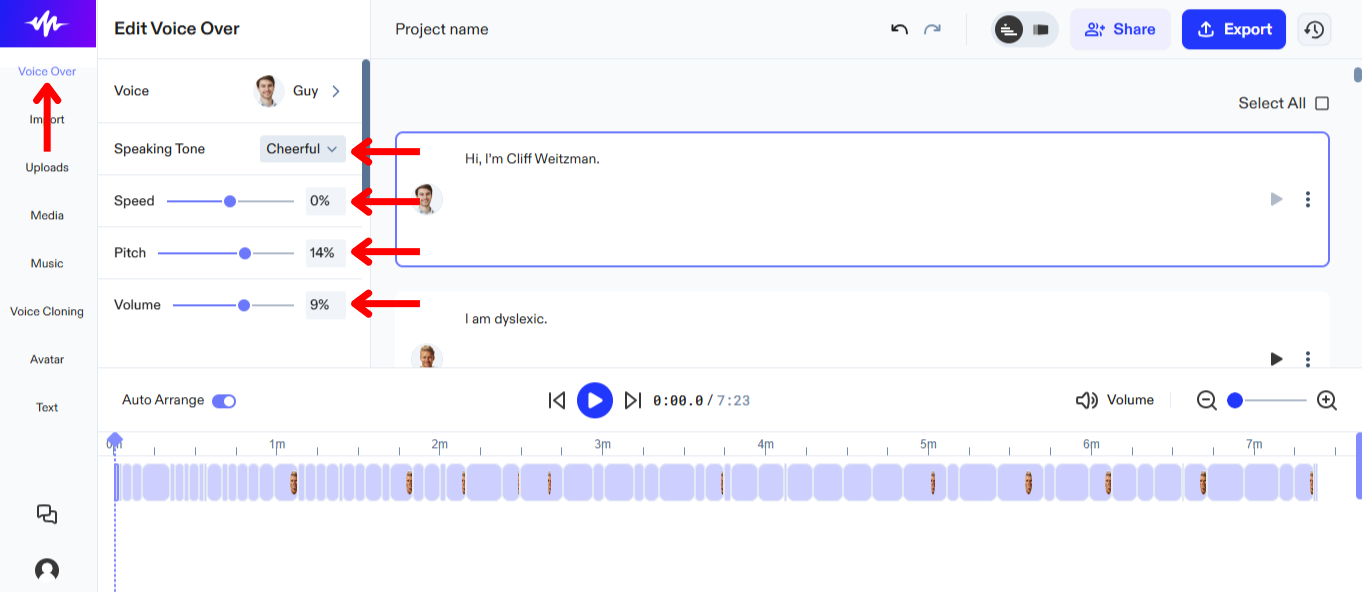
- Tap “Voice Over” in the left-hand toolbar.
- To change the emotion, select an option next to “Speaking Tone.” Note: This option is only currently available on AI voices that say “Expressions” next to them on the voice list.
- To adjust the voice speed, move the slider next to “Speed.”
- To adjust the voice pitch, move the slider next to “Pitch.”
- To change the volume, move the slider next to “Volume.”
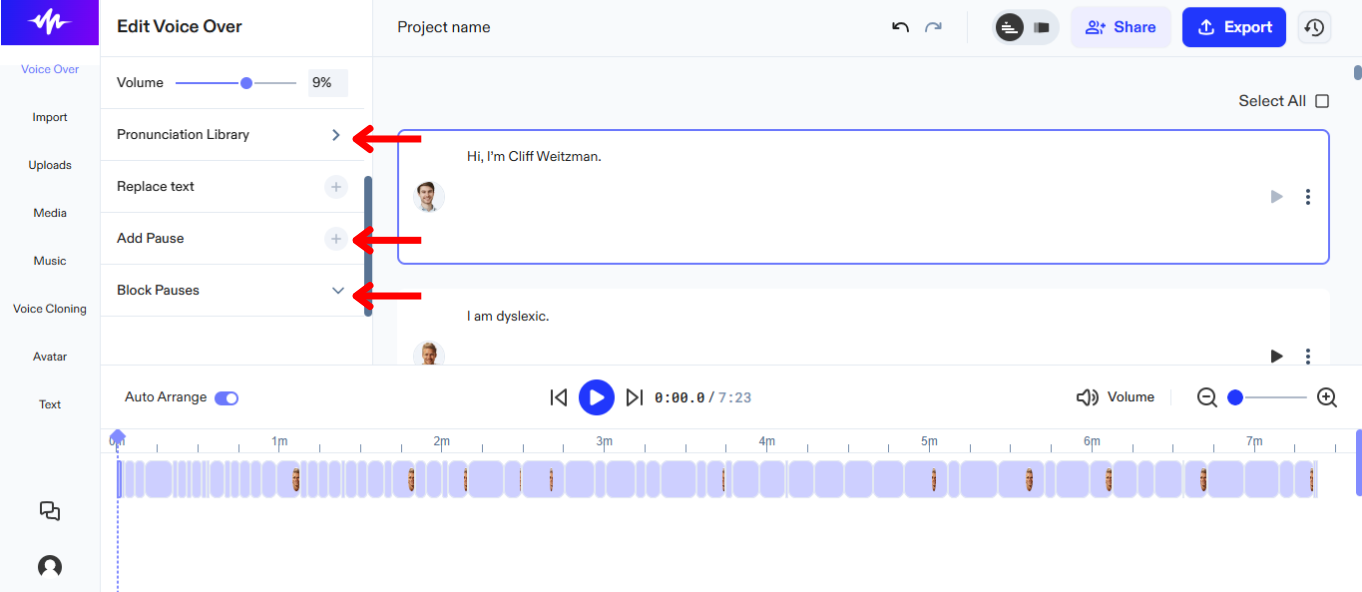
- To adjust pronunciation, tap “Pronunciation Library.”
- Add or remove pauses to make the AI voice over sound more lifelike by tapping “Add Pause” or “Block Pauses.”
How to use Voice Cloning on Speechify Studio Voice Over
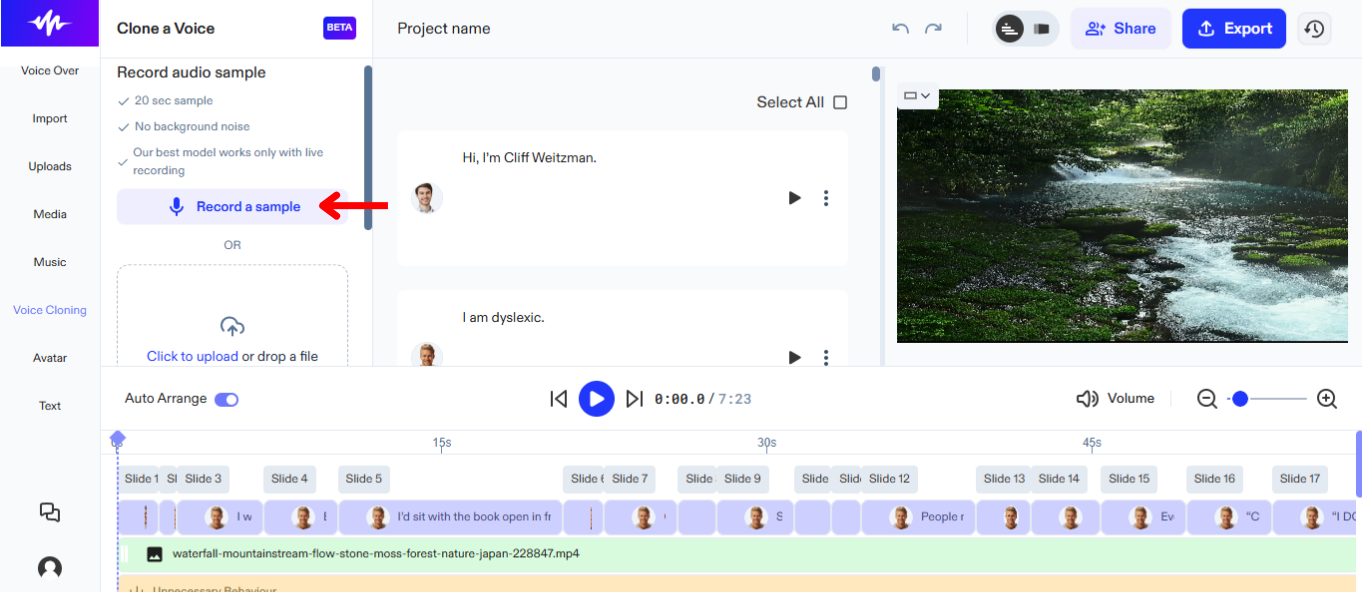
Using voice cloning on Speechify Studio for your voice over projects enables you to create projects in your own voice and maintain a consistent and familiar auditory presence. To use voice cloning:
- Select “Voice Cloning” from the left-hand toolbar.
- Press “Create a New Clone."
- Record a 20-second sample or upload a file featuring your voice.
- Click “Create Clone.”
- Use the new voice by selecting it from the AI voice list.
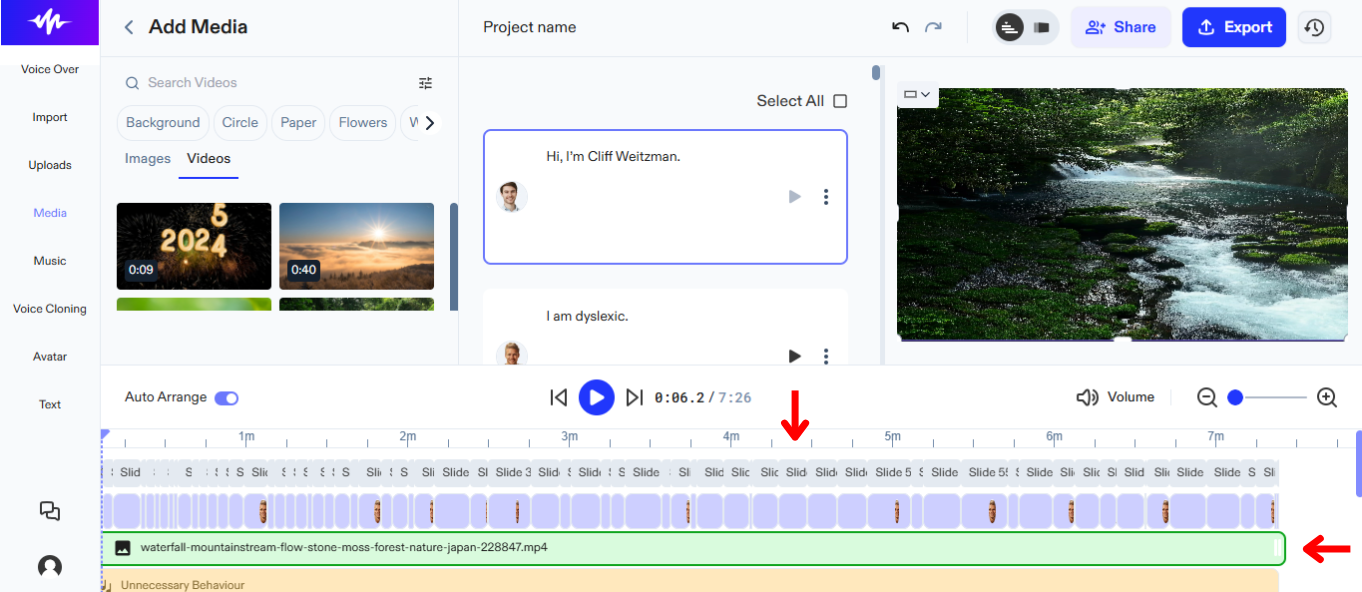
How to Add Stock Media on Speechify Studio Voice Over
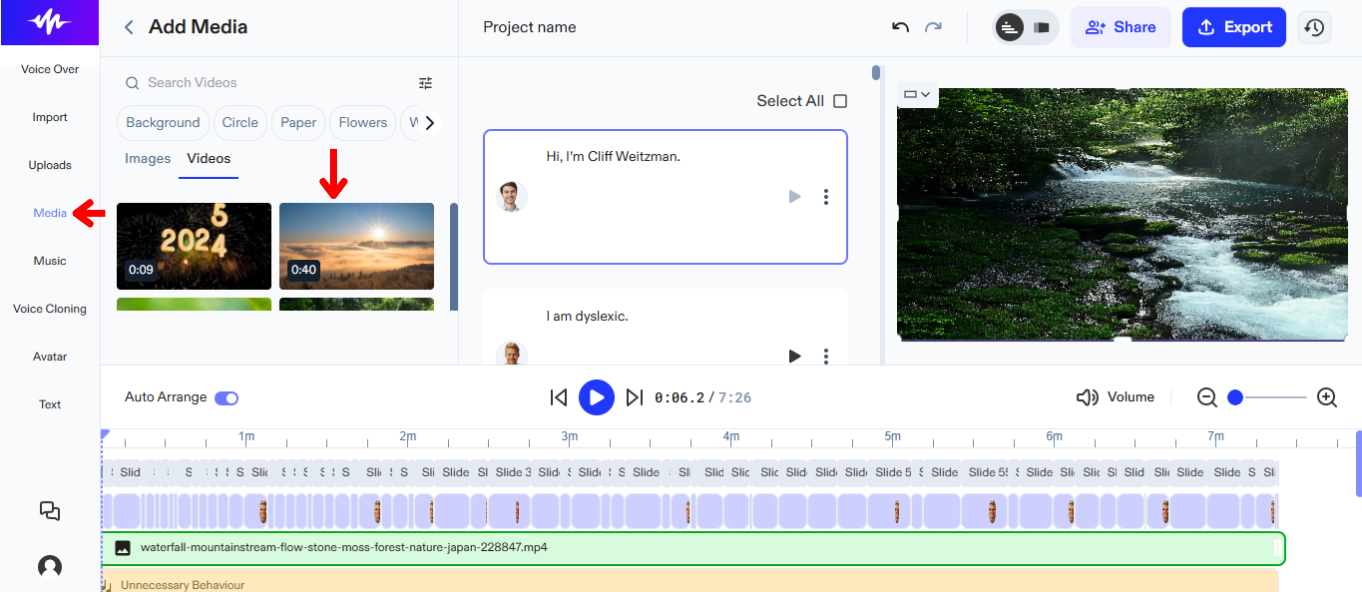
Tell a story by adding stock footage to your video. Simply follow these steps to add video or images:
- Click “Media” in the left-hand toolbar.
- Choose from a wide range of stock images or videos.
How to Add Original Media on Speechify Studio Voice Over
Add original media to enhance your story by following these steps:
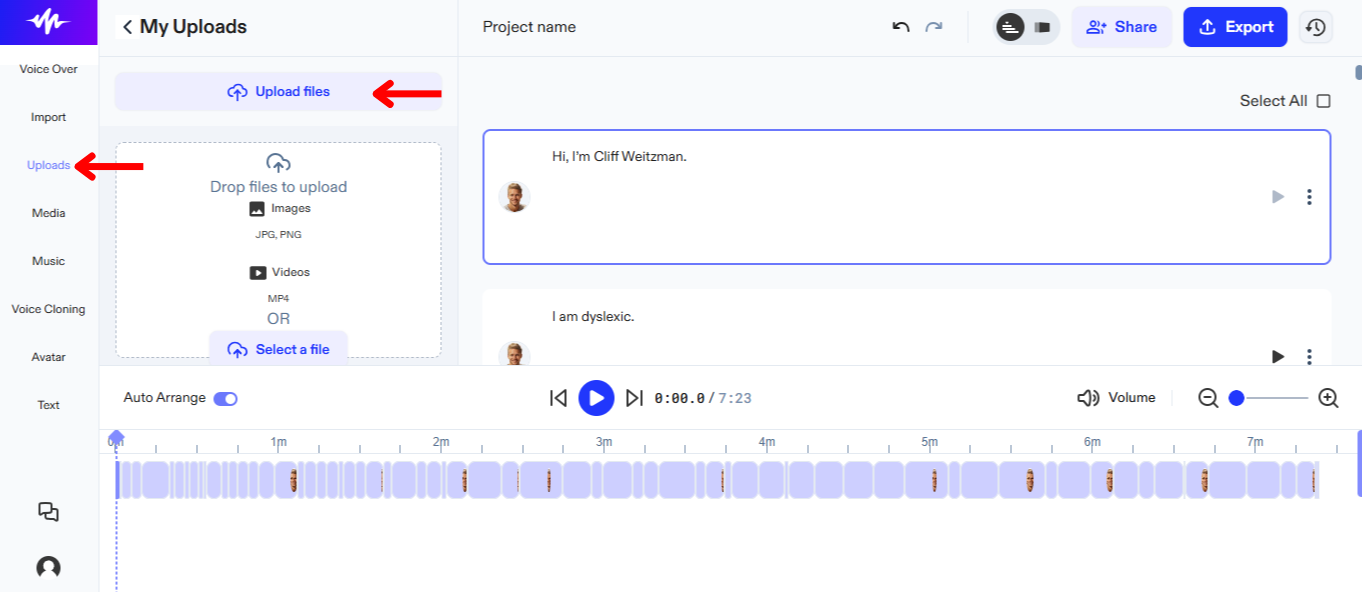
- Tap “Upload” in the left-hand toolbar.
- Upload images or videos.
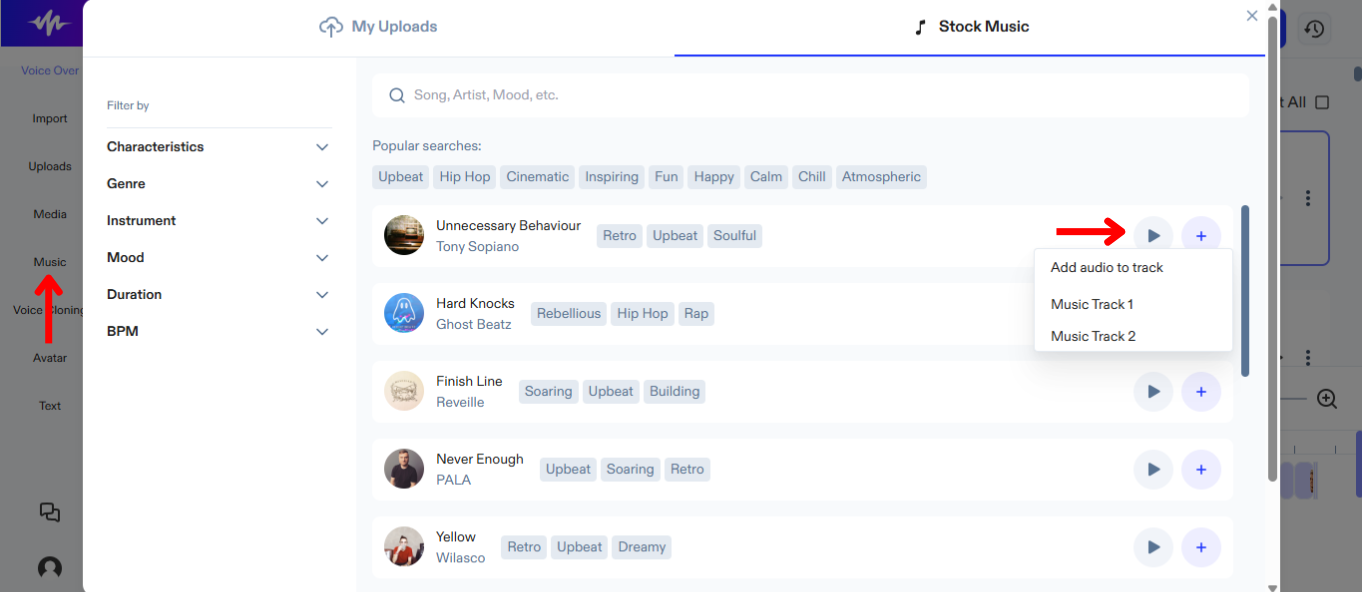
How to Add Stock Music on Speechify Studio Voice Over
Mixing music with your AI voice over is easy. Simply:
- Click “Music” in the left-hand toolbar.
- Choose from a variety of stock music.
How to use AI Avatars on Speechify Studio Voice Over
If you don’t have actors but would still like a star in your videos, try AI avatars. To activate AI avatars:
- Tap “Avatar” in the left-hand toolbar.
- Select from a range of humanlike AI avatars that can stand in for actors in your projects.
How to Add Text on Speechify Studio Voice Over
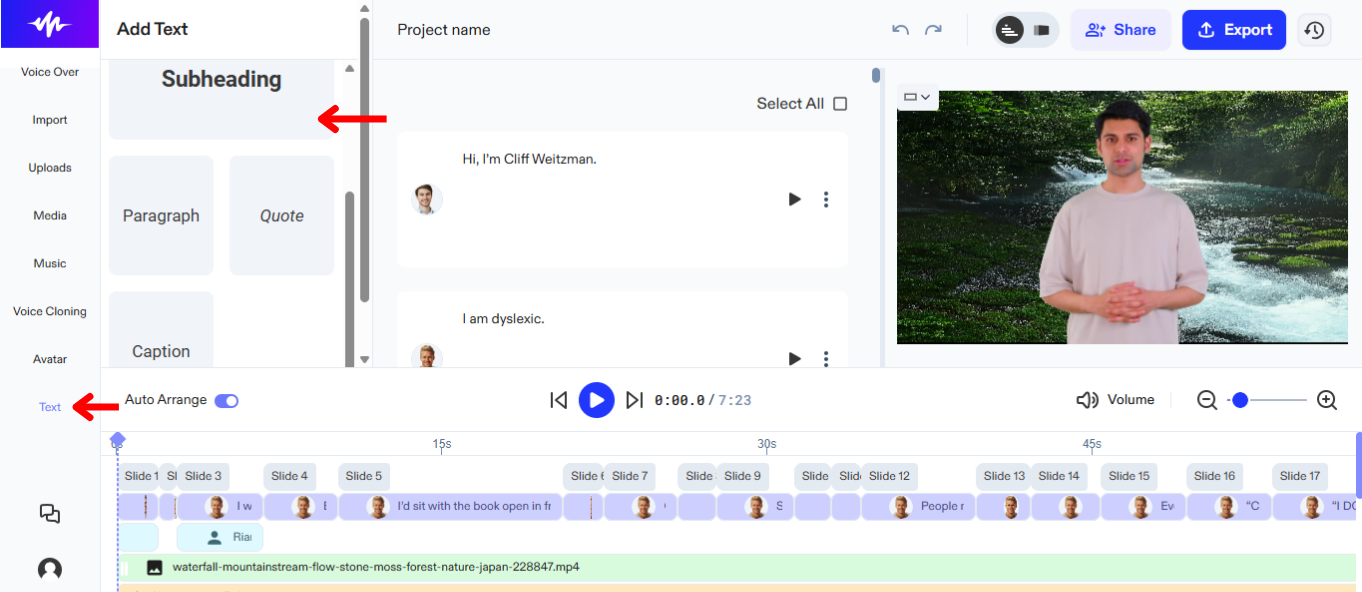
Add subtitles or headings to your AI voice over projects for more context. To add text on Speechify Studio voice over:
- Click “Text” in the left-hand toolbar.
- Choose from headings or captions for your project.
- Type into the textbox.
How to Rearrange Content on Speechify Studio Voice Over
Optimize the flow of your video and ensure that the audio perfectly aligns with the visual elements by rearranging the elements on your project timeline. To rearrange content on your timeline:
- Simply drag and drop objects to move them.
How to Export Project on Speechify Studio Voice Over
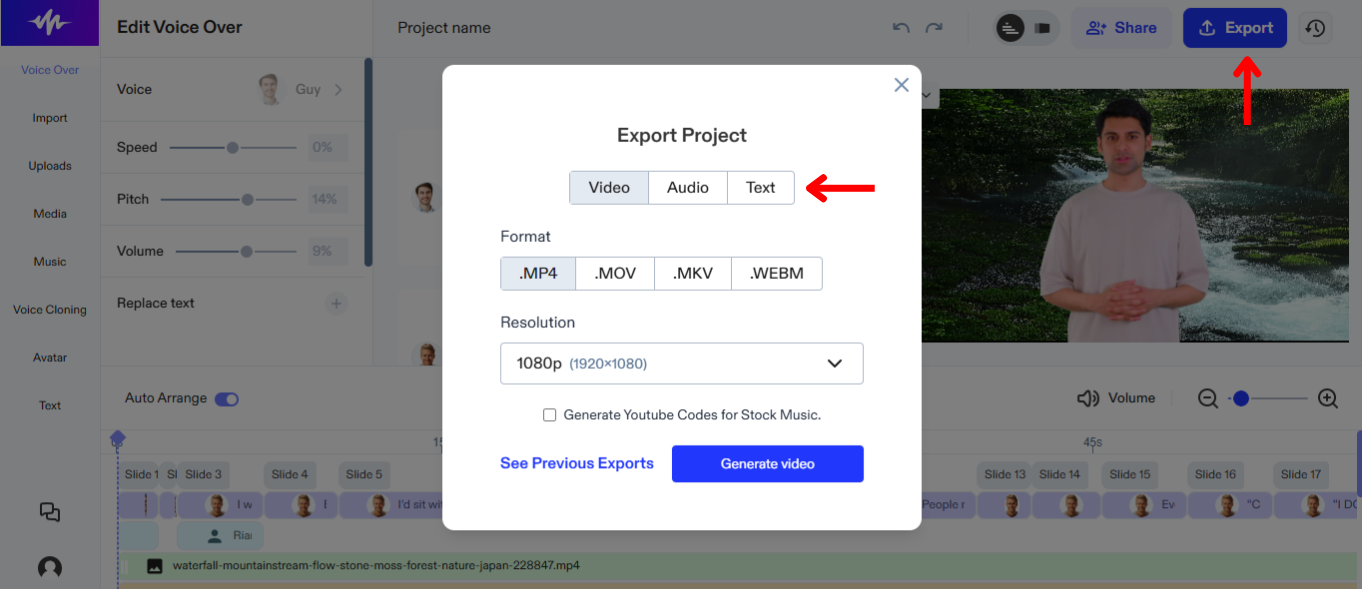
Exporting your project on Speechify Studio allows for easy integration with other media editing tools and platforms, Here’s how to share your project:
- Select “Export” in the top right-hand corner.
- Choose whether you wish to download your AI voice over in audio format (OGG, MP3, or WAV) or text/subtitle format (SRT, WEBVTT, or DOCX).